
Docs / AI Box And Video Analytics Software / Draw The Door, Shelves, Queue And Floor
Draw The Door, Shelves, Queue And Floor
On a Smart Retail Counter camera, draw the door line with its inside and test it live, the product areas, the queue zone and the floor area.
Smart Retail Counter counts visitors at the door, measures time at the shelves and watches the queue. You draw what it needs in step 3 of the camera flow (Add a Camera and Draw). Its checklist covers the whole store: an item drawn on another camera of the same site counts too, so each camera draws only what it sees.
- The door line, with its inside.
- Product areas over the shelves.
- The queue zone where shoppers wait to pay.
- Floor area (optional): the shop floor, for the floor heatmap (one per camera).
Step 1: Draw The Door Line
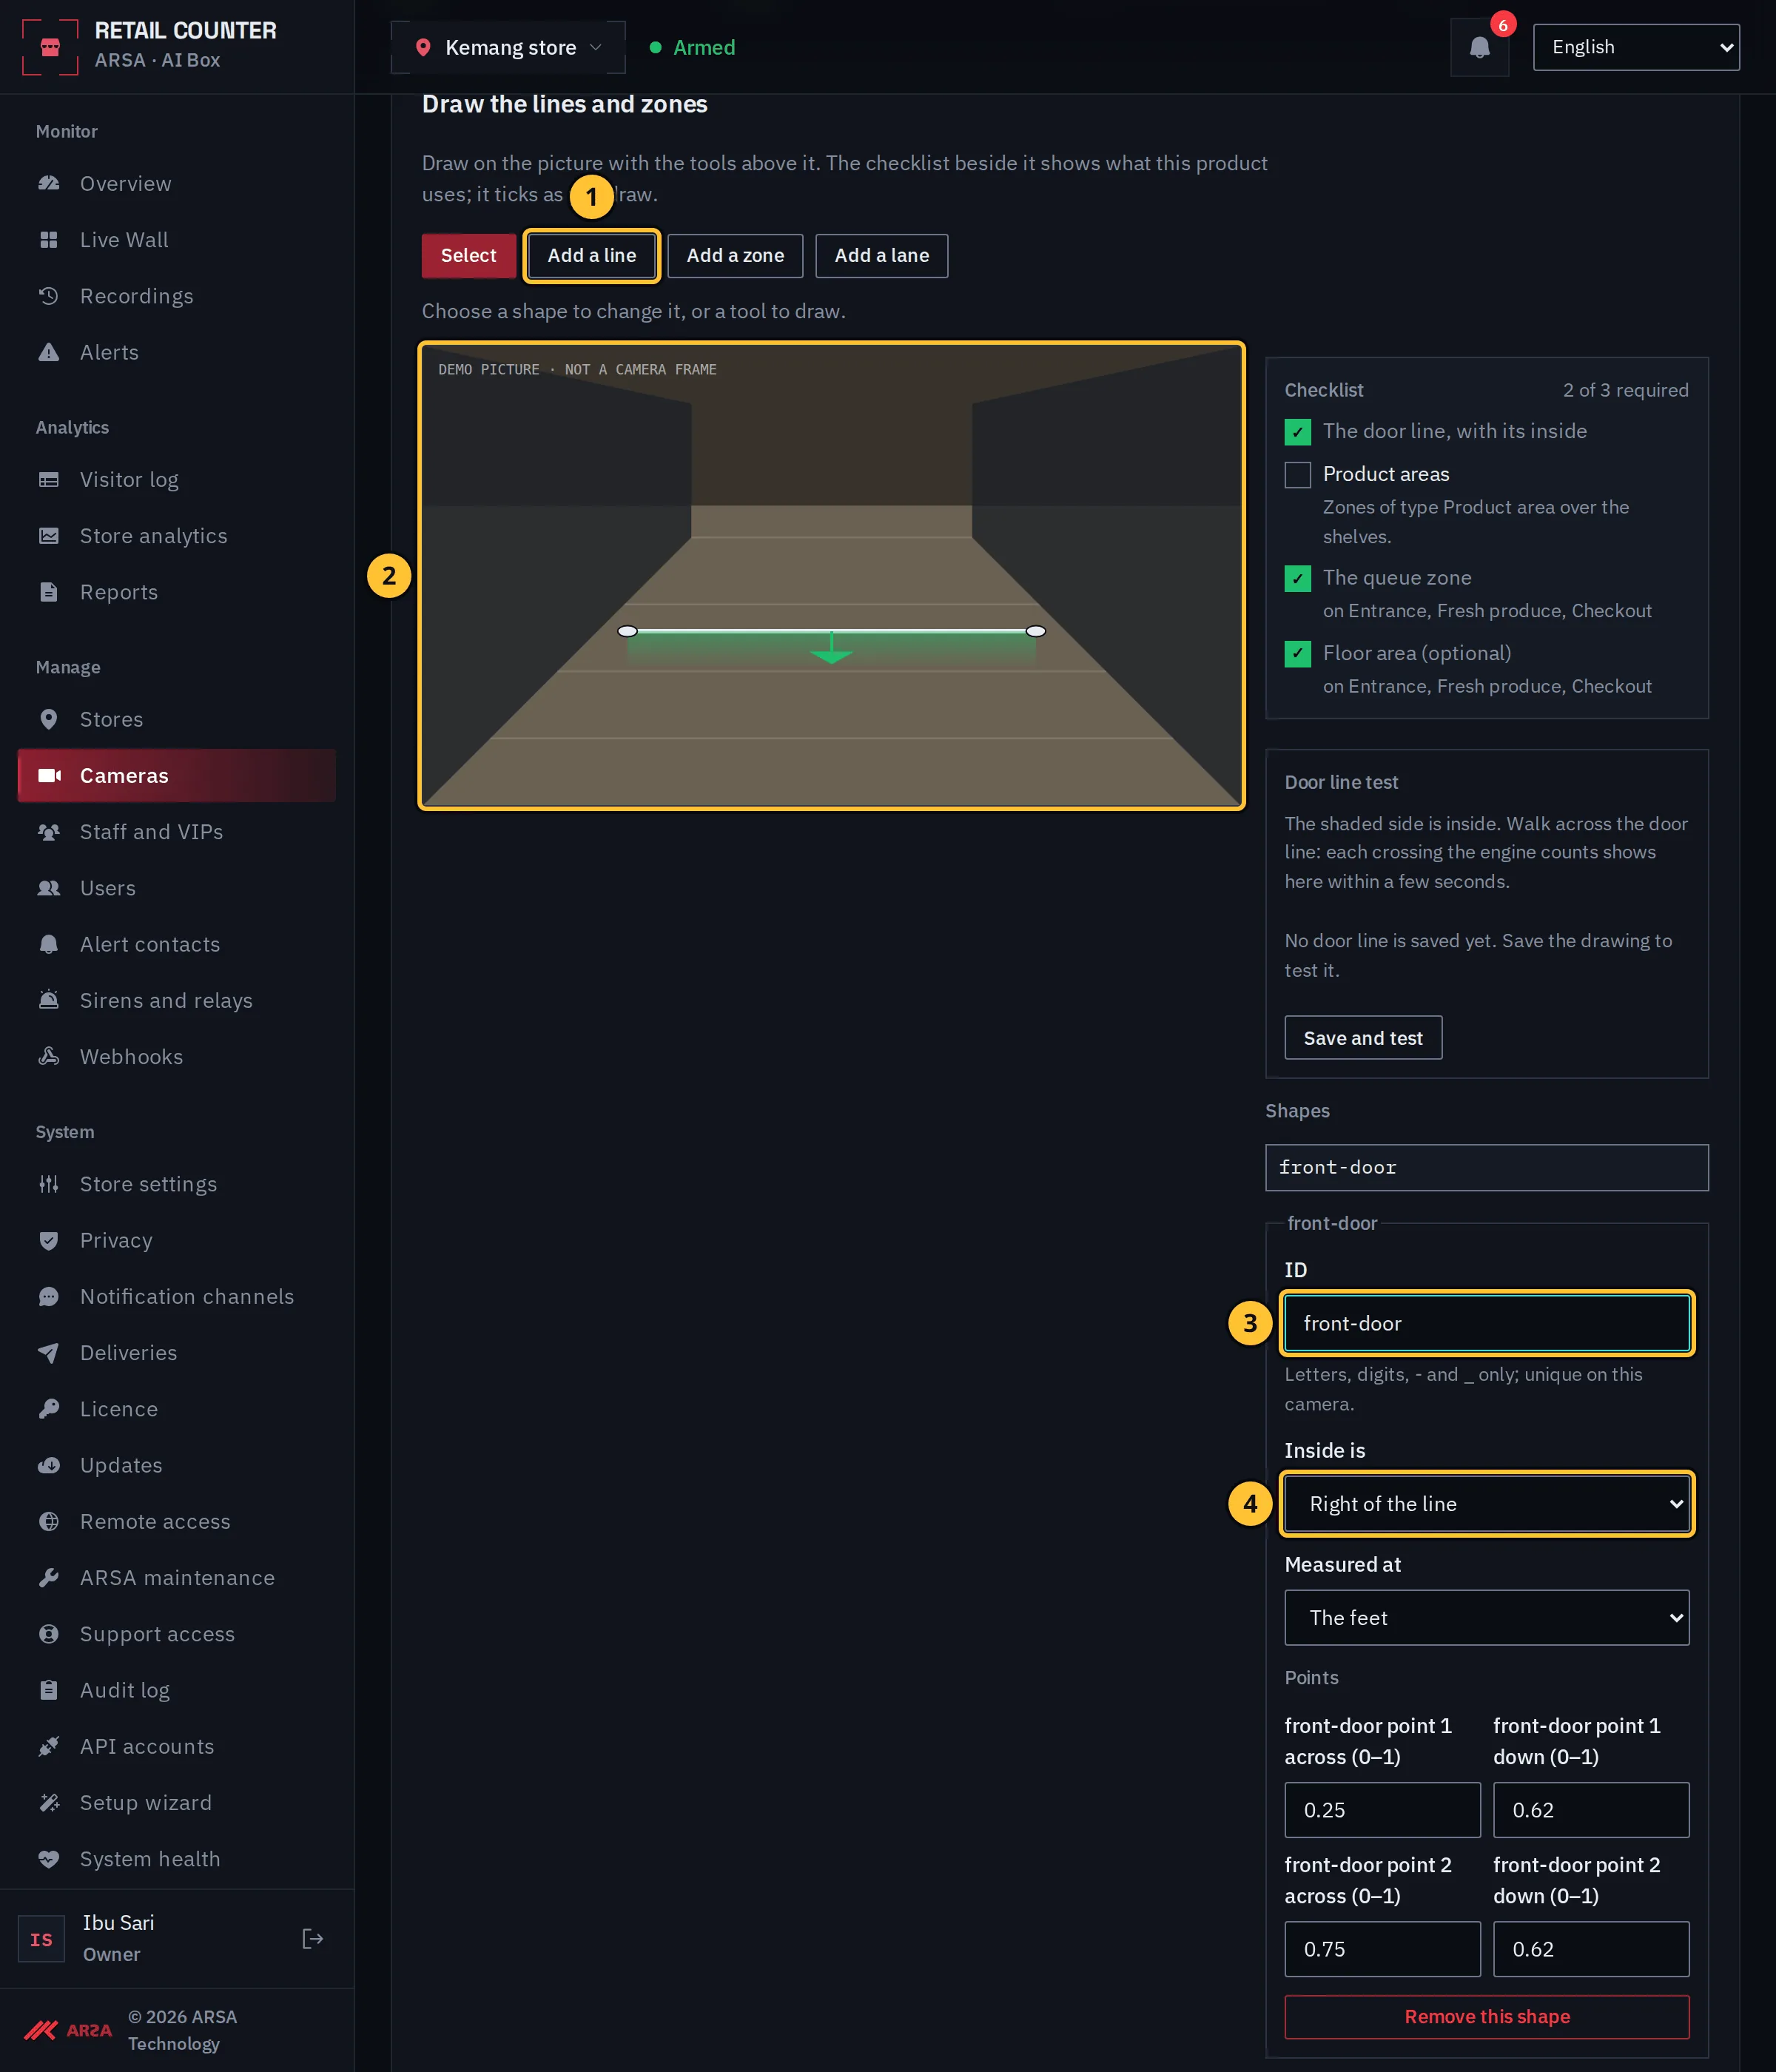
- Select Add a line.
- Click two points across the door on the picture.
- Give it an ID, for example
front-door. The visit log shows the door by its ID. - Set Inside is to the side of the line that is inside the store. The inside is shaded on the picture.
Step 2: Test The Door Line Live
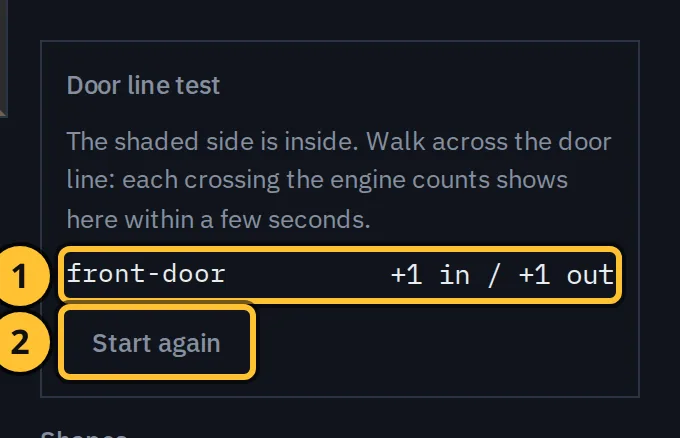
Demo data.
- Select Save and test, then walk across the door line. Each crossing the box counts shows here within a few seconds, in and out.
- Start again sets the count back to zero. If people walking in are counted out, change Inside is and test again.
Step 3: Draw The Product Areas
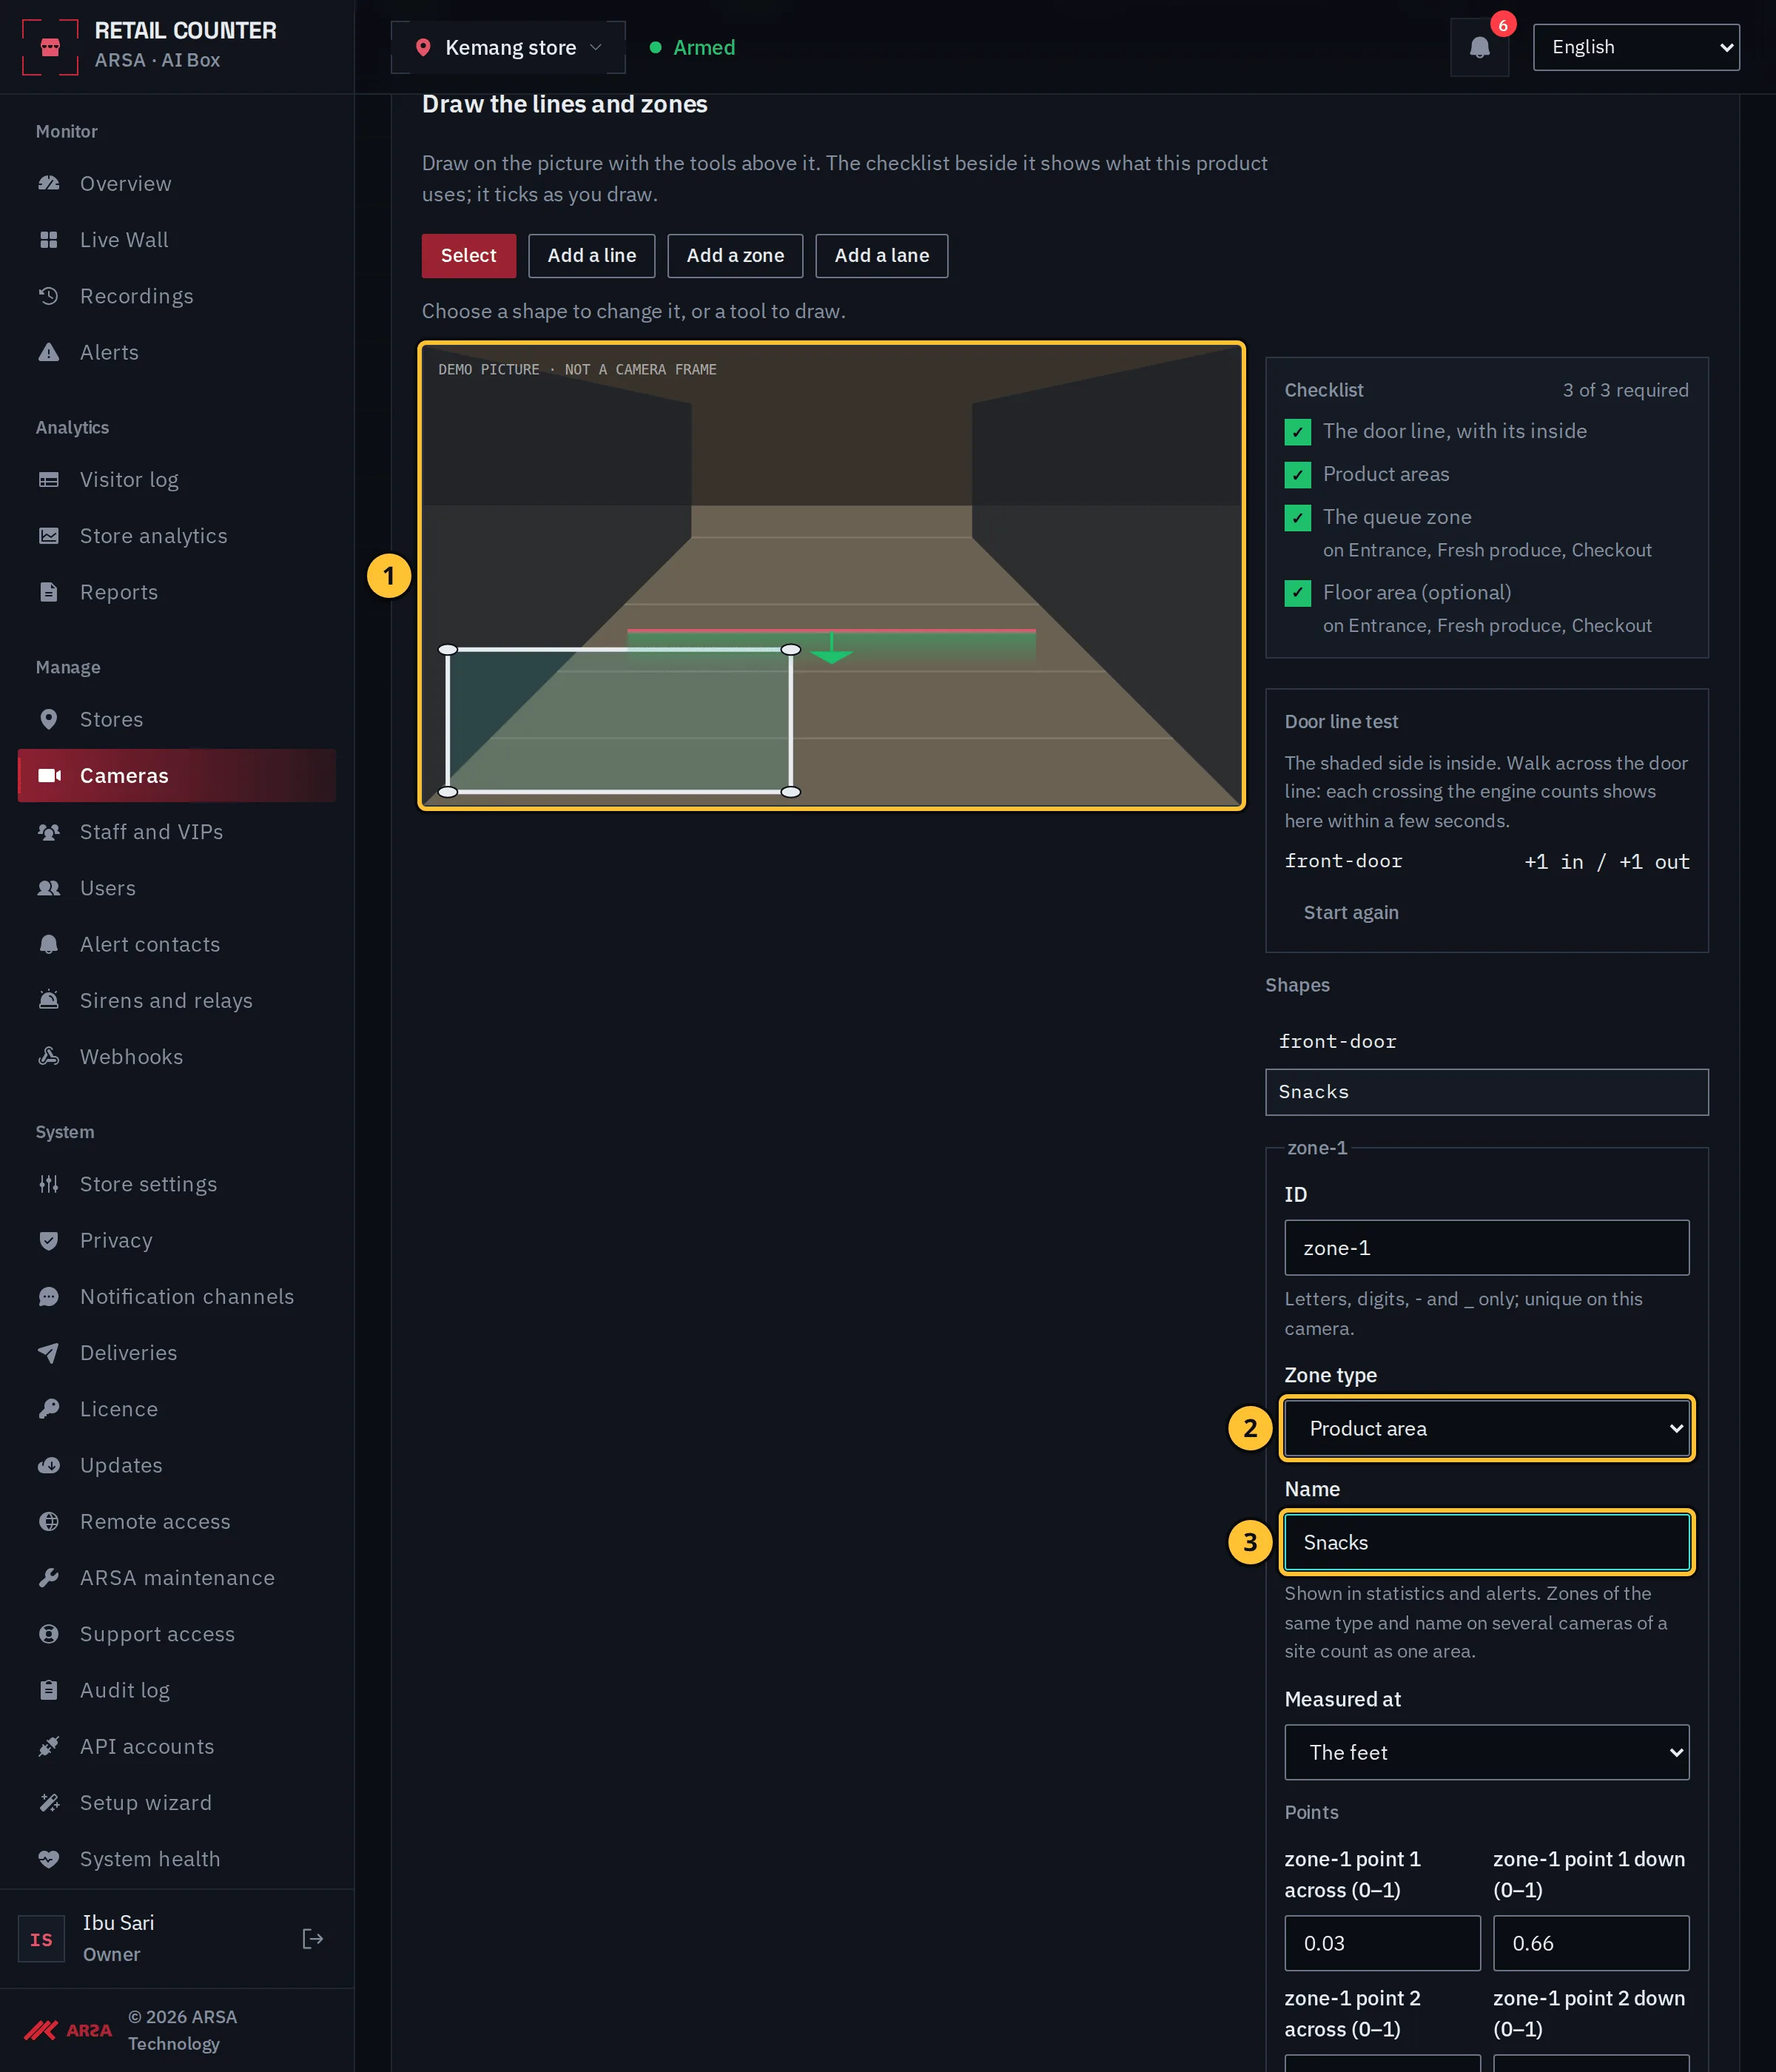
- Select Add a zone and click the corners around a shelf, then Finish the shape.
- Set the zone type to Product area. Other types are Entrance, Food and drink, Checkout, Service desk and Storefront.
- Give it the name of its category, for example “Snacks”. The same name on several cameras of a store counts as one area.
Step 4: Draw The Queue Zone
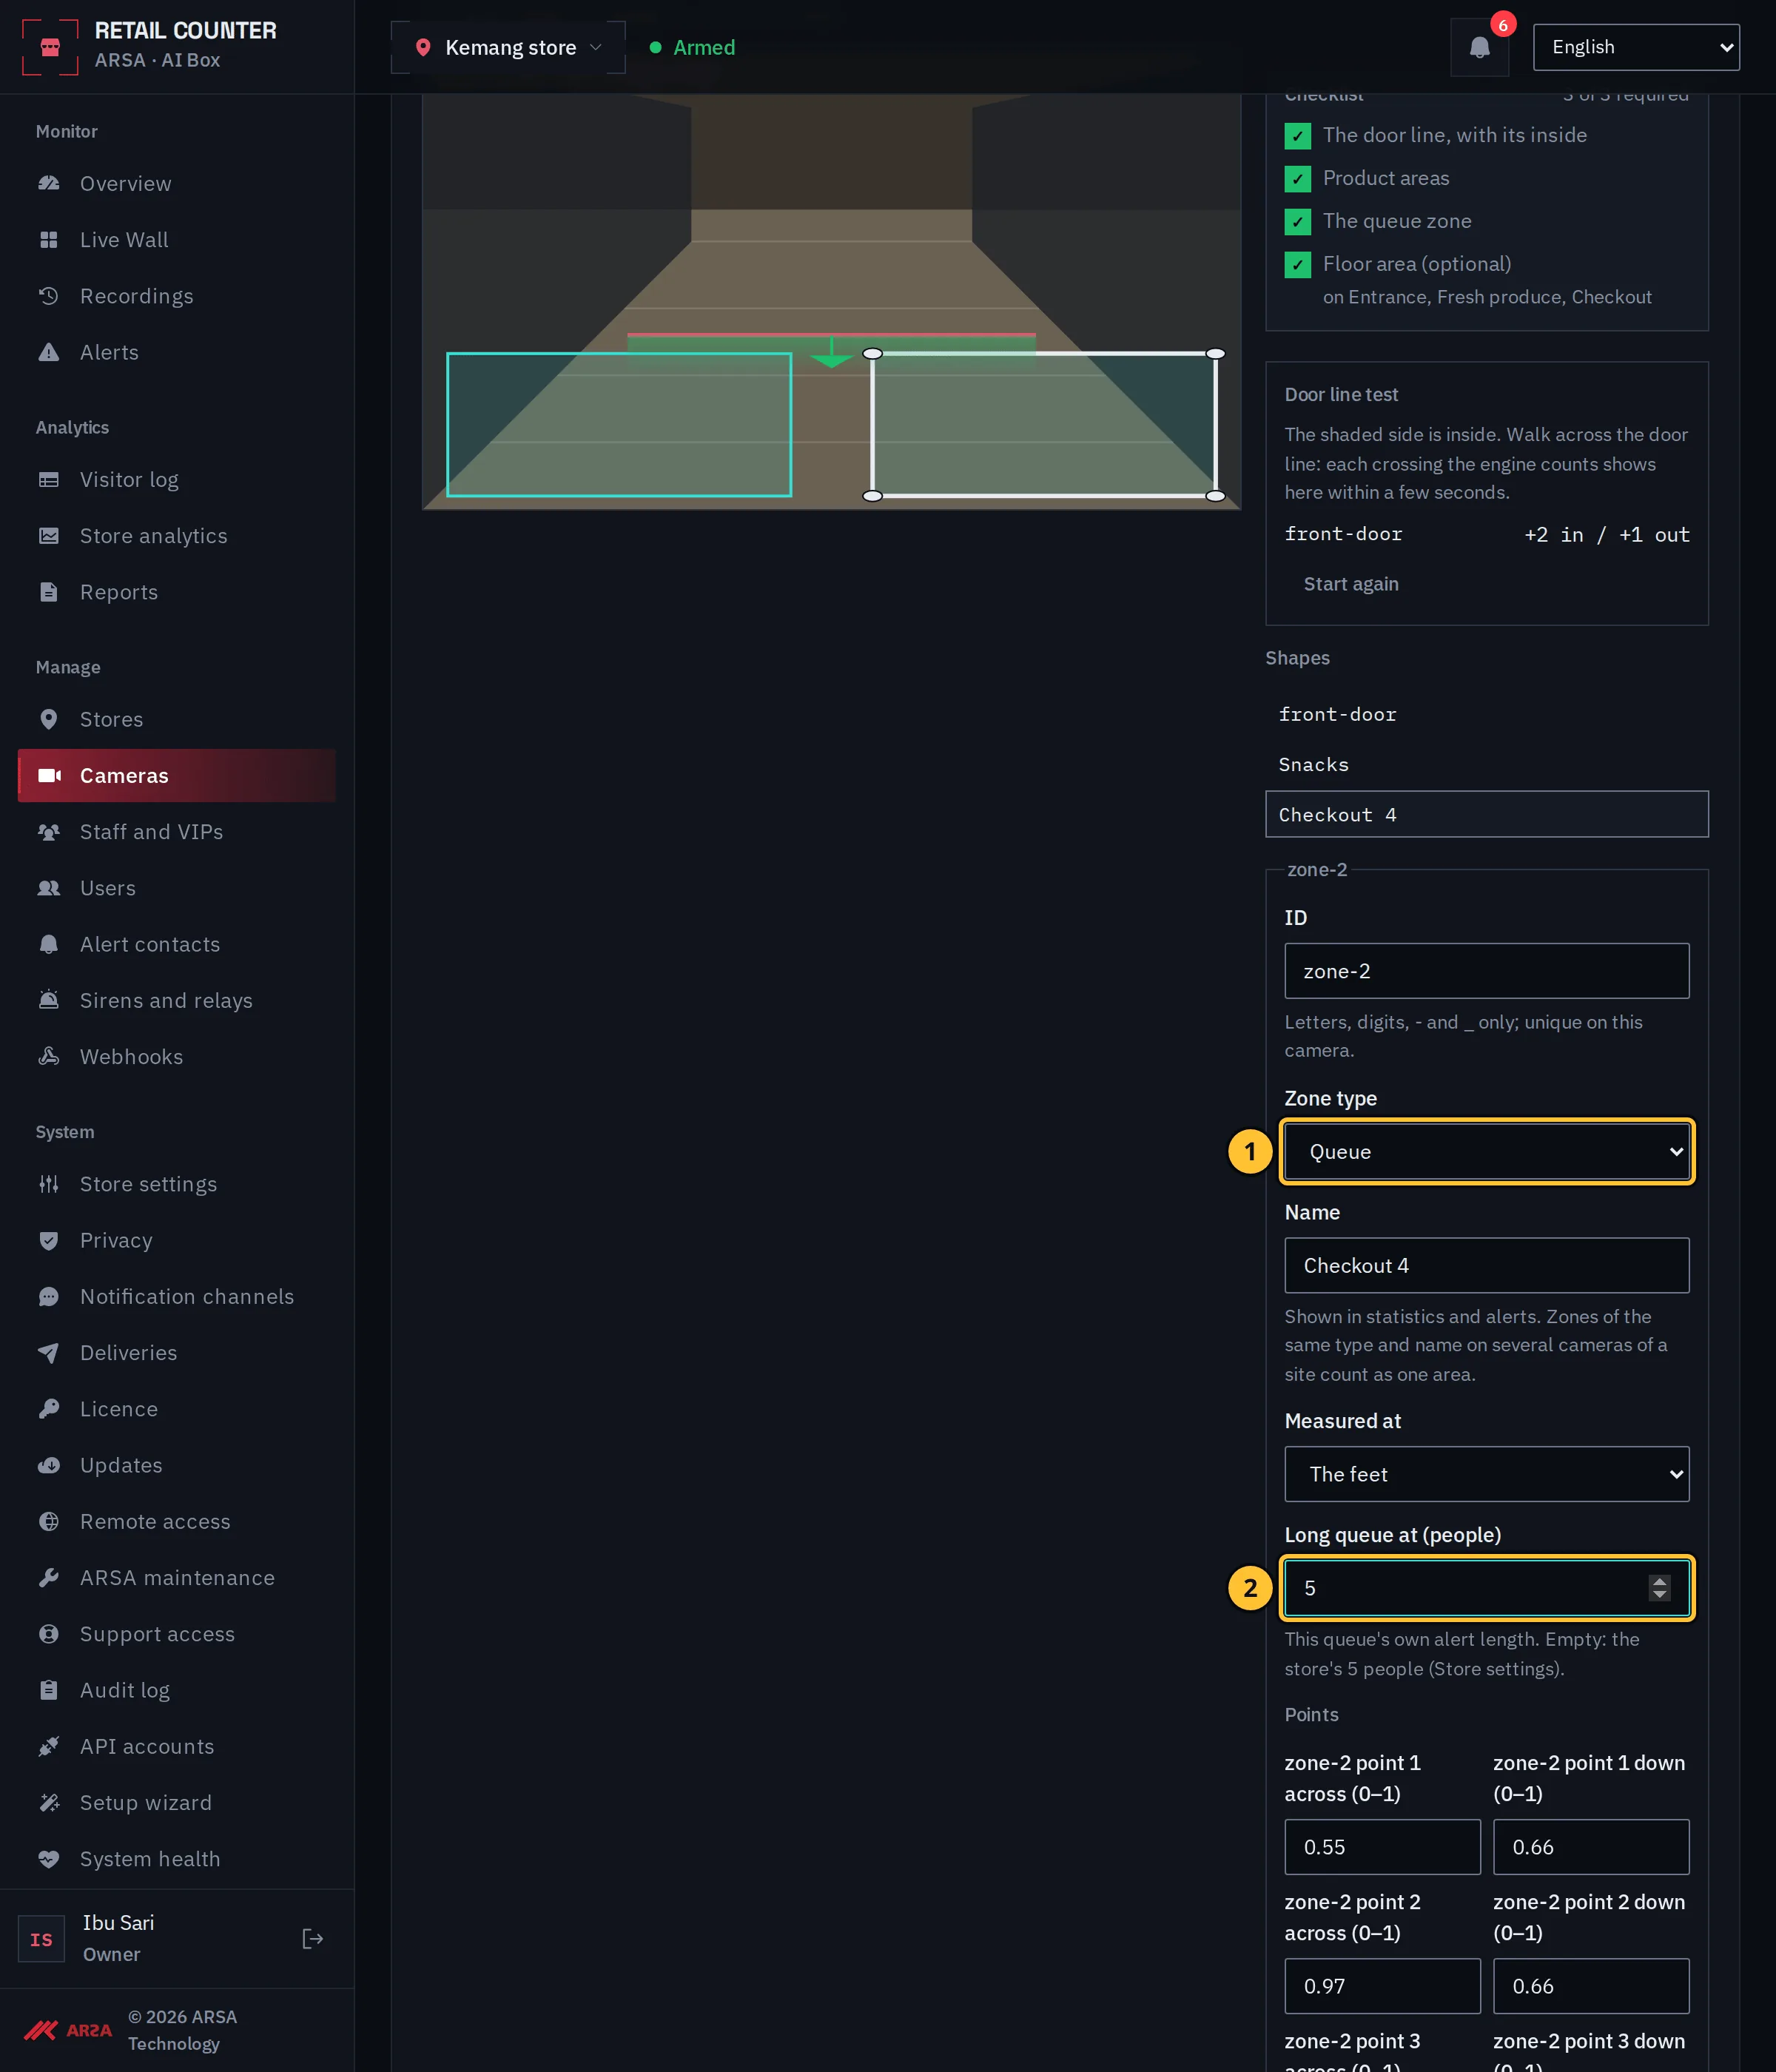
- Draw a zone where shoppers wait to pay and set its zone type to Queue.
- Long queue at (people) is this queue’s own alert length. Leave it empty to use the store’s length from the store settings.
Step 5: Draw The Floor Area
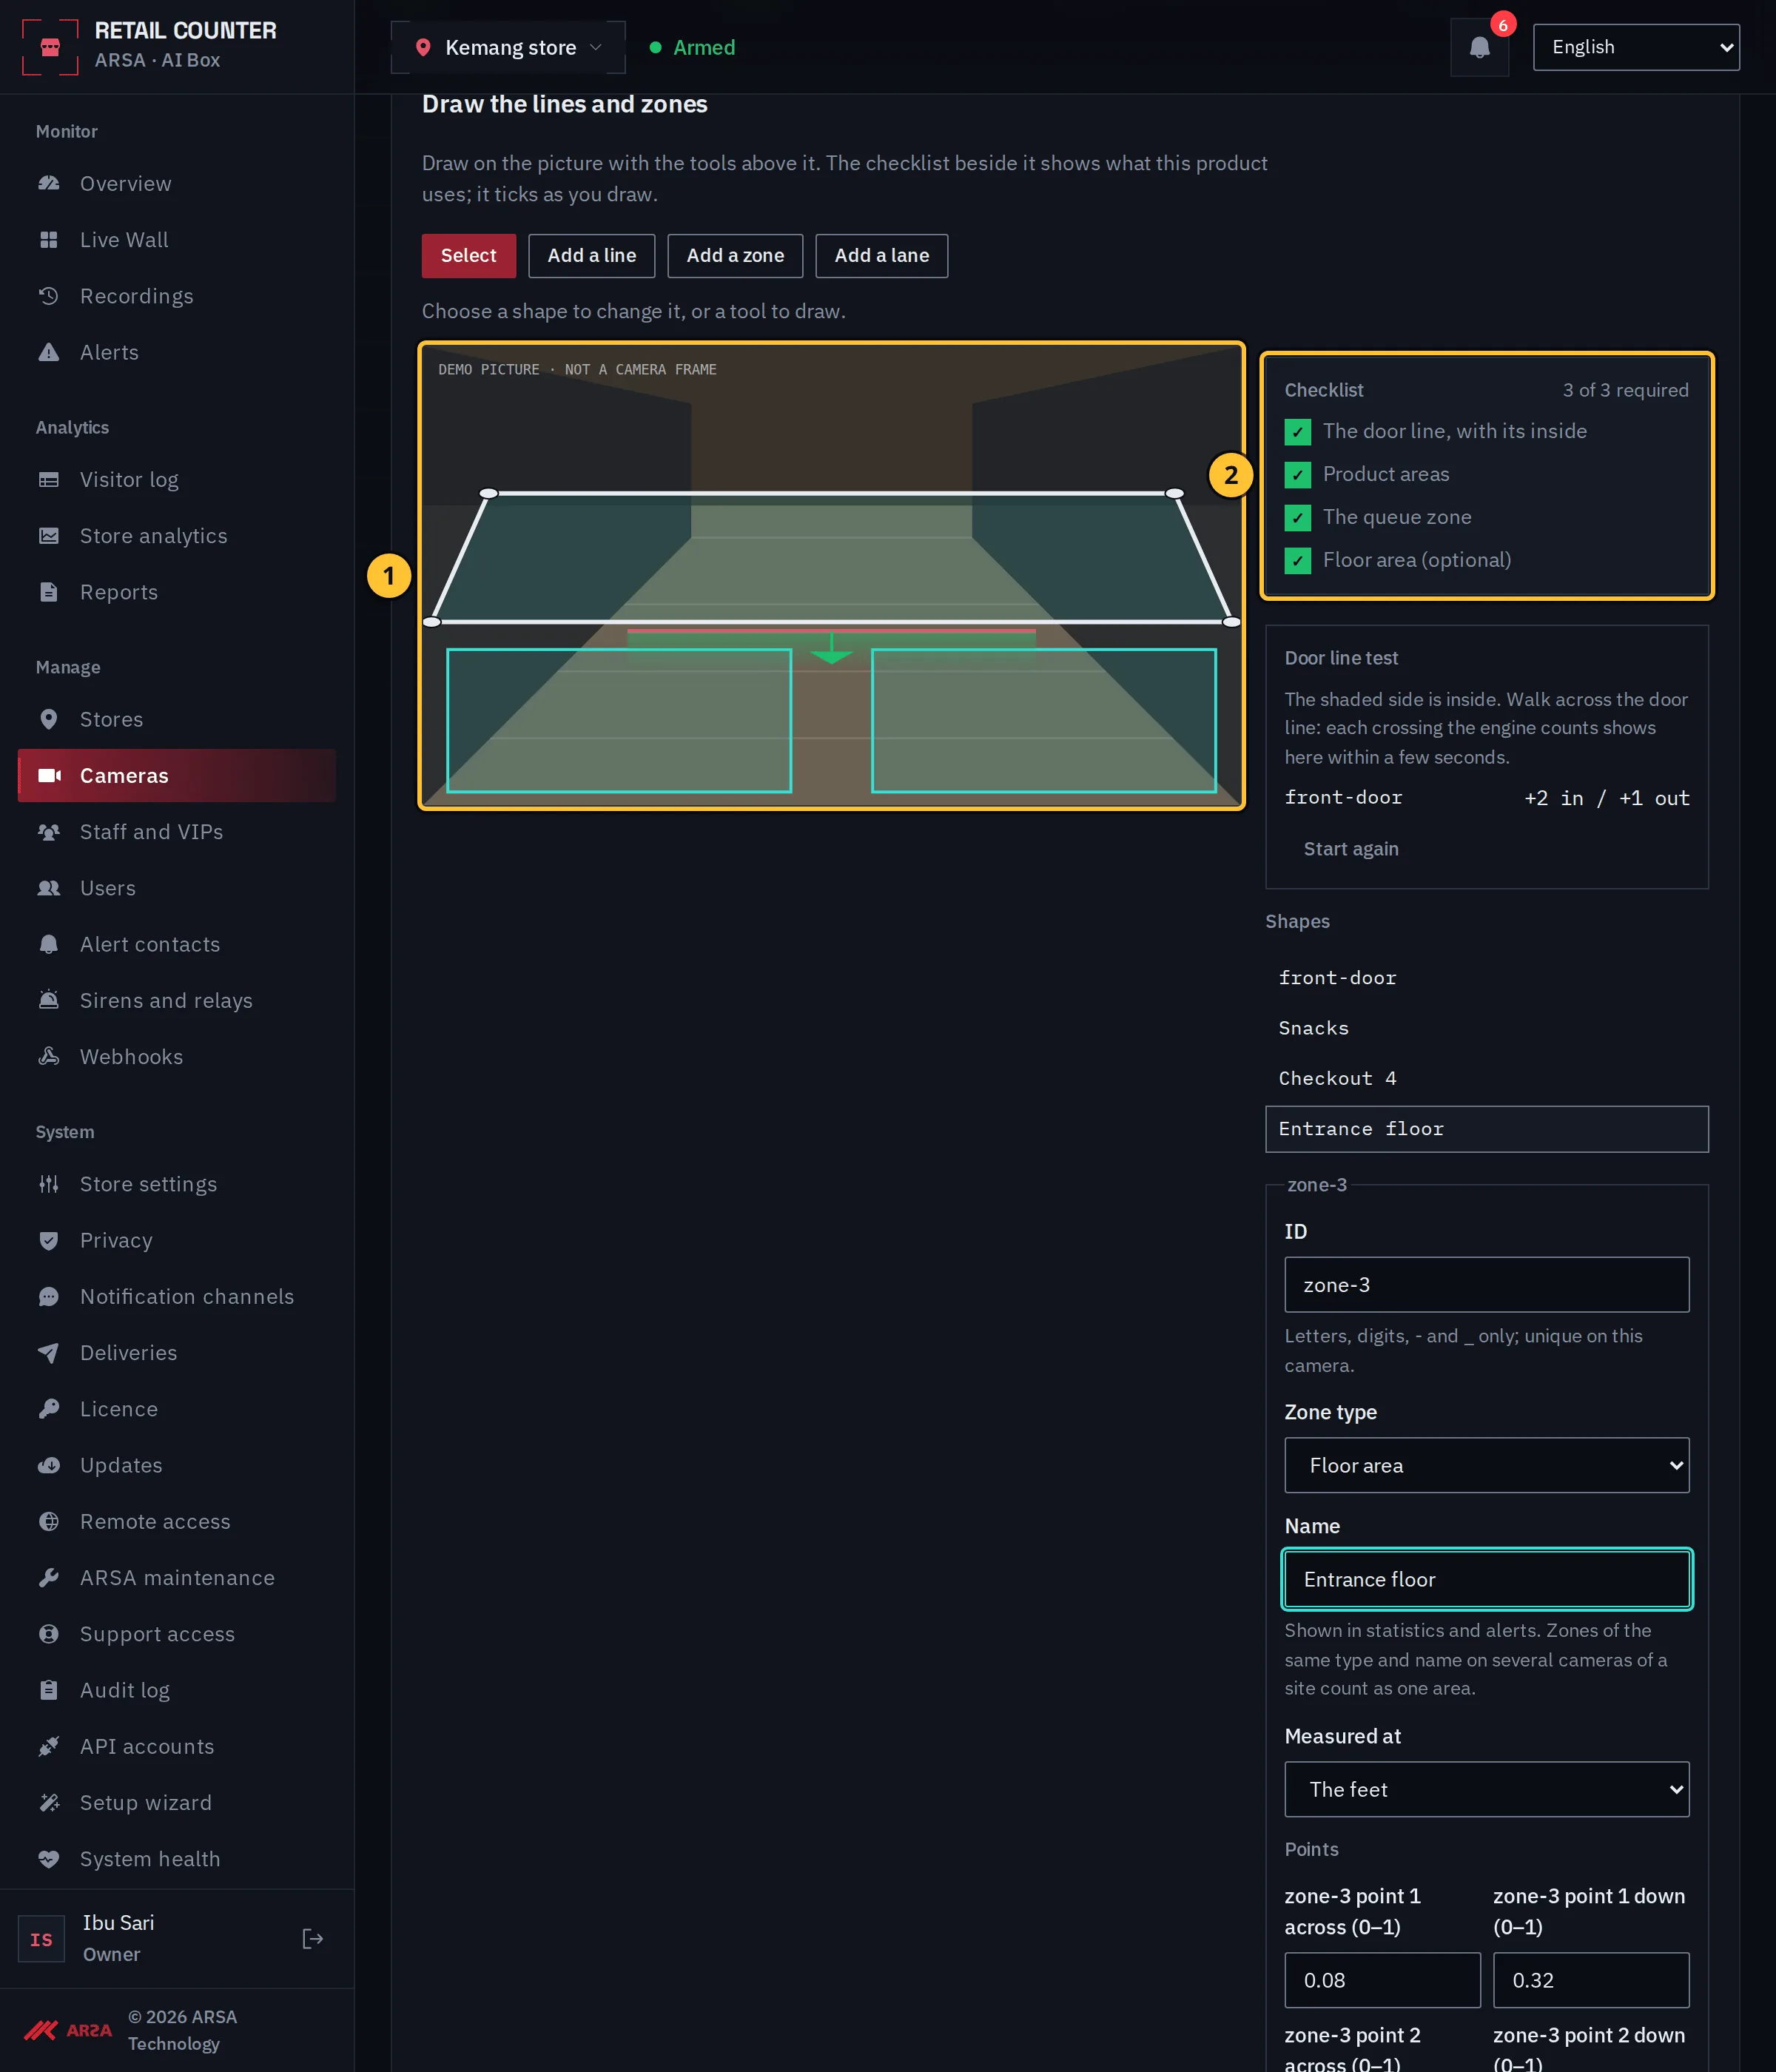
- Draw a zone over the walkable shop floor and set its type to Floor area. The floor heatmap shows where people spend time.
- The checklist ticks each item.
Step 6: Check The Store And Save
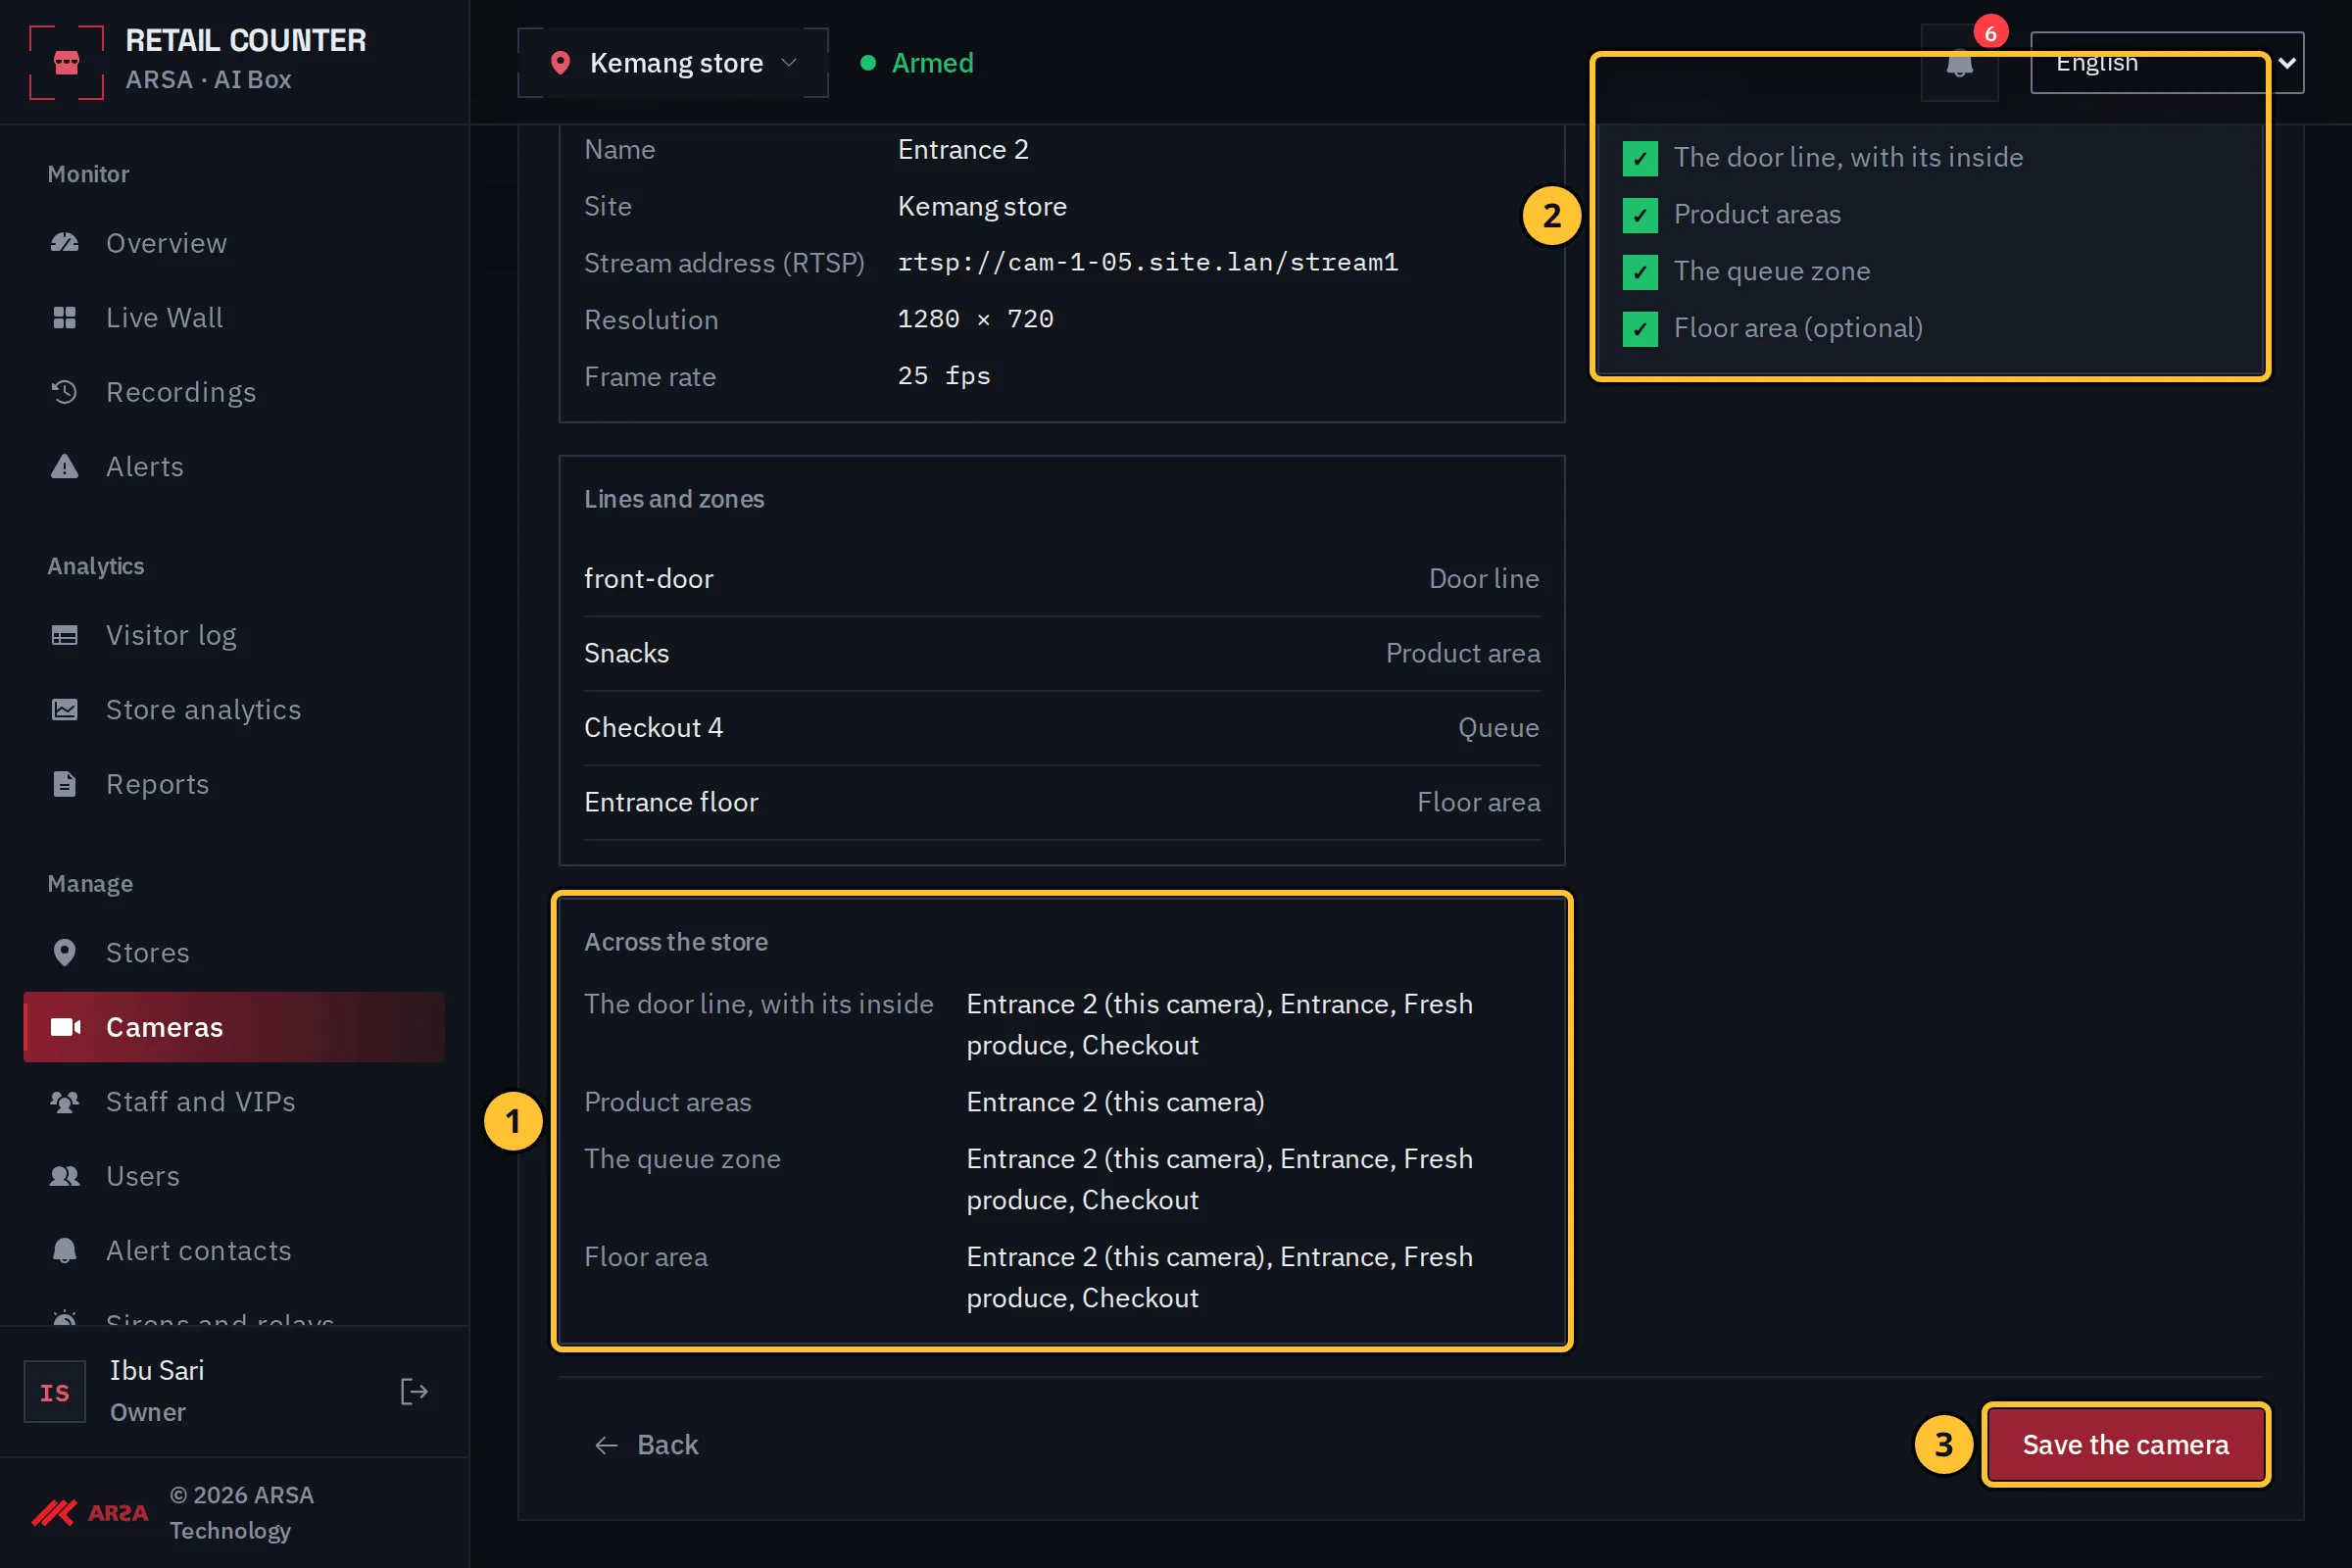
Demo data.
- Across the store lists which camera covers each item: this camera, or another camera of the site.
- The checklist: an item drawn on another camera shows that camera’s name.
- Select Save the camera.
Watch The Drawing
Transcript of the drawing clip
Transcript of the clip “Draw the Door, Shelves, Queue and Floor” (silent, about 30 seconds, demo data).
- On the drawing step of a new camera the installer selects Add a line and clicks two points across the door. The line gets the ID “front-door” and Inside is set to the right of the line; the inside is shaded.
- In the door line test the installer selects Save and test. Crossings appear within a few seconds as counts in and out.
- A zone over the shelves on the left gets the type Product area and the name “Snacks”.
- A zone at the till gets the type Queue, the name “Checkout 4” and its own long queue length of 5 people.
- A zone over the floor near the door gets the type Floor area.
- The review shows, across the store, which camera covers each item. The installer selects Save the camera.
Was this page helpful?
1.0.0. Updated 2026-11-06