
Docs / AI Box And Video Analytics Software / First Run And The Setup Wizard
First Run And The Setup Wizard
Switch on a new AI Box, create the owner account with two-step sign-in, then let the setup wizard take you through the licence, sites, cameras and alerts.
A new AI Box starts with no accounts. The first person to open its dashboard creates the owner account, then the setup wizard opens and takes you through the licence, the sites and cameras, and who is told about alerts. Plan about twenty minutes. The pictures show Basic Safety Guard; the other products have the same steps.
Before You Start
- The box is switched on and connected to the same network as the cameras.
- You use a computer on that network. For safety, the owner account can only be created from the box’s own network, within 2 hours of switching the box on. If that time has passed, switch the box off and on again.
- You have an authenticator app on your phone (for example Google Authenticator, Microsoft Authenticator or 2FAS).
- You have the cameras’ RTSP addresses, or their ONVIF user names and passwords.
Open https://<BOX_HOST>:8443 in the browser, where <BOX_HOST> is the box’s address on your network.
On ARSA AI Video Analytics Software, the box is your server: switching it on means starting the software on the
server, and <BOX_HOST> is the server’s host name.
Step 1: Create The Owner Account
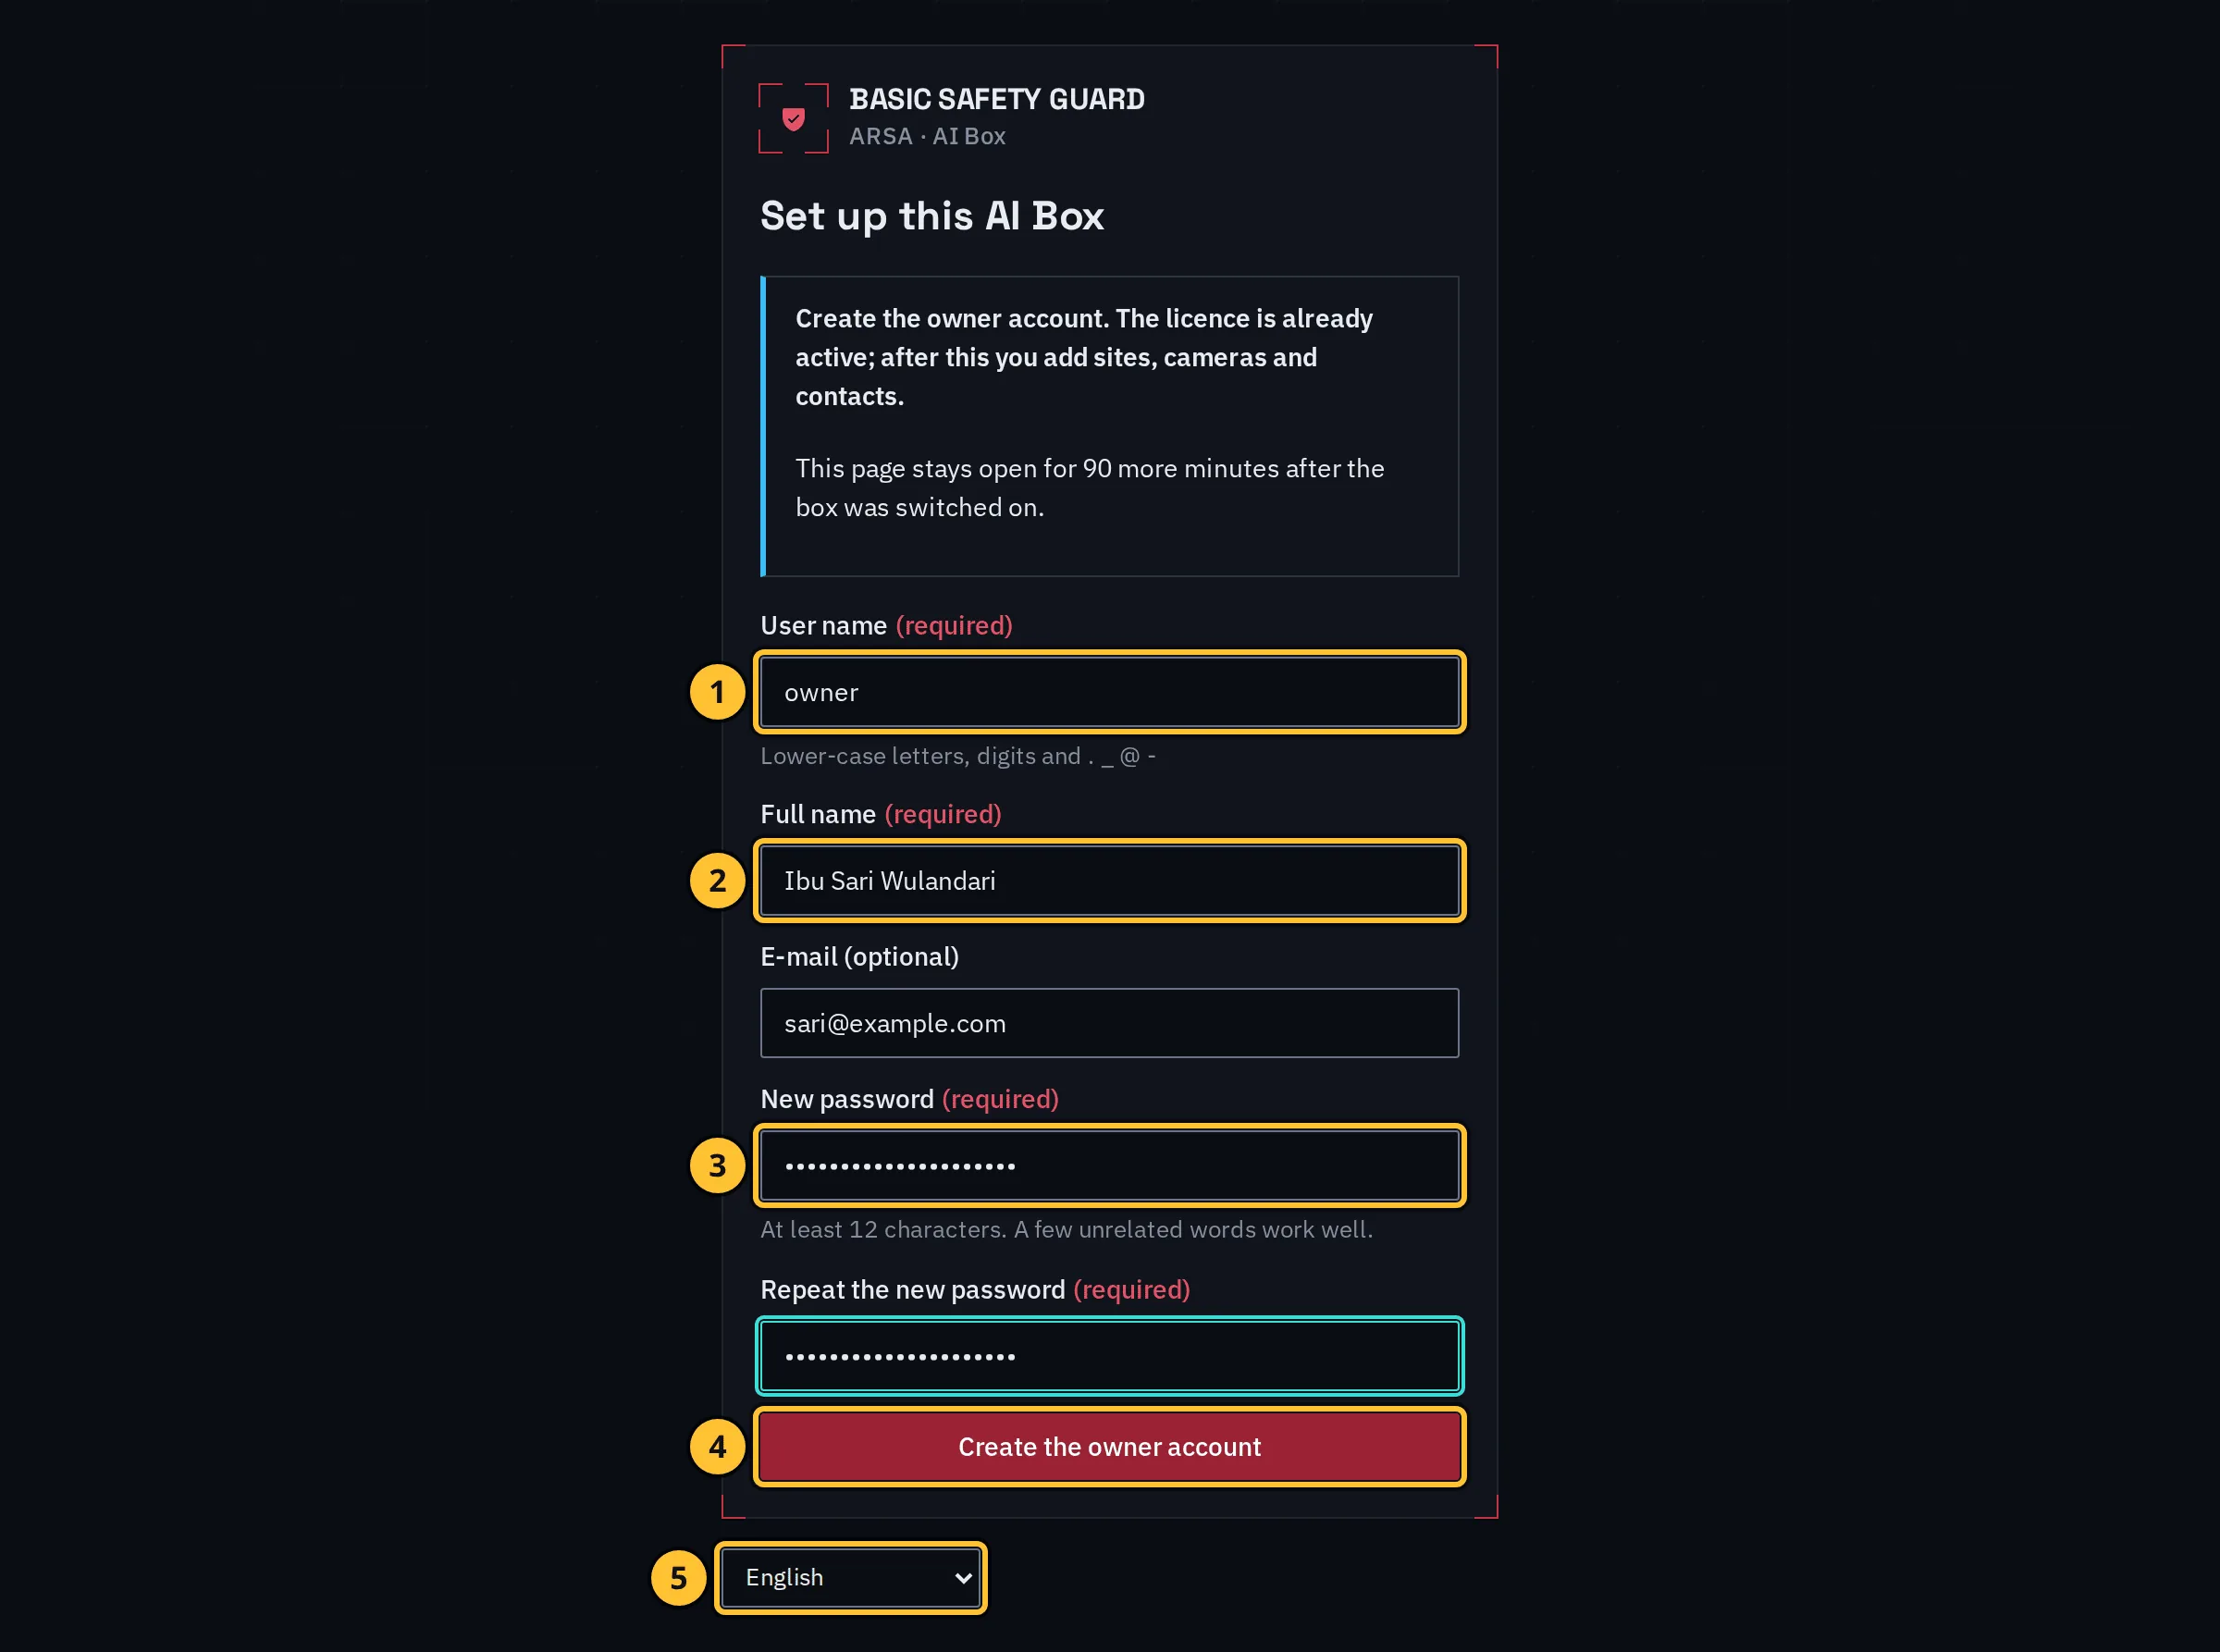
- Type a user name in lower-case letters, for example
owner. - Type your full name. The e-mail address is optional.
- Choose a password of at least 12 characters and type it again below. A few unrelated words work well.
- Select Create the owner account.
- The Language selector at the bottom switches the dashboard between English and Bahasa Indonesia at any time.
The owner sees every site and manages users and settings. Keep this account for yourself and add other people later as users with their own accounts (Users and Notifications).
Step 2: Sign In
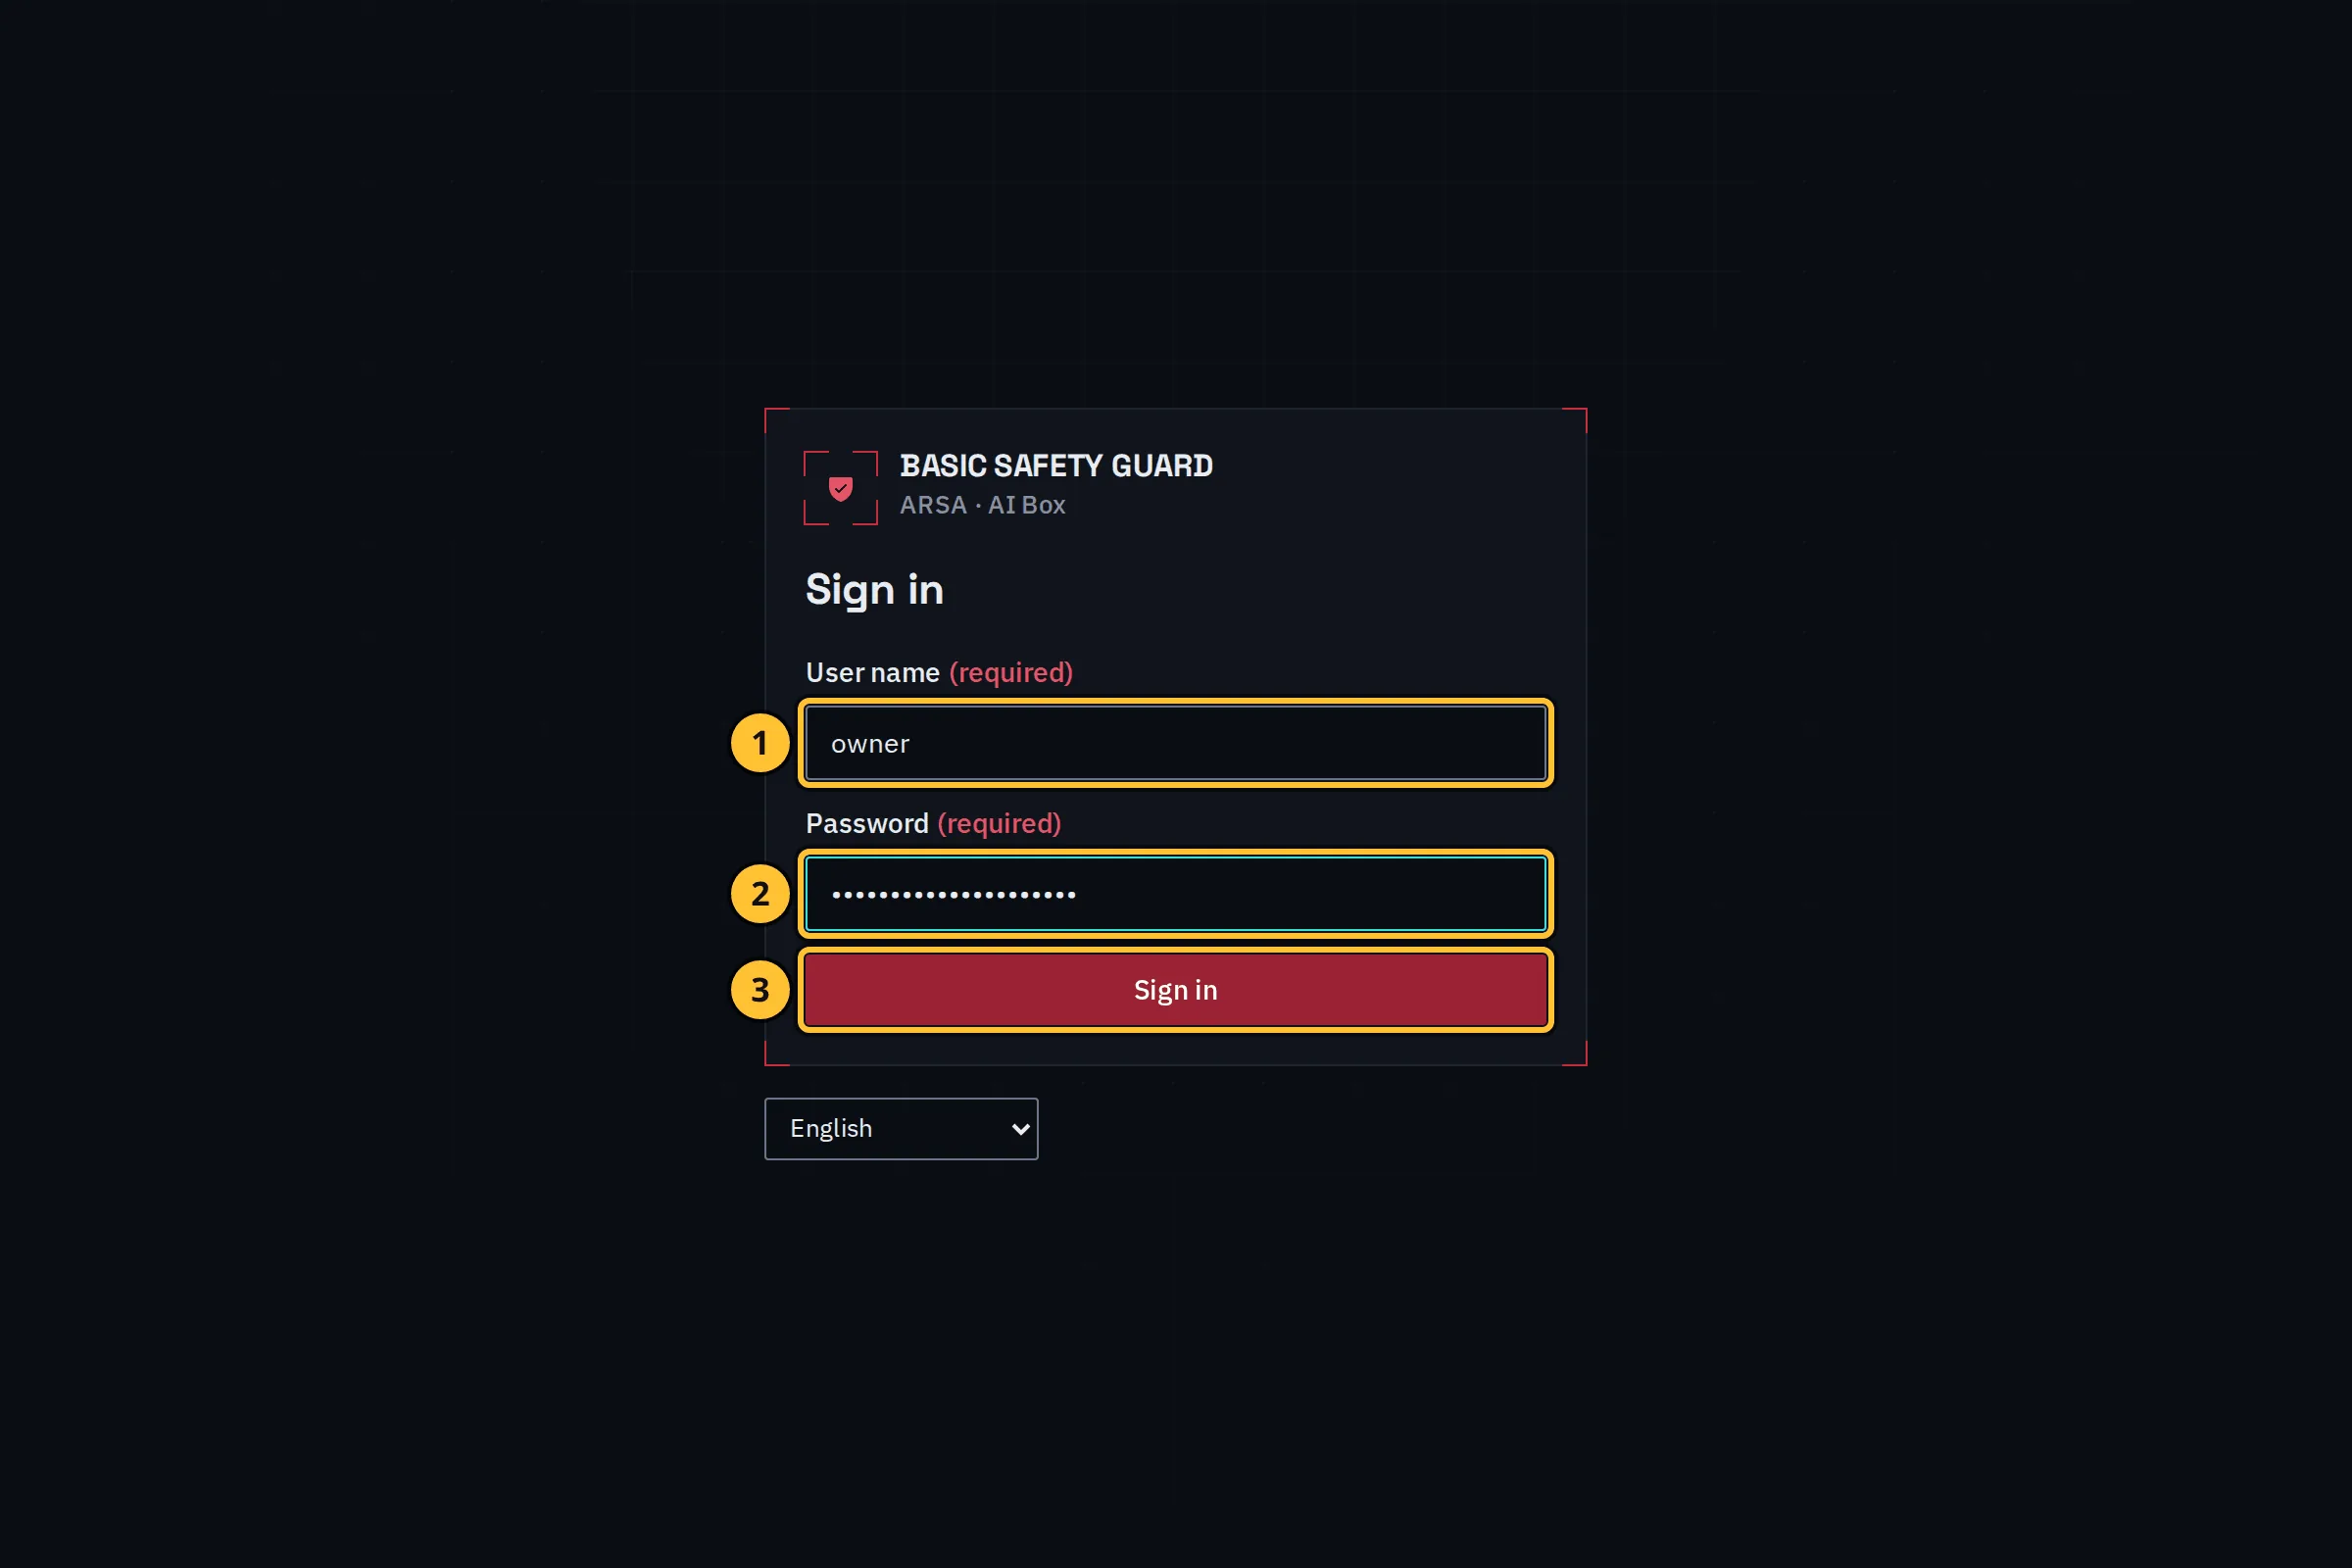
- Type the user name you chose.
- Type the password.
- Select Sign in.
Step 3: Set Up Two-Step Sign-In
The owner always signs in with a second step: a 6-digit code from the authenticator app.
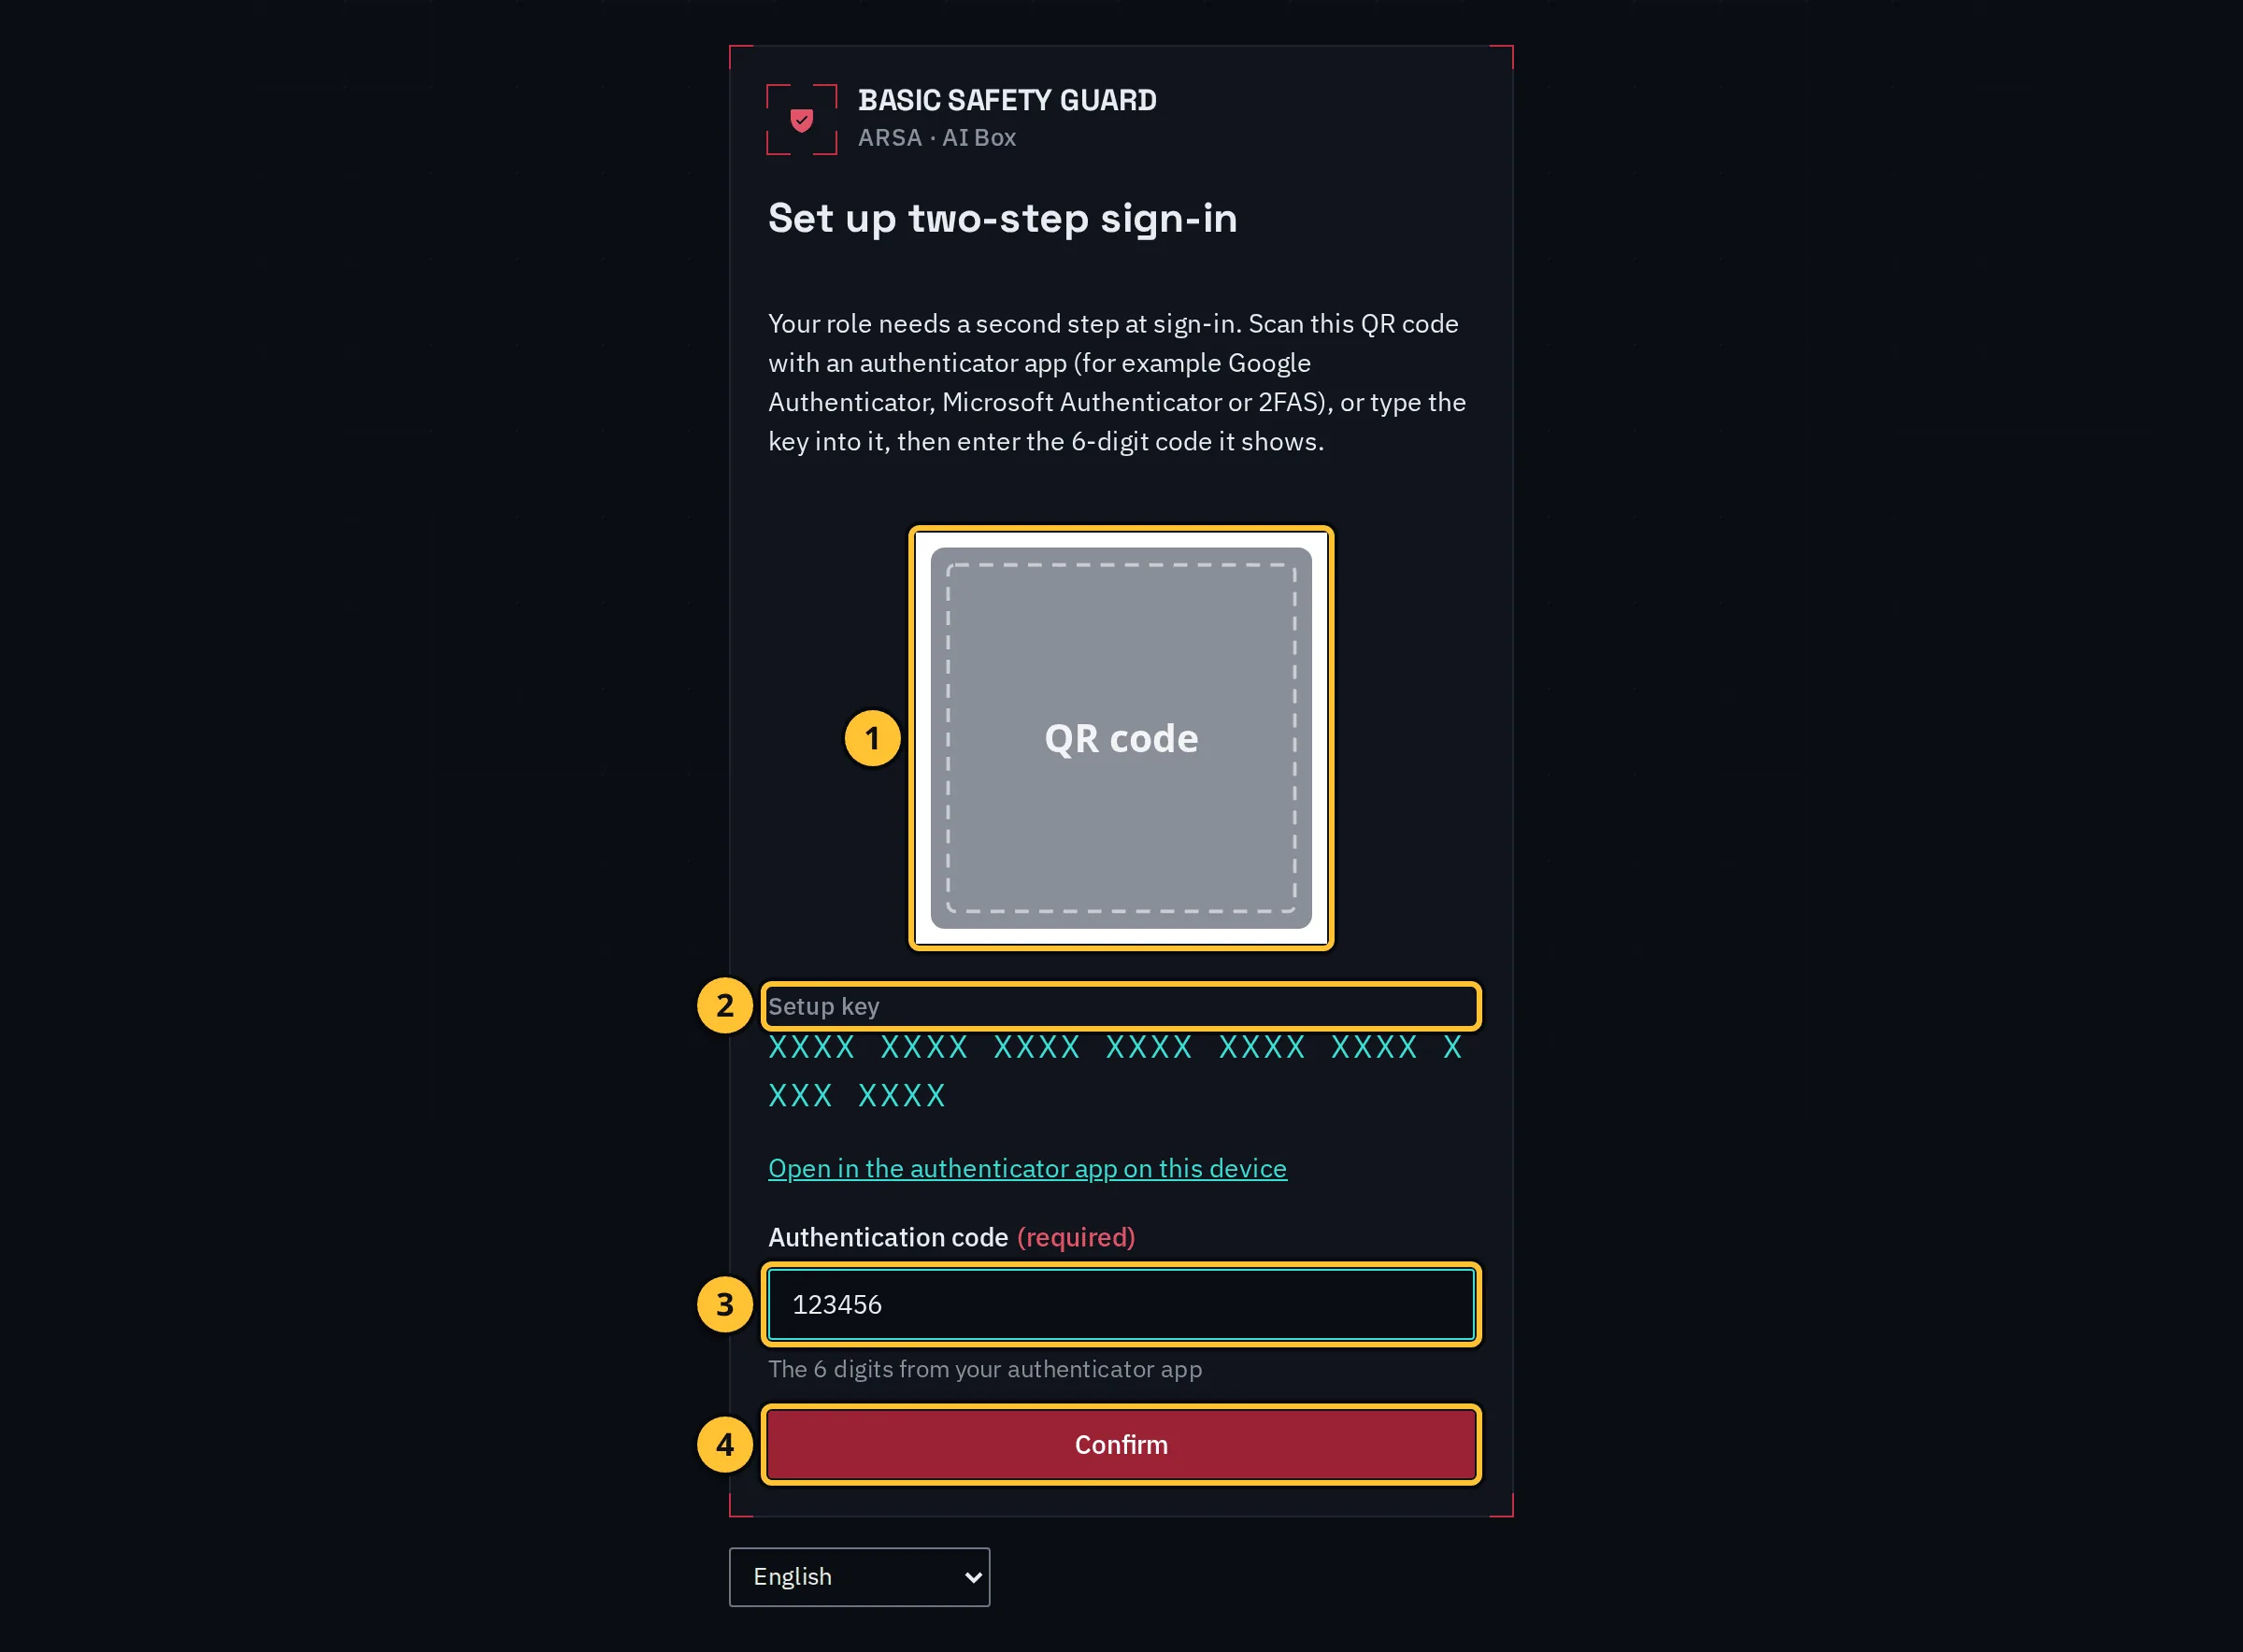
- Scan the QR code with the authenticator app.
- If you cannot scan it, type the setup key into the app instead.
- Type the 6-digit code the app now shows.
- Select Confirm.
From now on the box asks for a fresh code at every sign-in. Keep the app on a phone that you control.
Step 4: Start The Setup Wizard
The wizard opens by itself the first time the owner signs in. You can open it again later from the menu under System, Setup wizard.
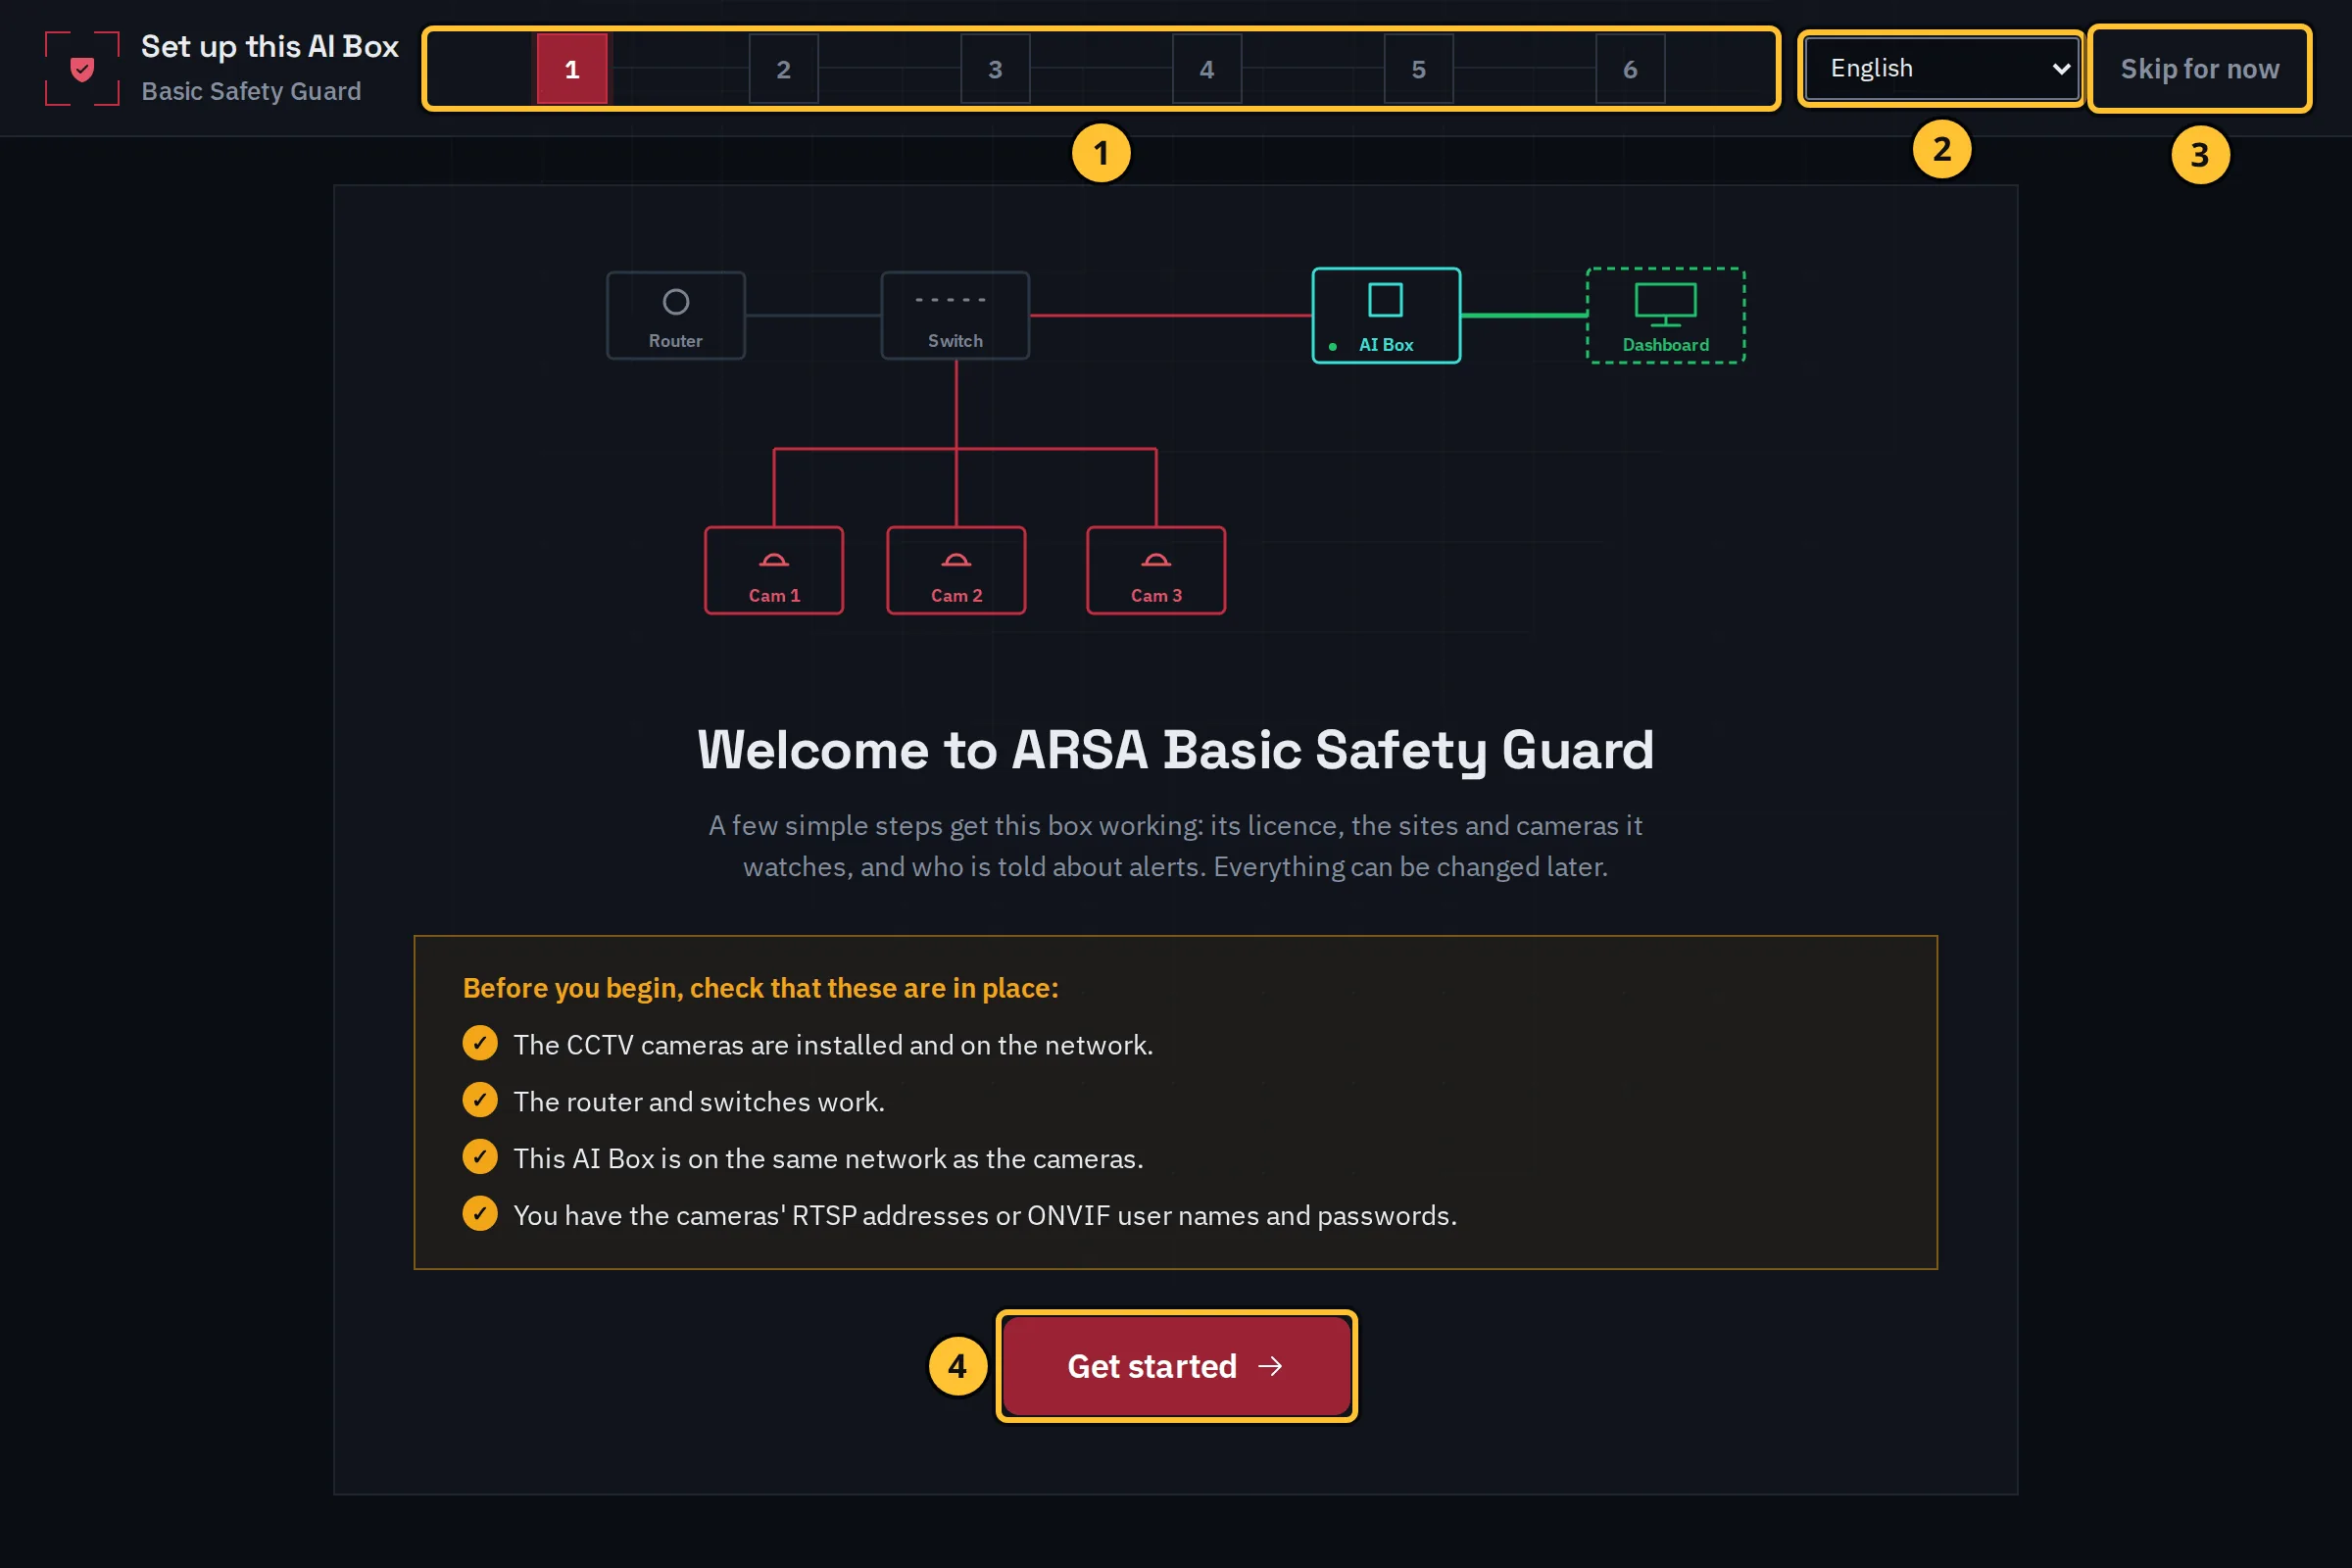
- The six steps of the wizard. A step turns green when it is done; select a number to go straight to it.
- The language of the dashboard.
- Skip for now leaves the wizard. Everything can be set up later from the menu.
- Check the list of what you need, then select Get started.
Step 5: Activate The Licence
The licence says which analytics the box runs and for how many cameras. A box that left ARSA’s factory with its licence is already active: the step shows The licence is active and you go on with Next. Otherwise, activate it here.
On ARSA AI Video Analytics Software the licence is never activated in a factory: activate it here with the software key from ARSA.
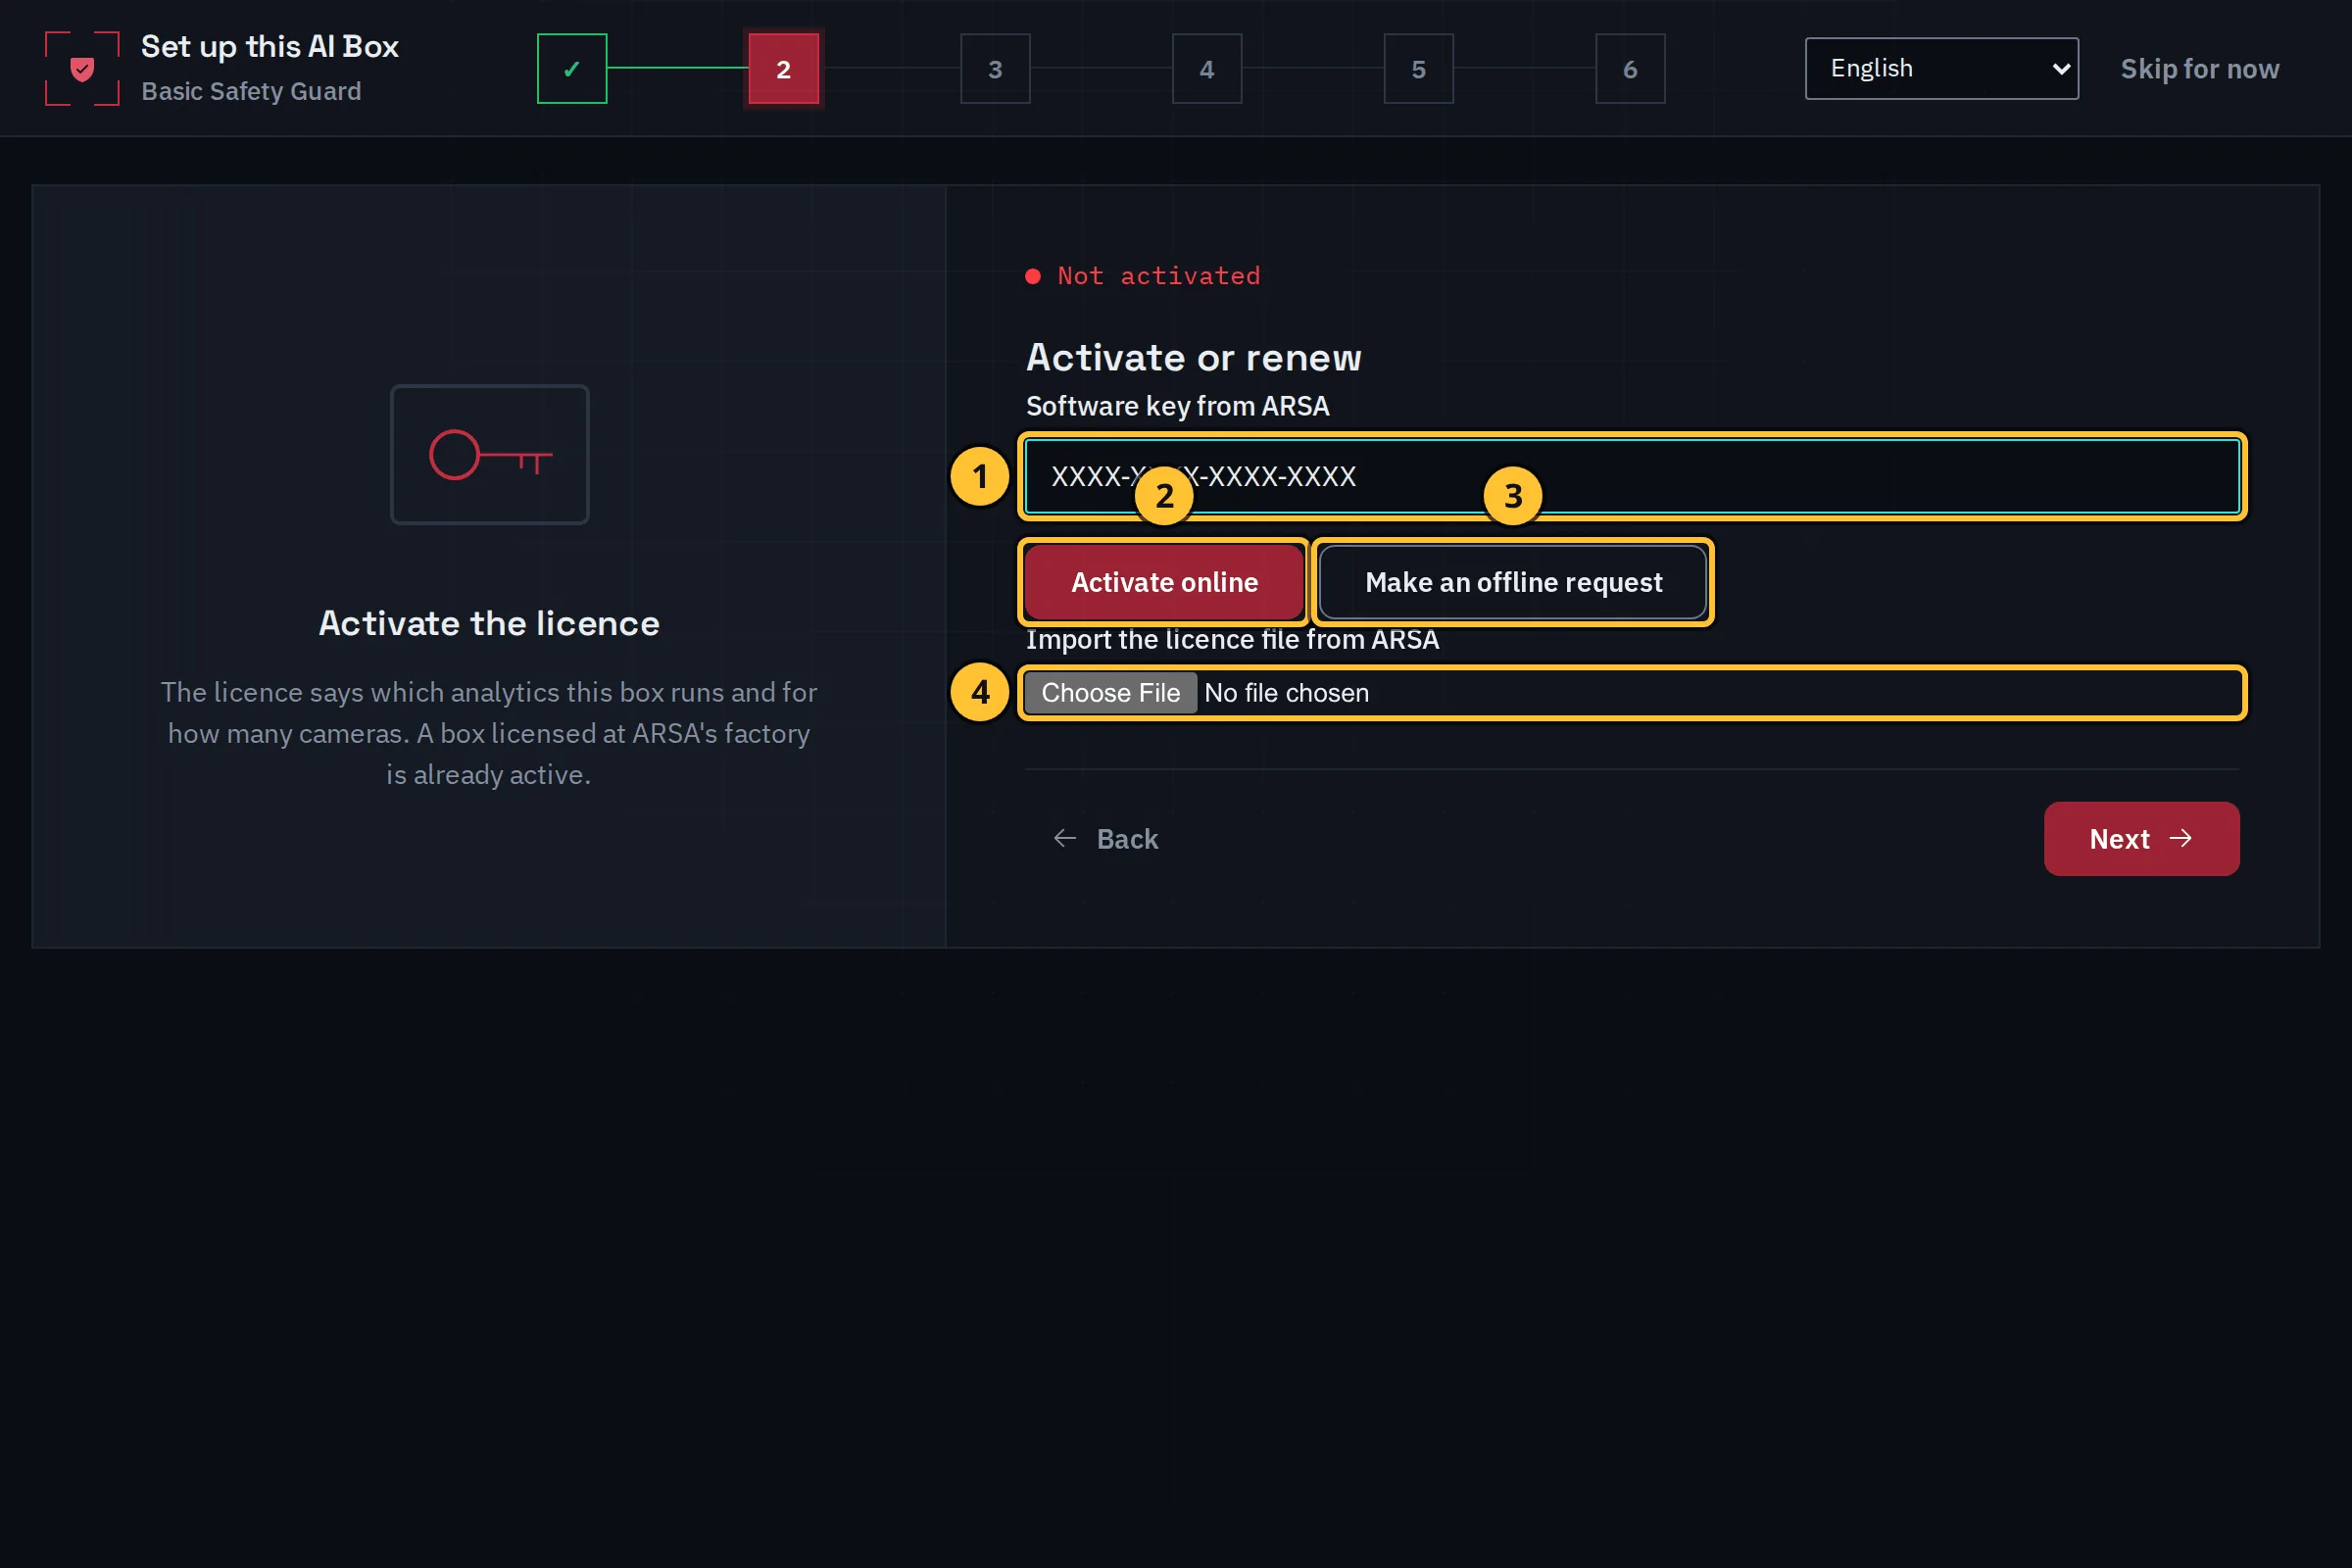
- Type the software key you received from ARSA.
- Select Activate online when the box can reach the internet.
- Without internet, select Make an offline request, download the request file and send it to ARSA.
- When ARSA sends back a licence file, import it with Import the licence file from ARSA.
Activating changes the AI engine itself, so the box asks you to confirm it is you.
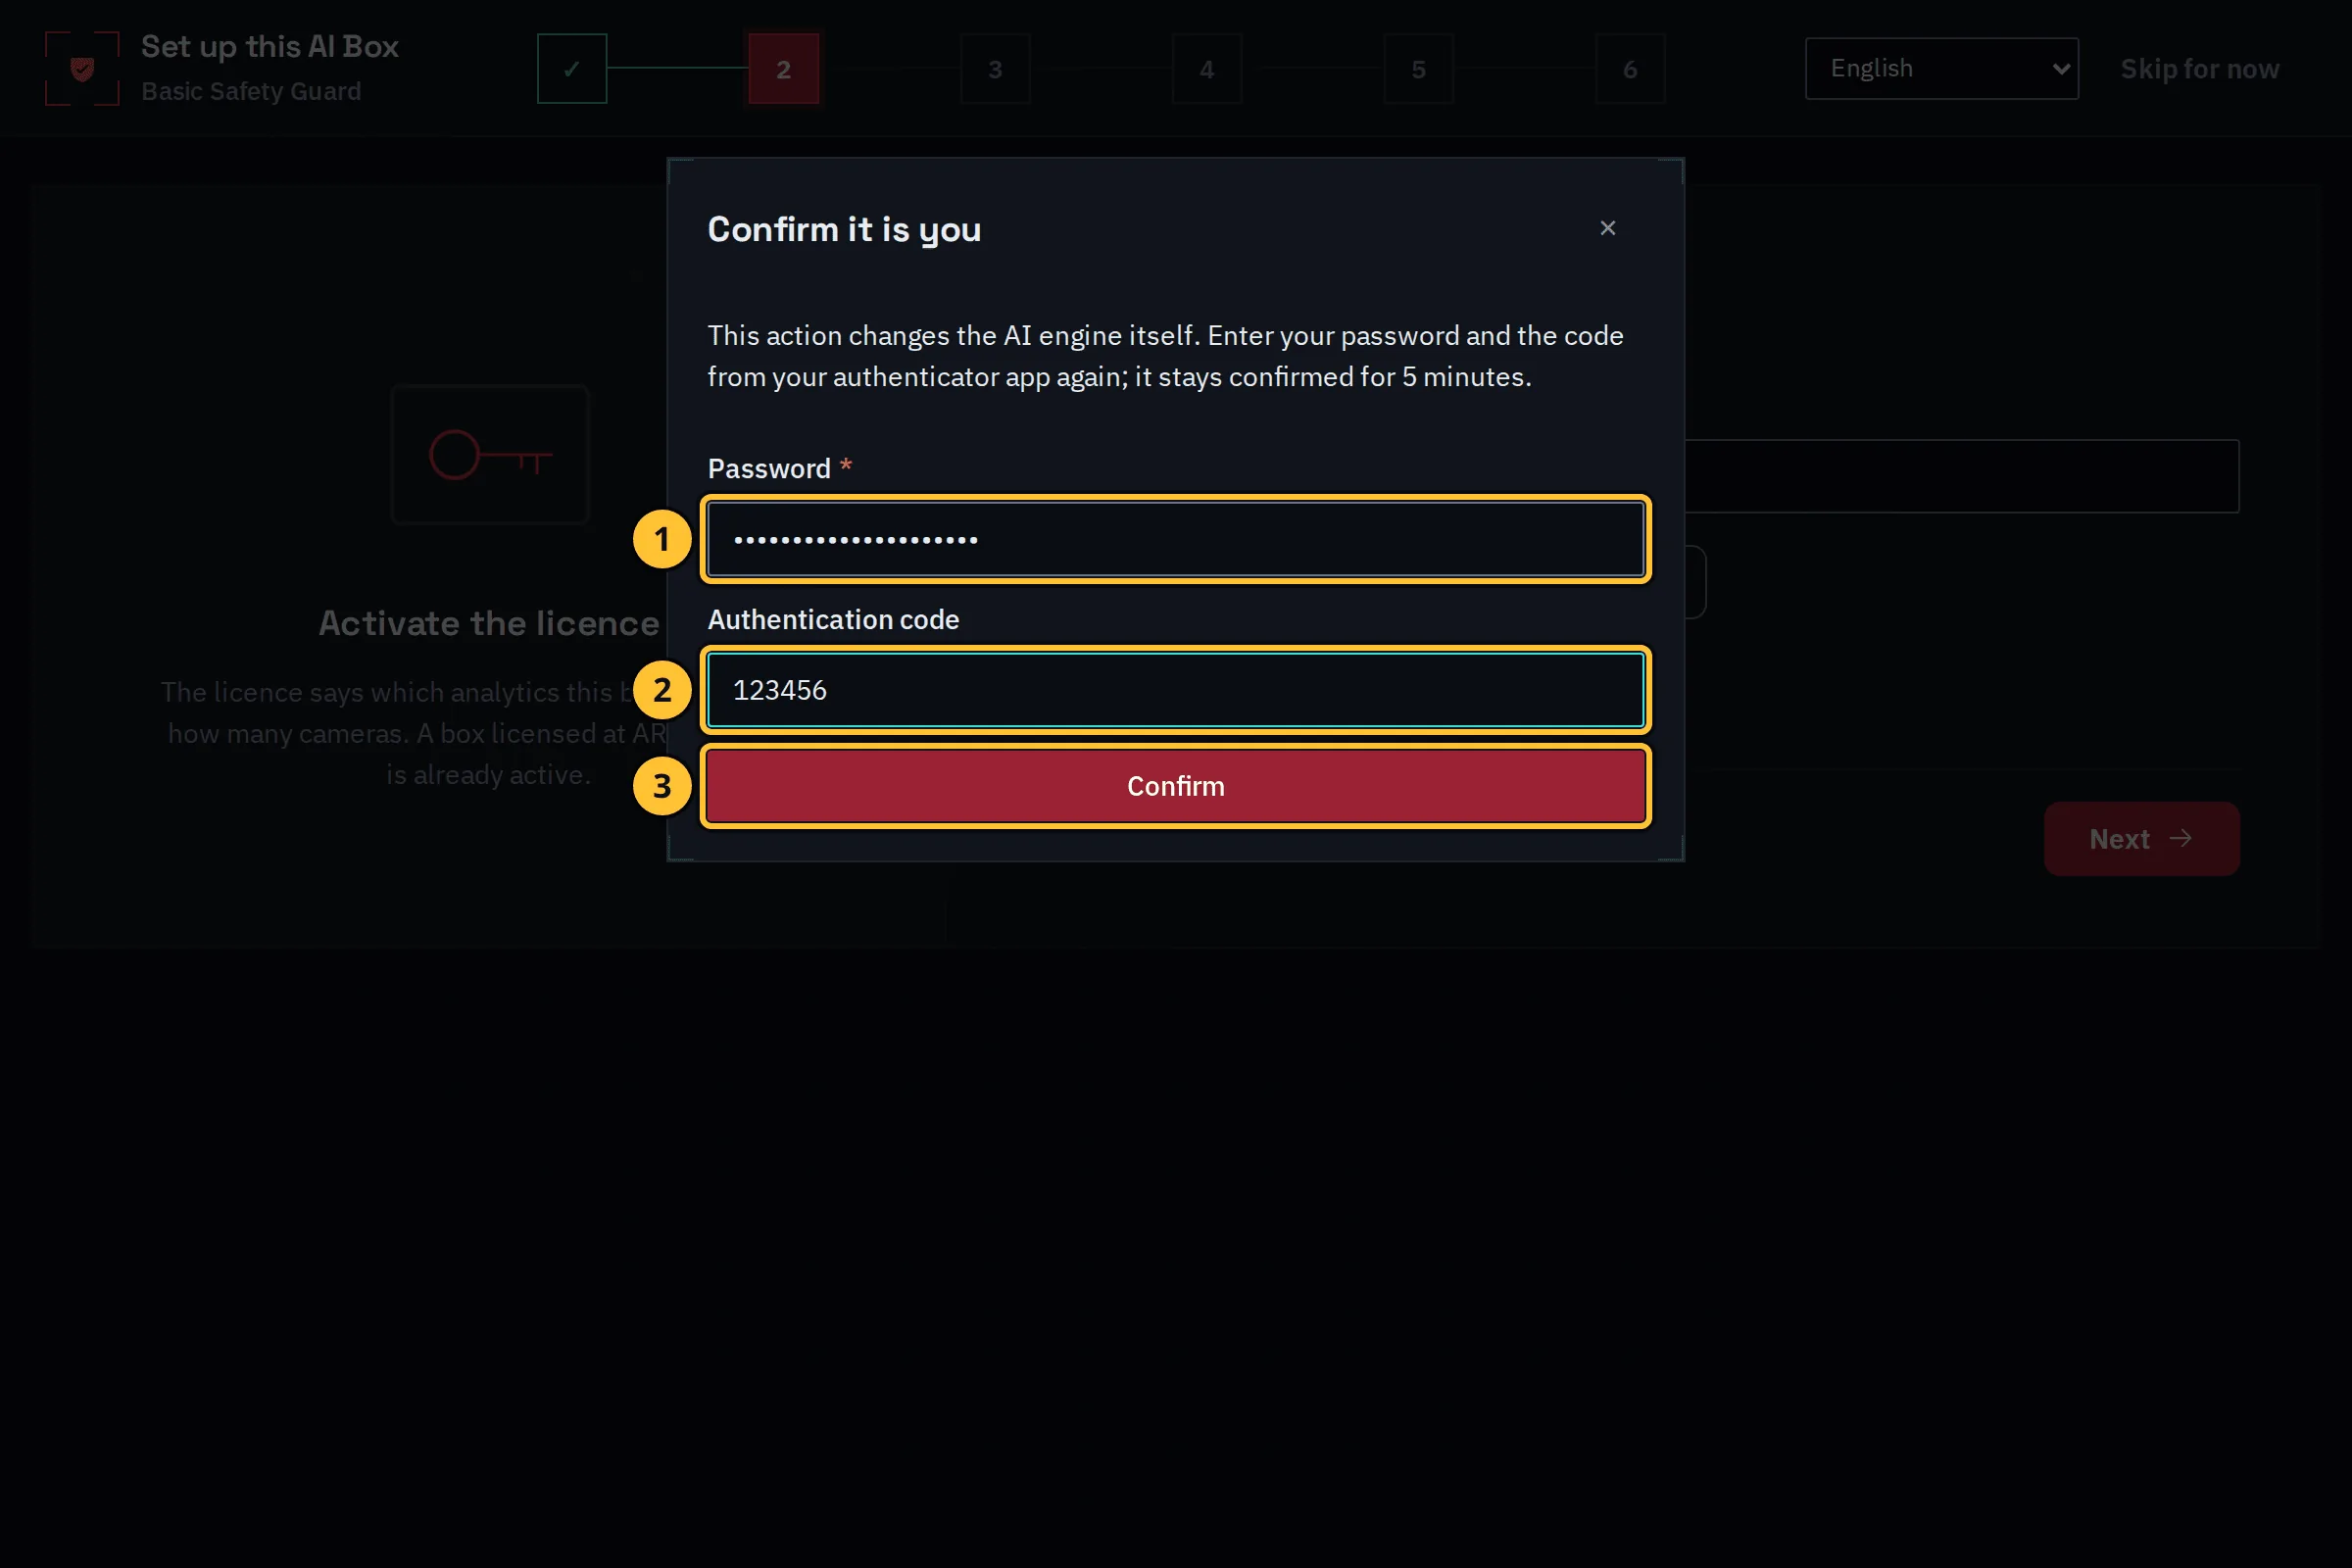
- Type your password again.
- Type a fresh code from the authenticator app.
- Select Confirm. The confirmation lasts 5 minutes, so the next protected action within that time does not ask again.
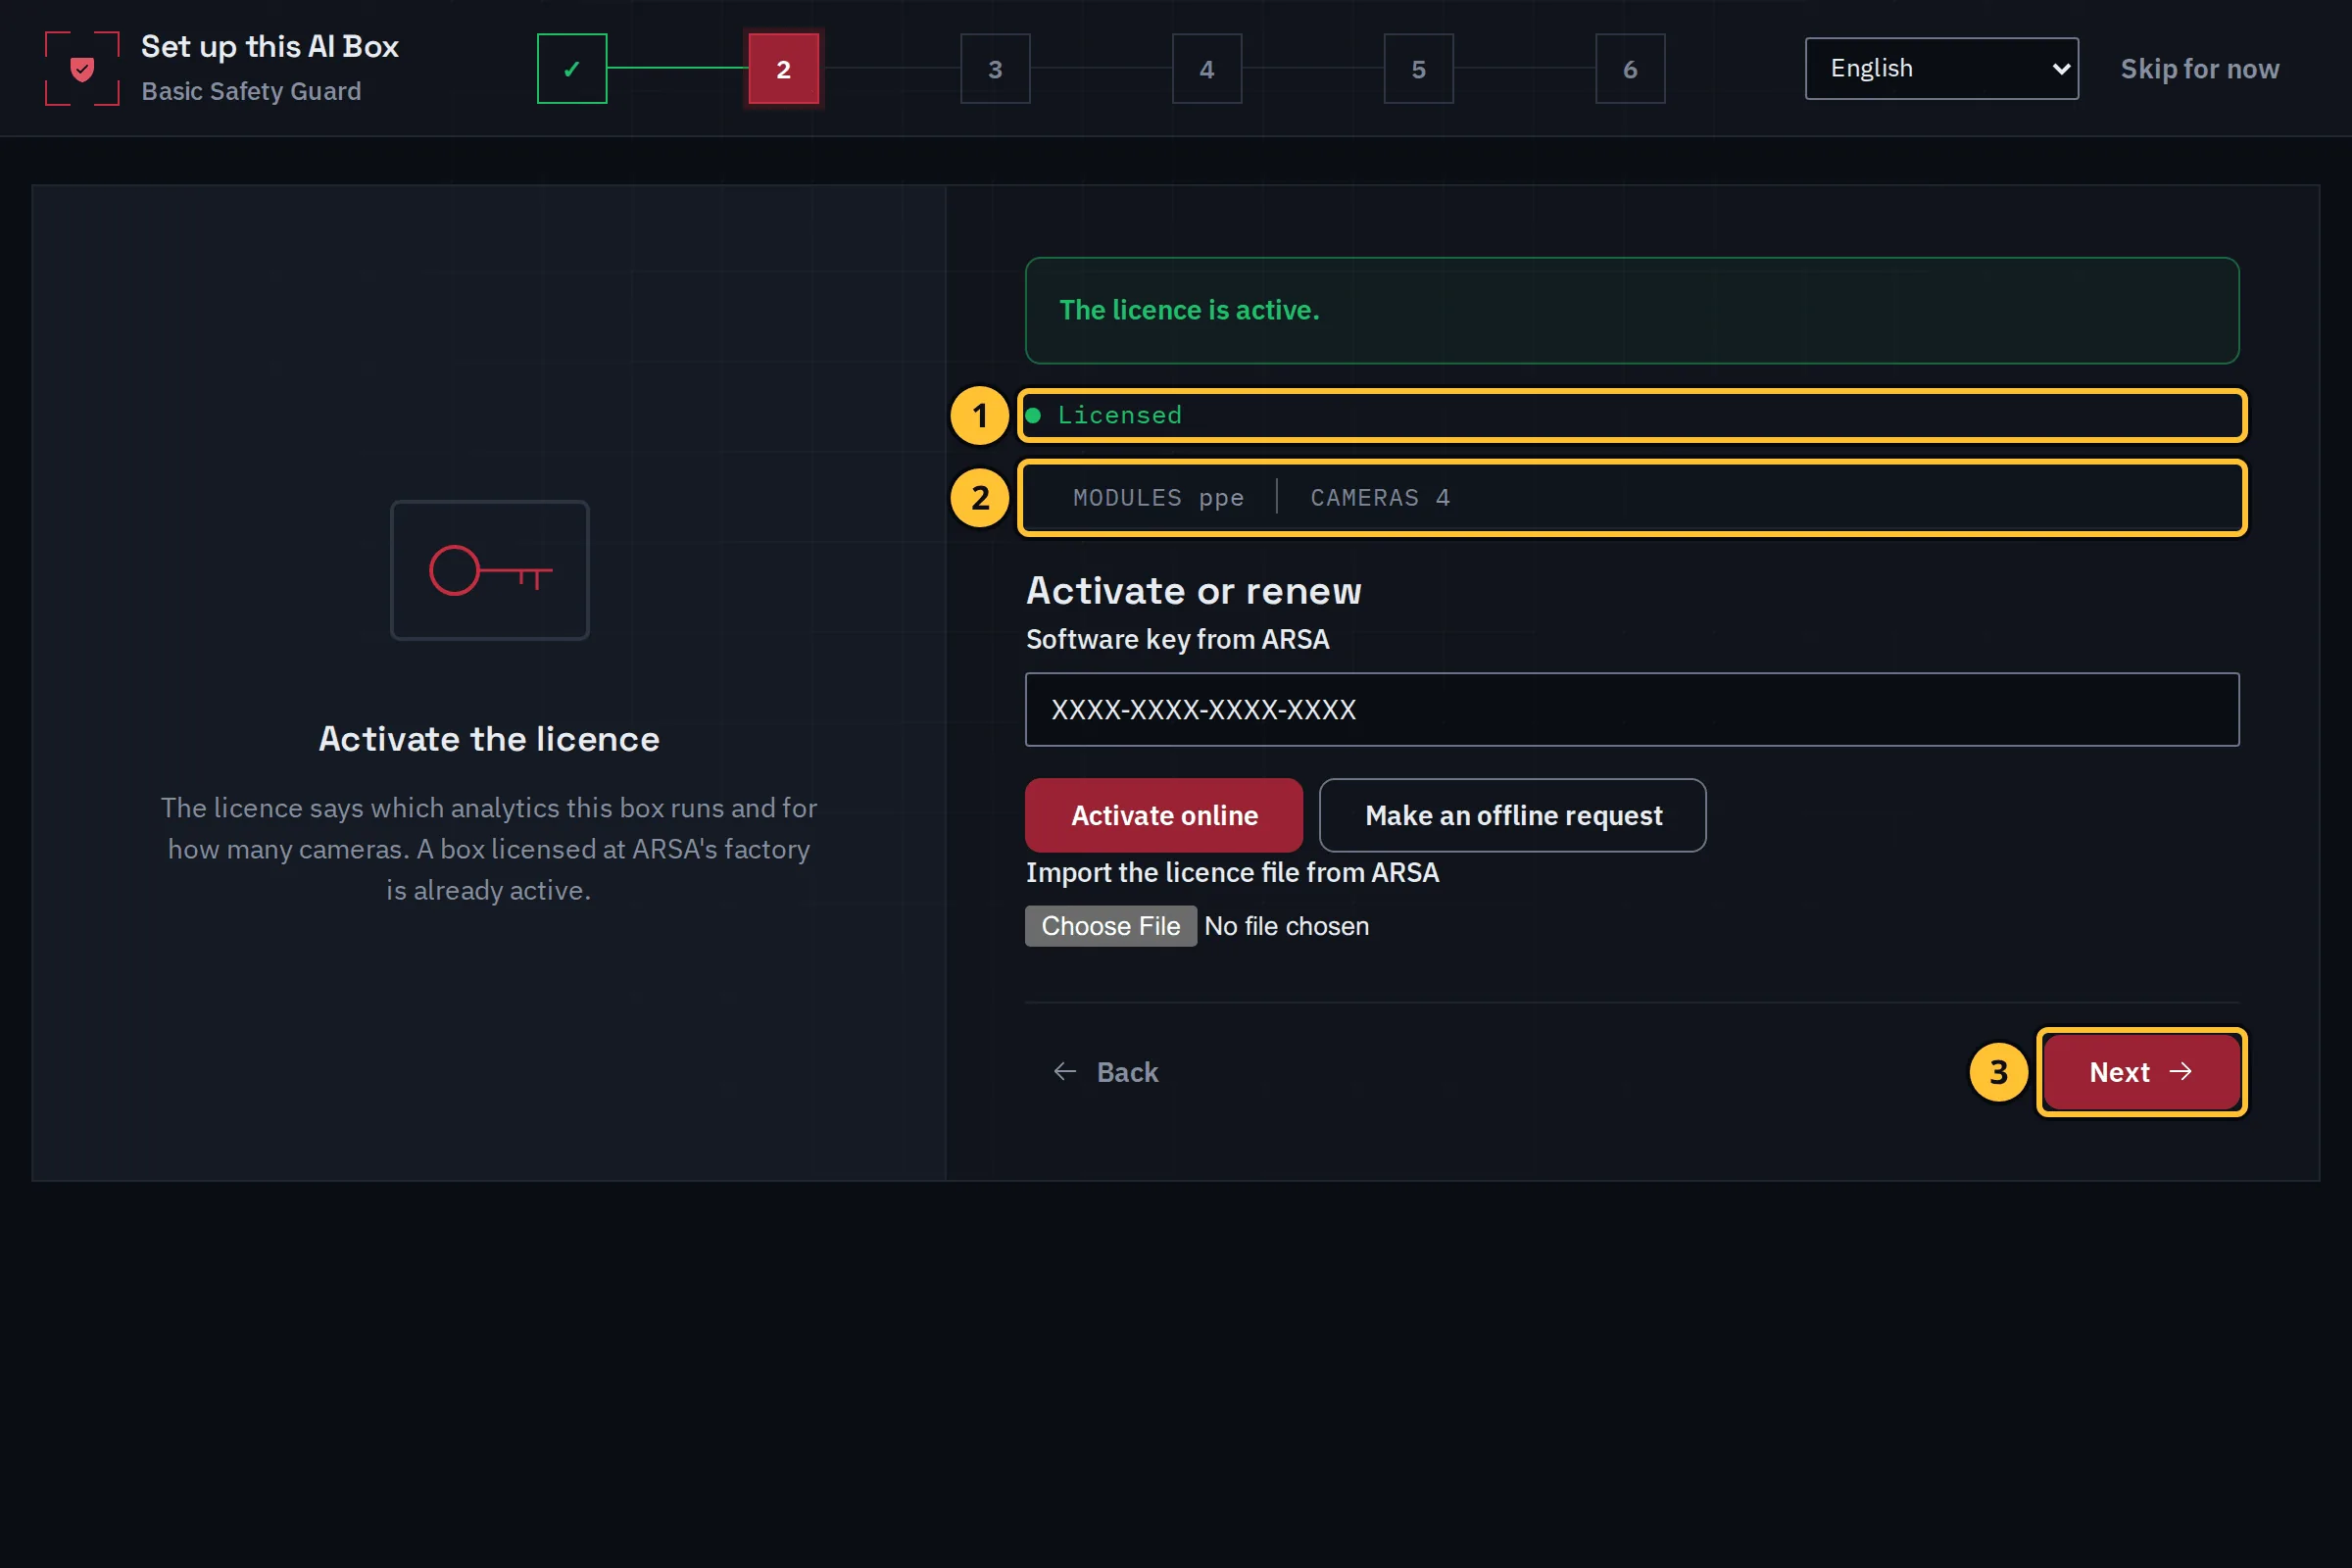
Demo data.
- The status shows that the licence is active.
- The licence lists the modules it allows and the number of cameras.
- Select Next.
Step 6: Add A Site And Its Cameras
A site is a place the box watches, such as a plant, a warehouse, a store or a road section. Reports and daily totals follow the site’s time zone.
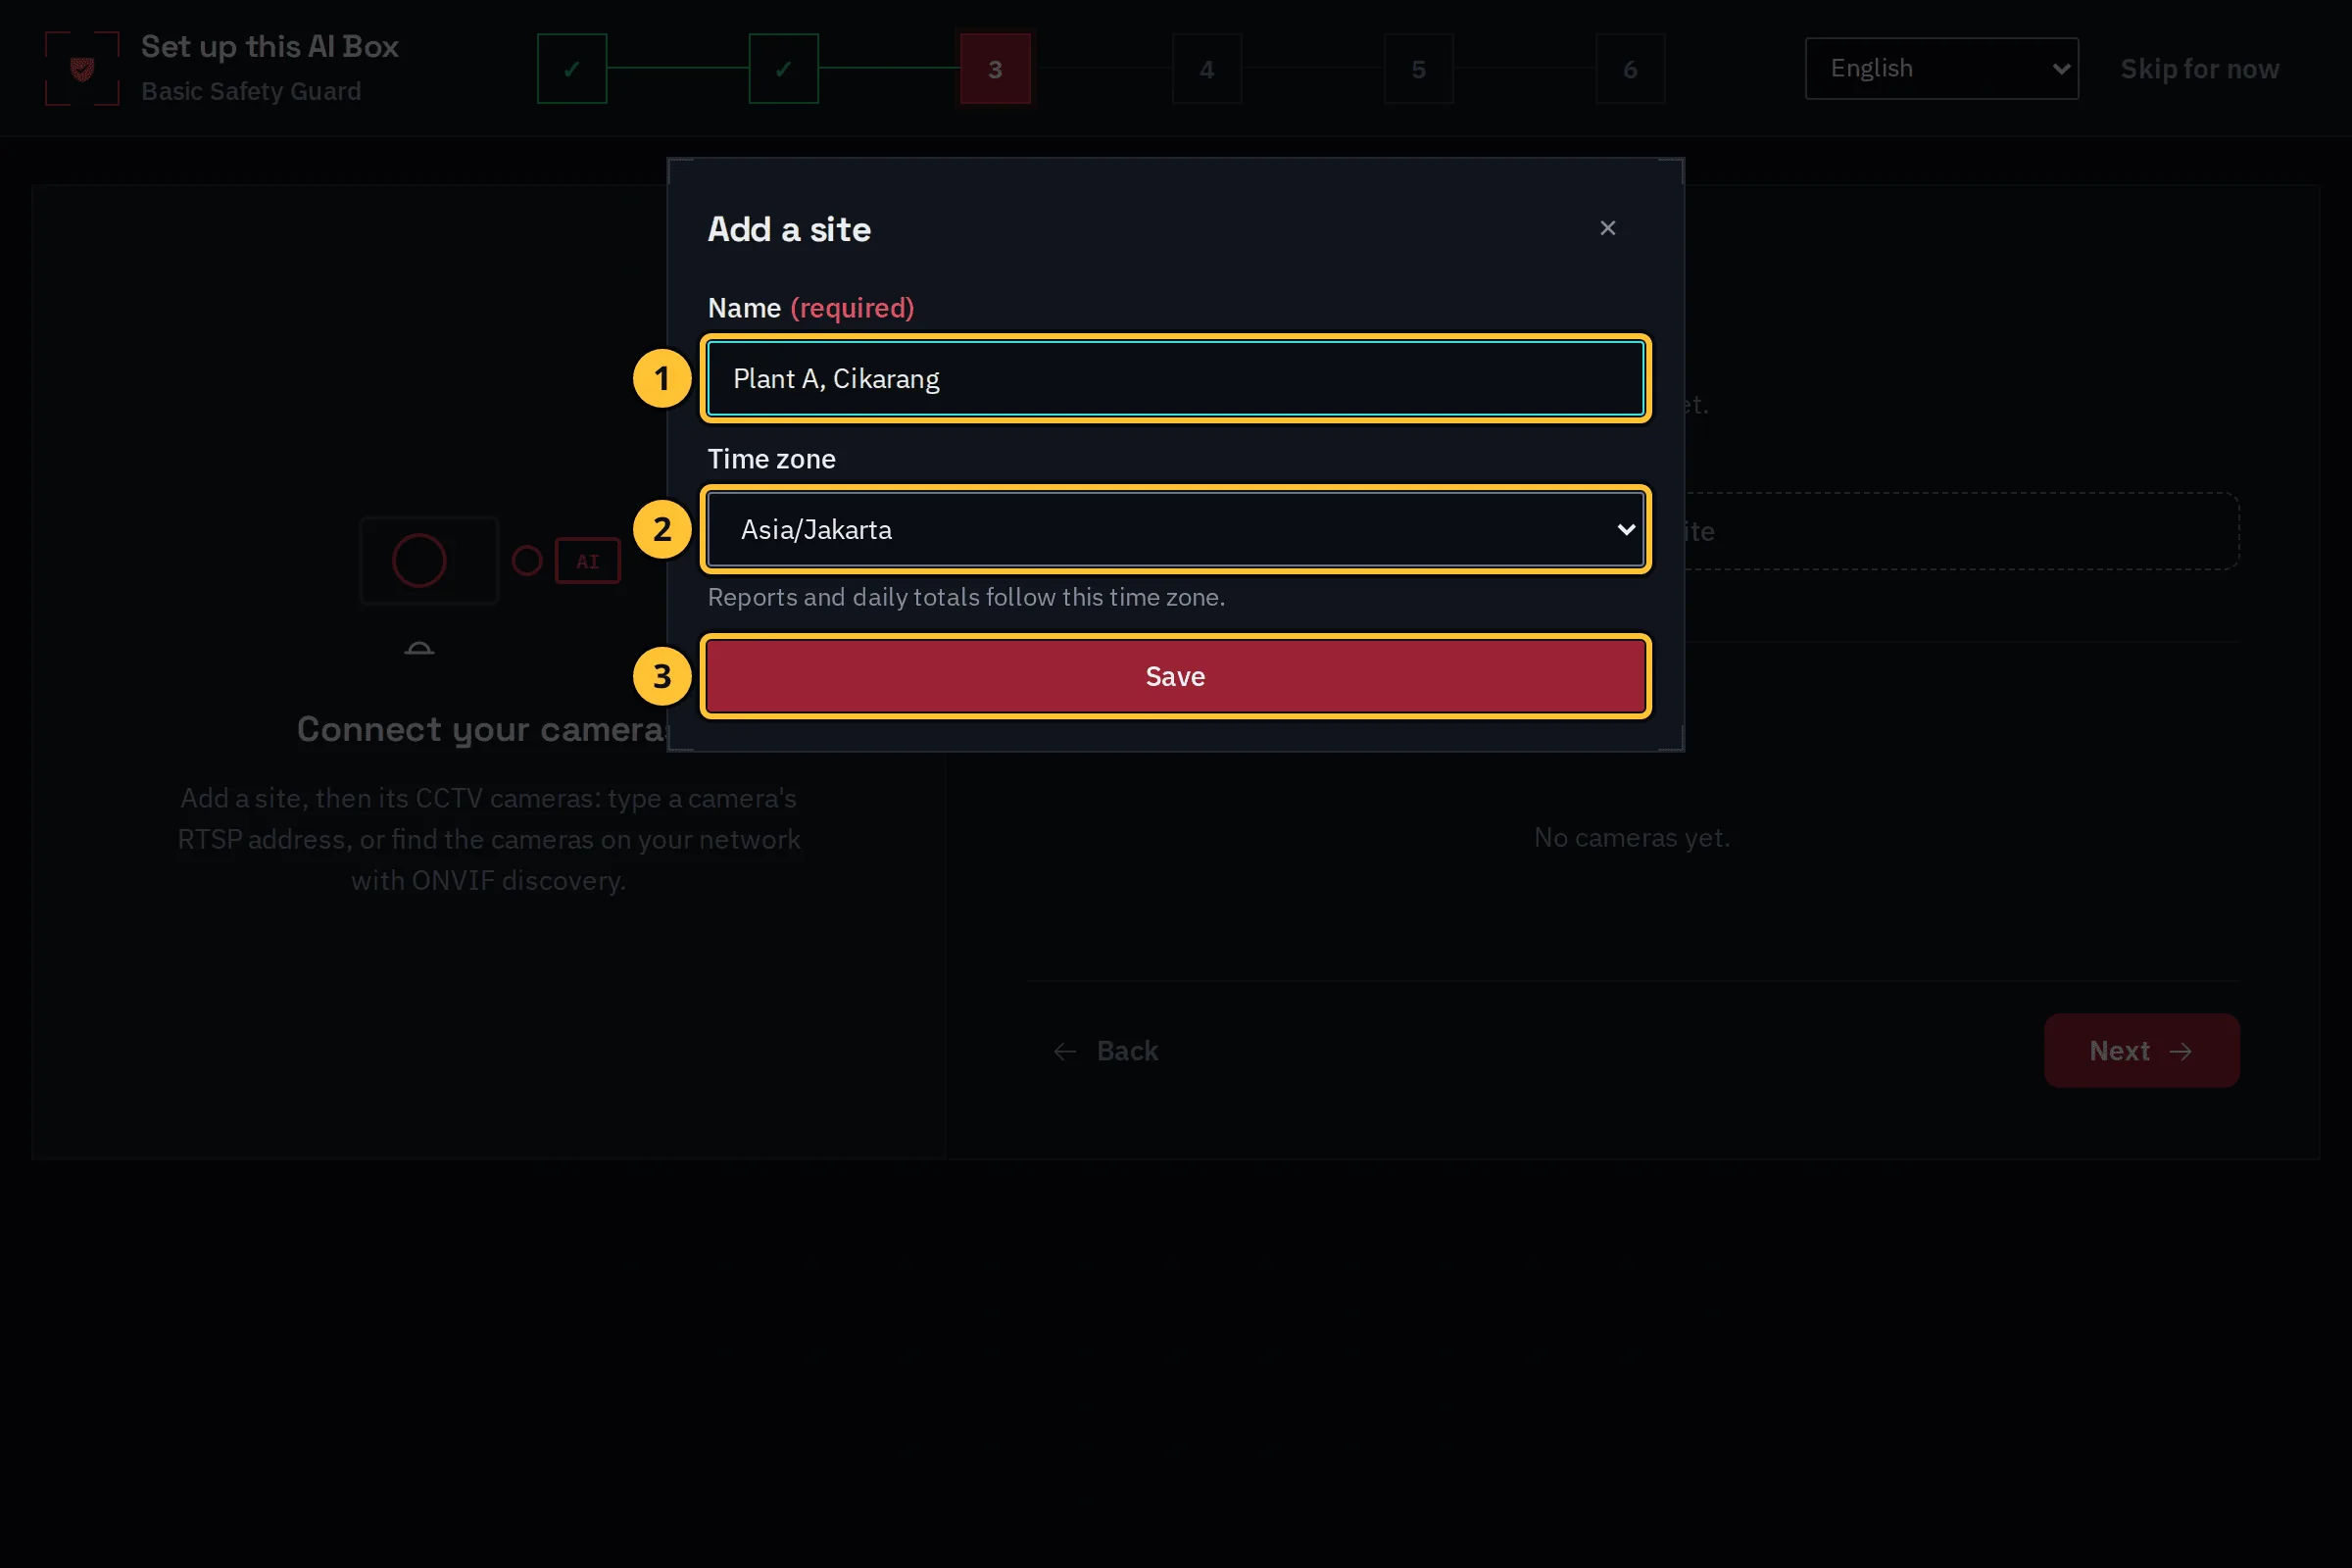
- Select Add a site, then type its name.
- Choose its time zone.
- Select Save.
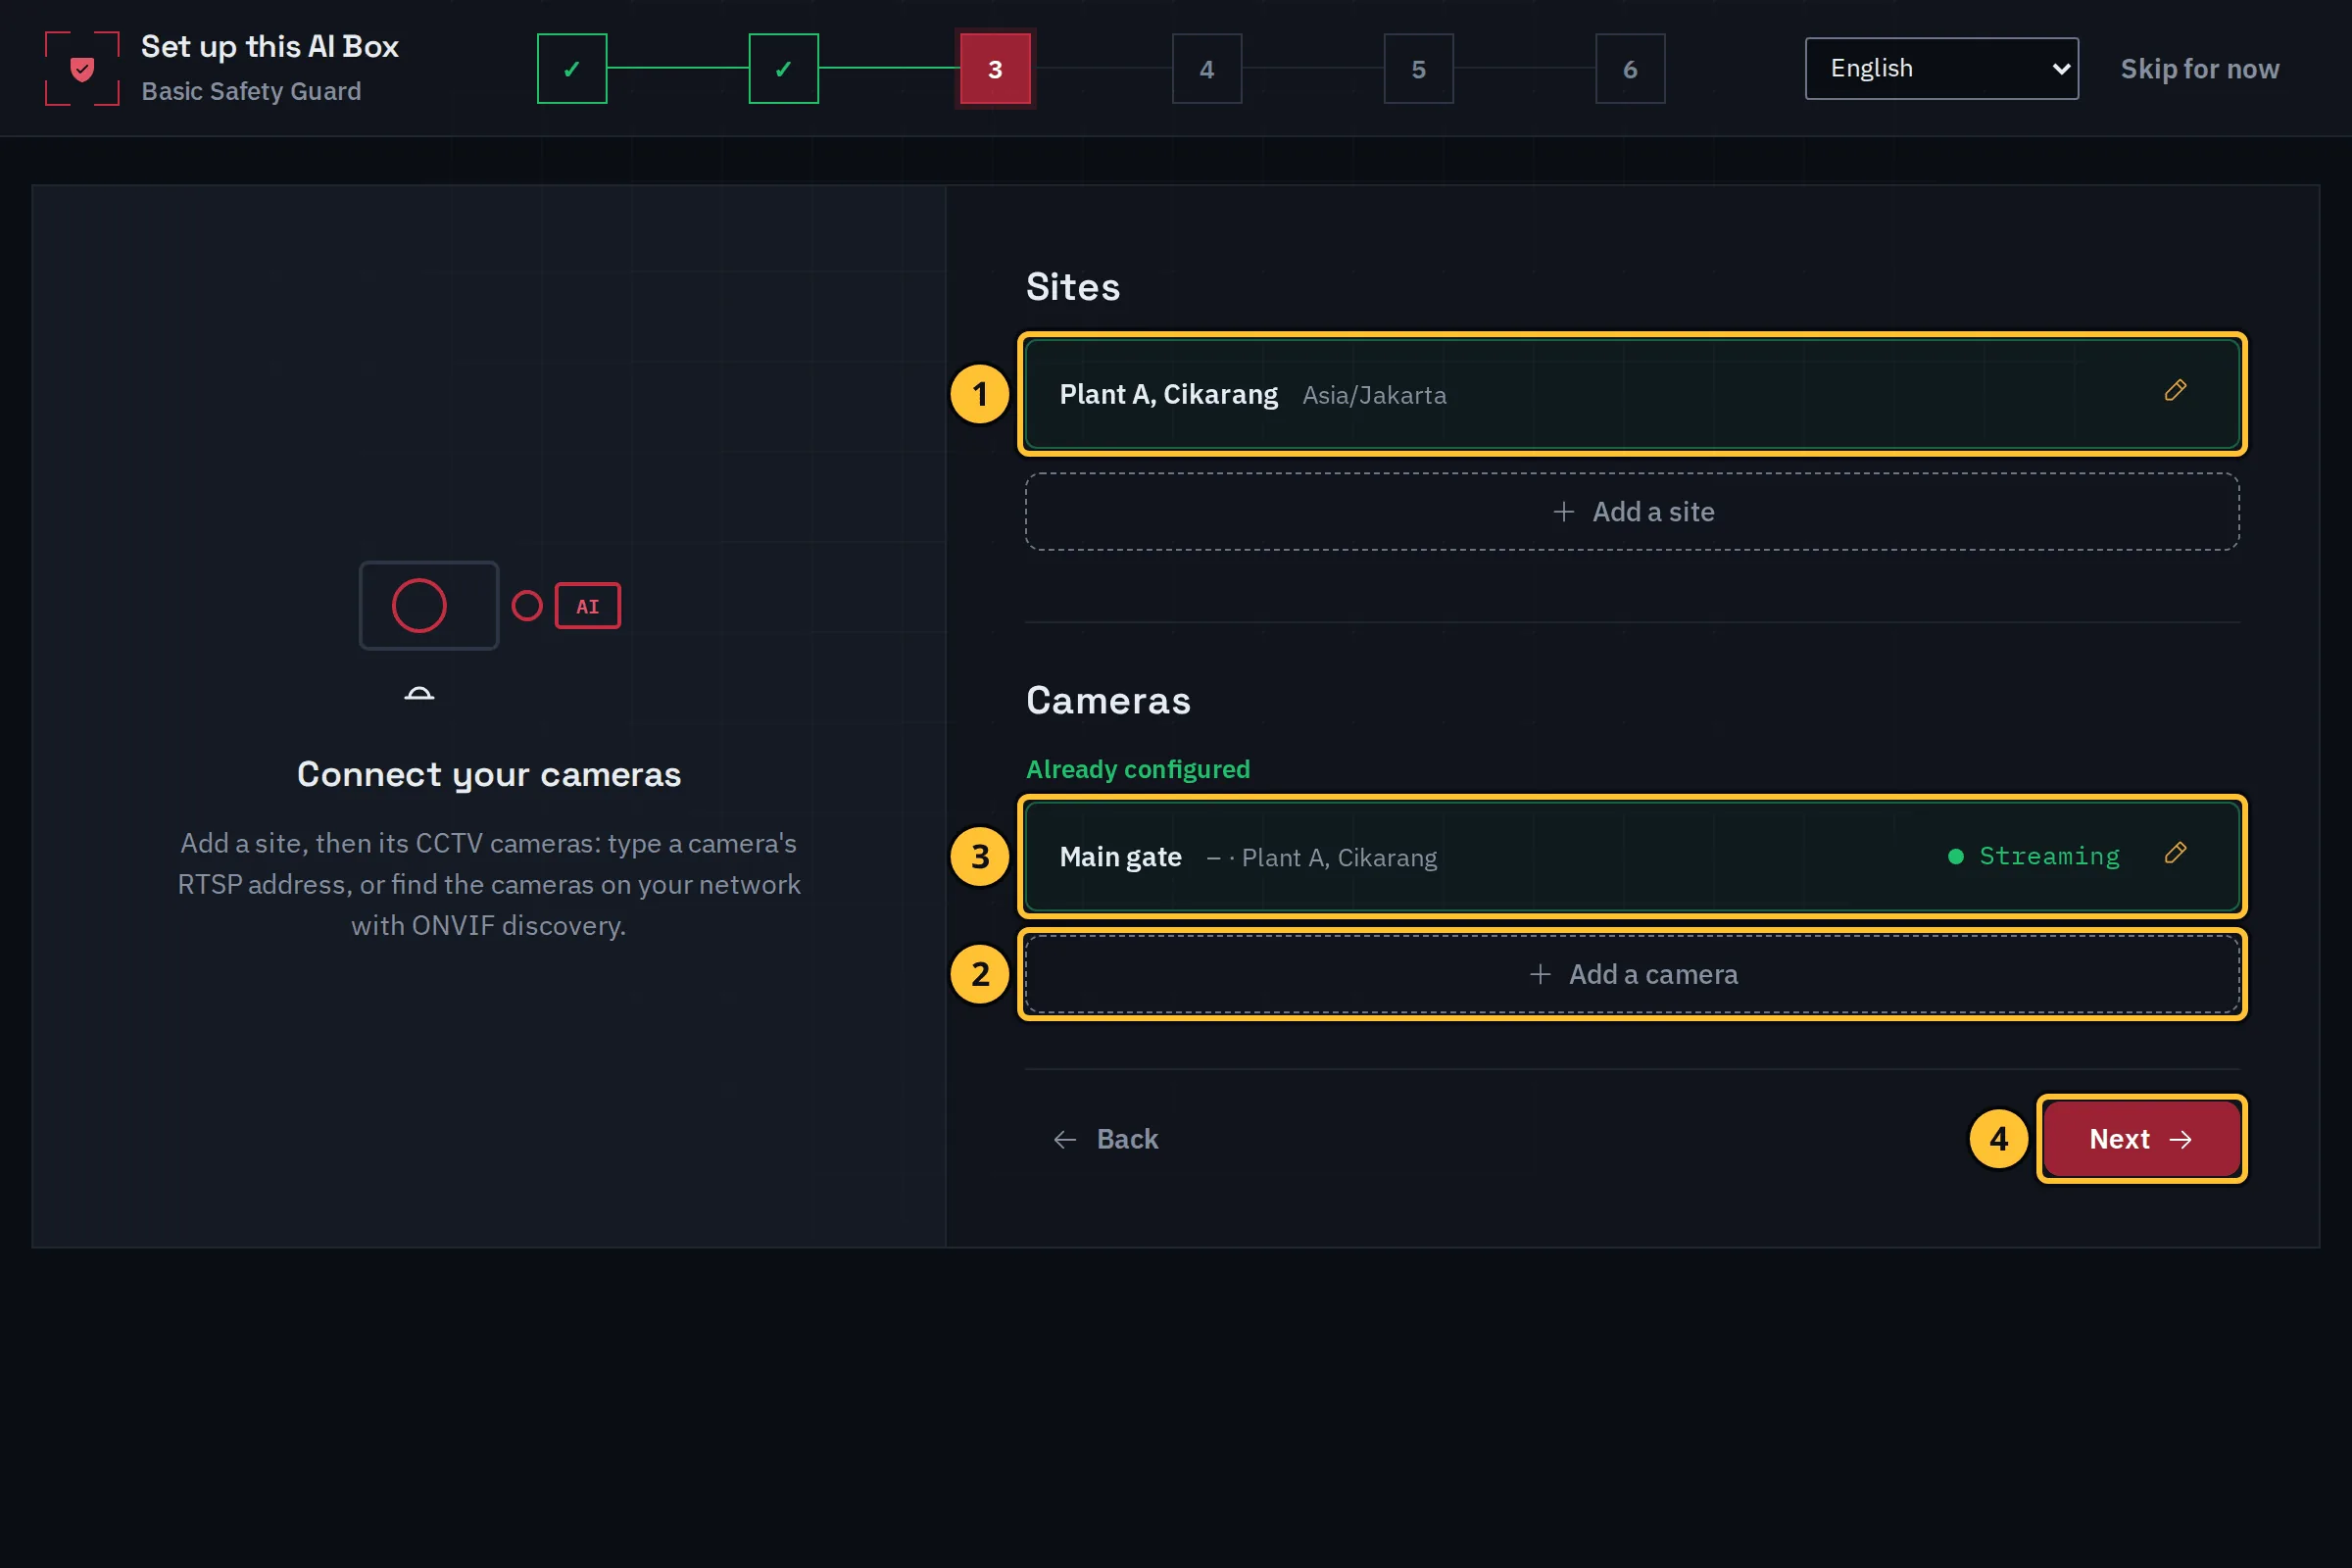
- The site is listed. Select the pencil to change it.
- Select Add a camera. The wizard opens the same guided flow as the Cameras page: connect the camera, test it, check its picture, draw what the product needs, then save. Add a Camera and Draw shows it step by step.
- Each camera added is listed with its state, for example Streaming.
- When every camera is added, select Next.
Step 7: Choose Who Is Told
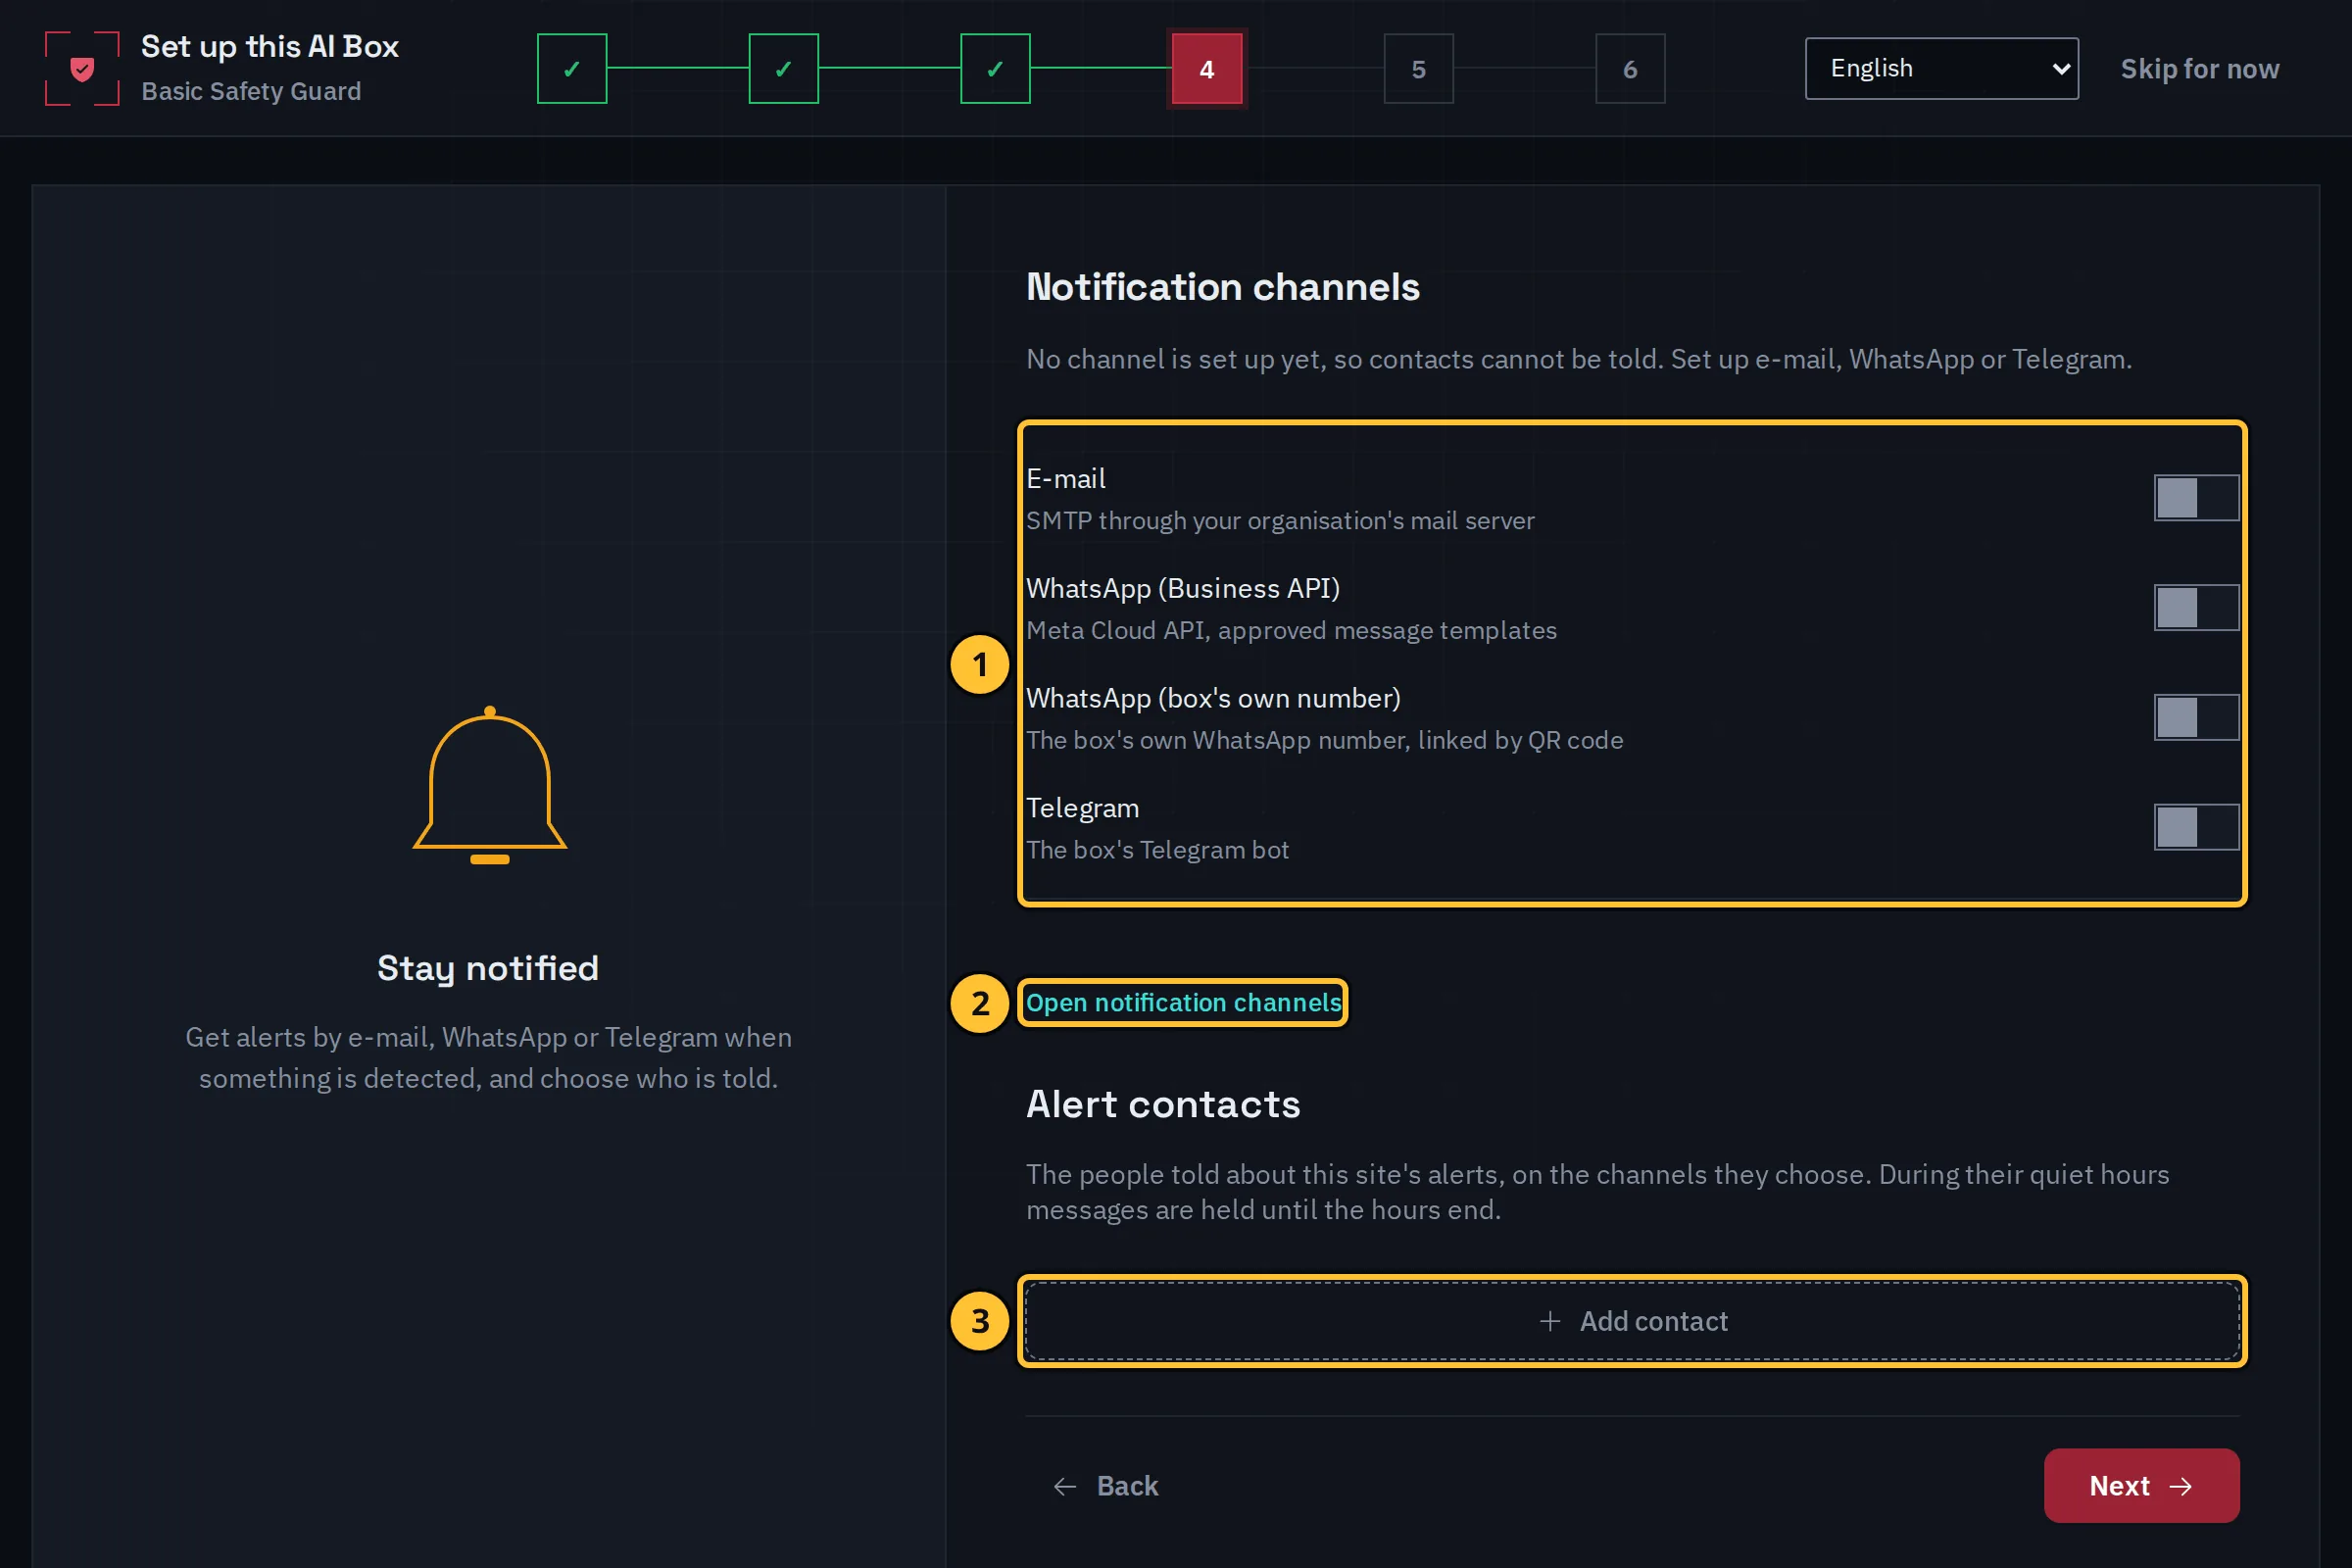
- The channels that send alerts: e-mail, WhatsApp (Business API), WhatsApp (the box’s own number) and Telegram. A switch is on once its channel is set up; selecting it opens the channel’s settings.
- Open notification channels sets up the accounts the box sends from.
- Add contact adds a person who receives alerts, on the channels they choose.
Users and Notifications explains both. You can also do this after the wizard; select Next to go on.
Step 8: Detection Settings
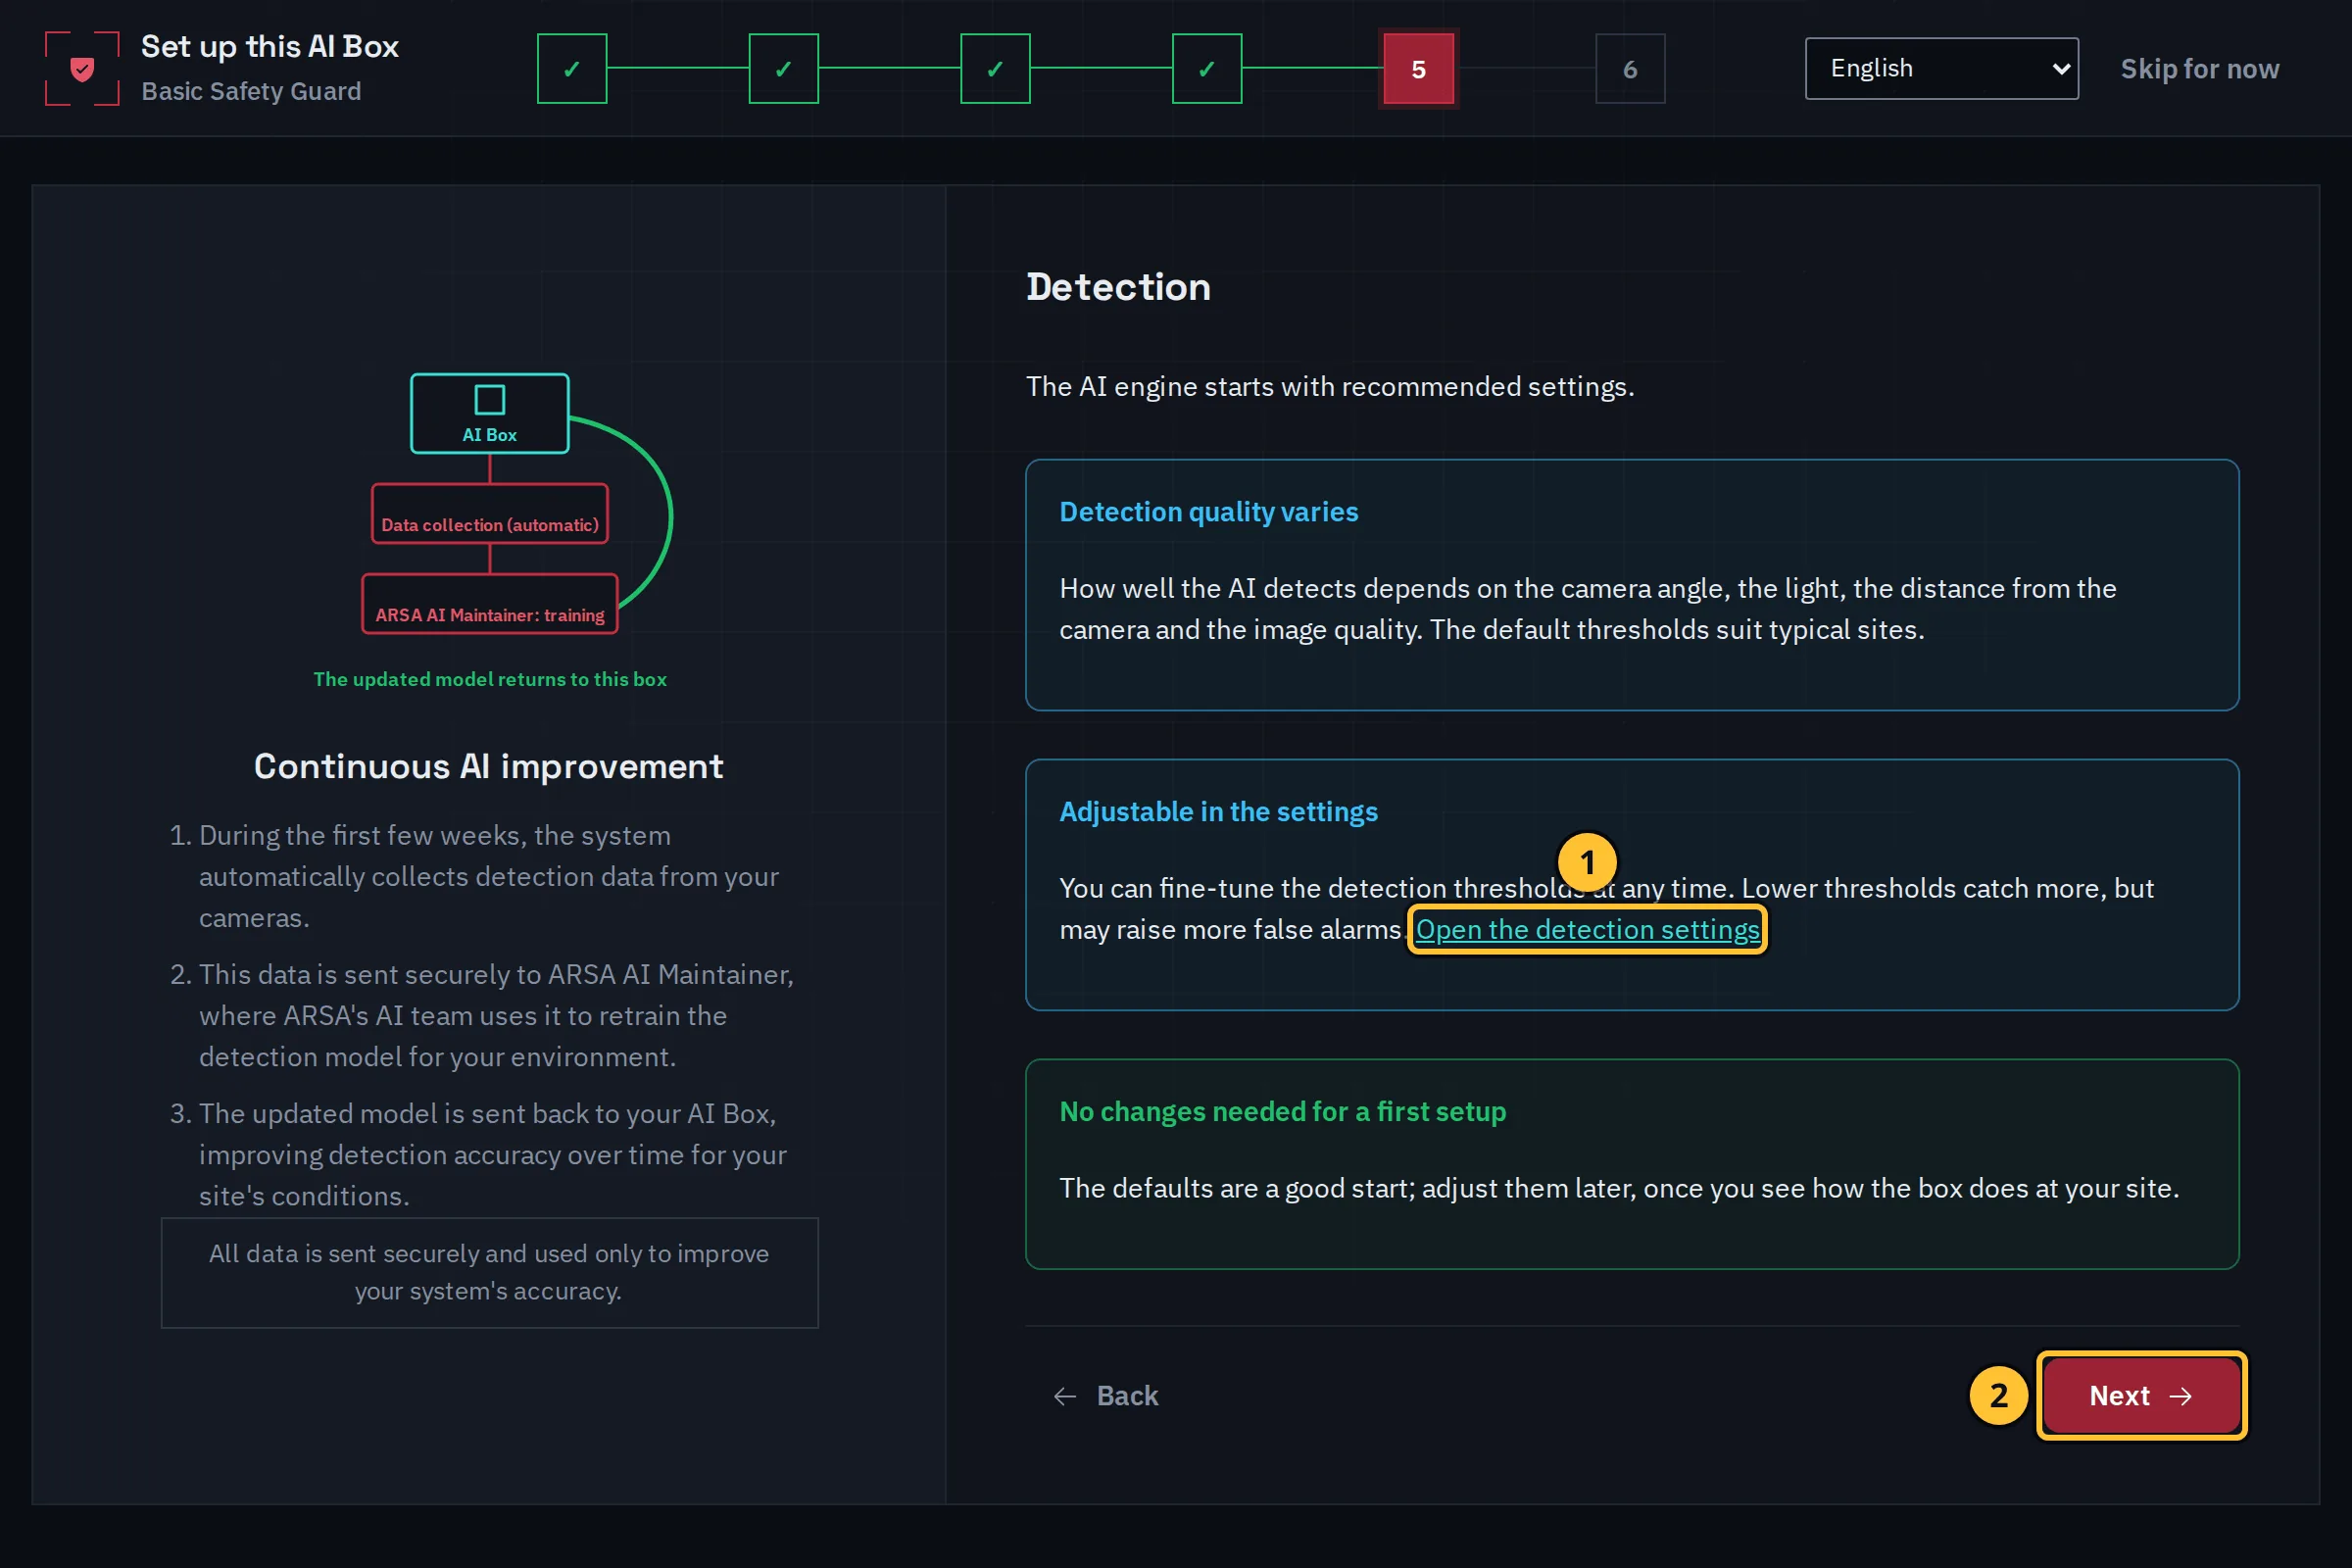
The AI engine starts with recommended settings, which suit a first setup.
- Open the detection settings to adjust the thresholds later, once you see how the box does at your site.
- Select Next.
Step 9: Finish
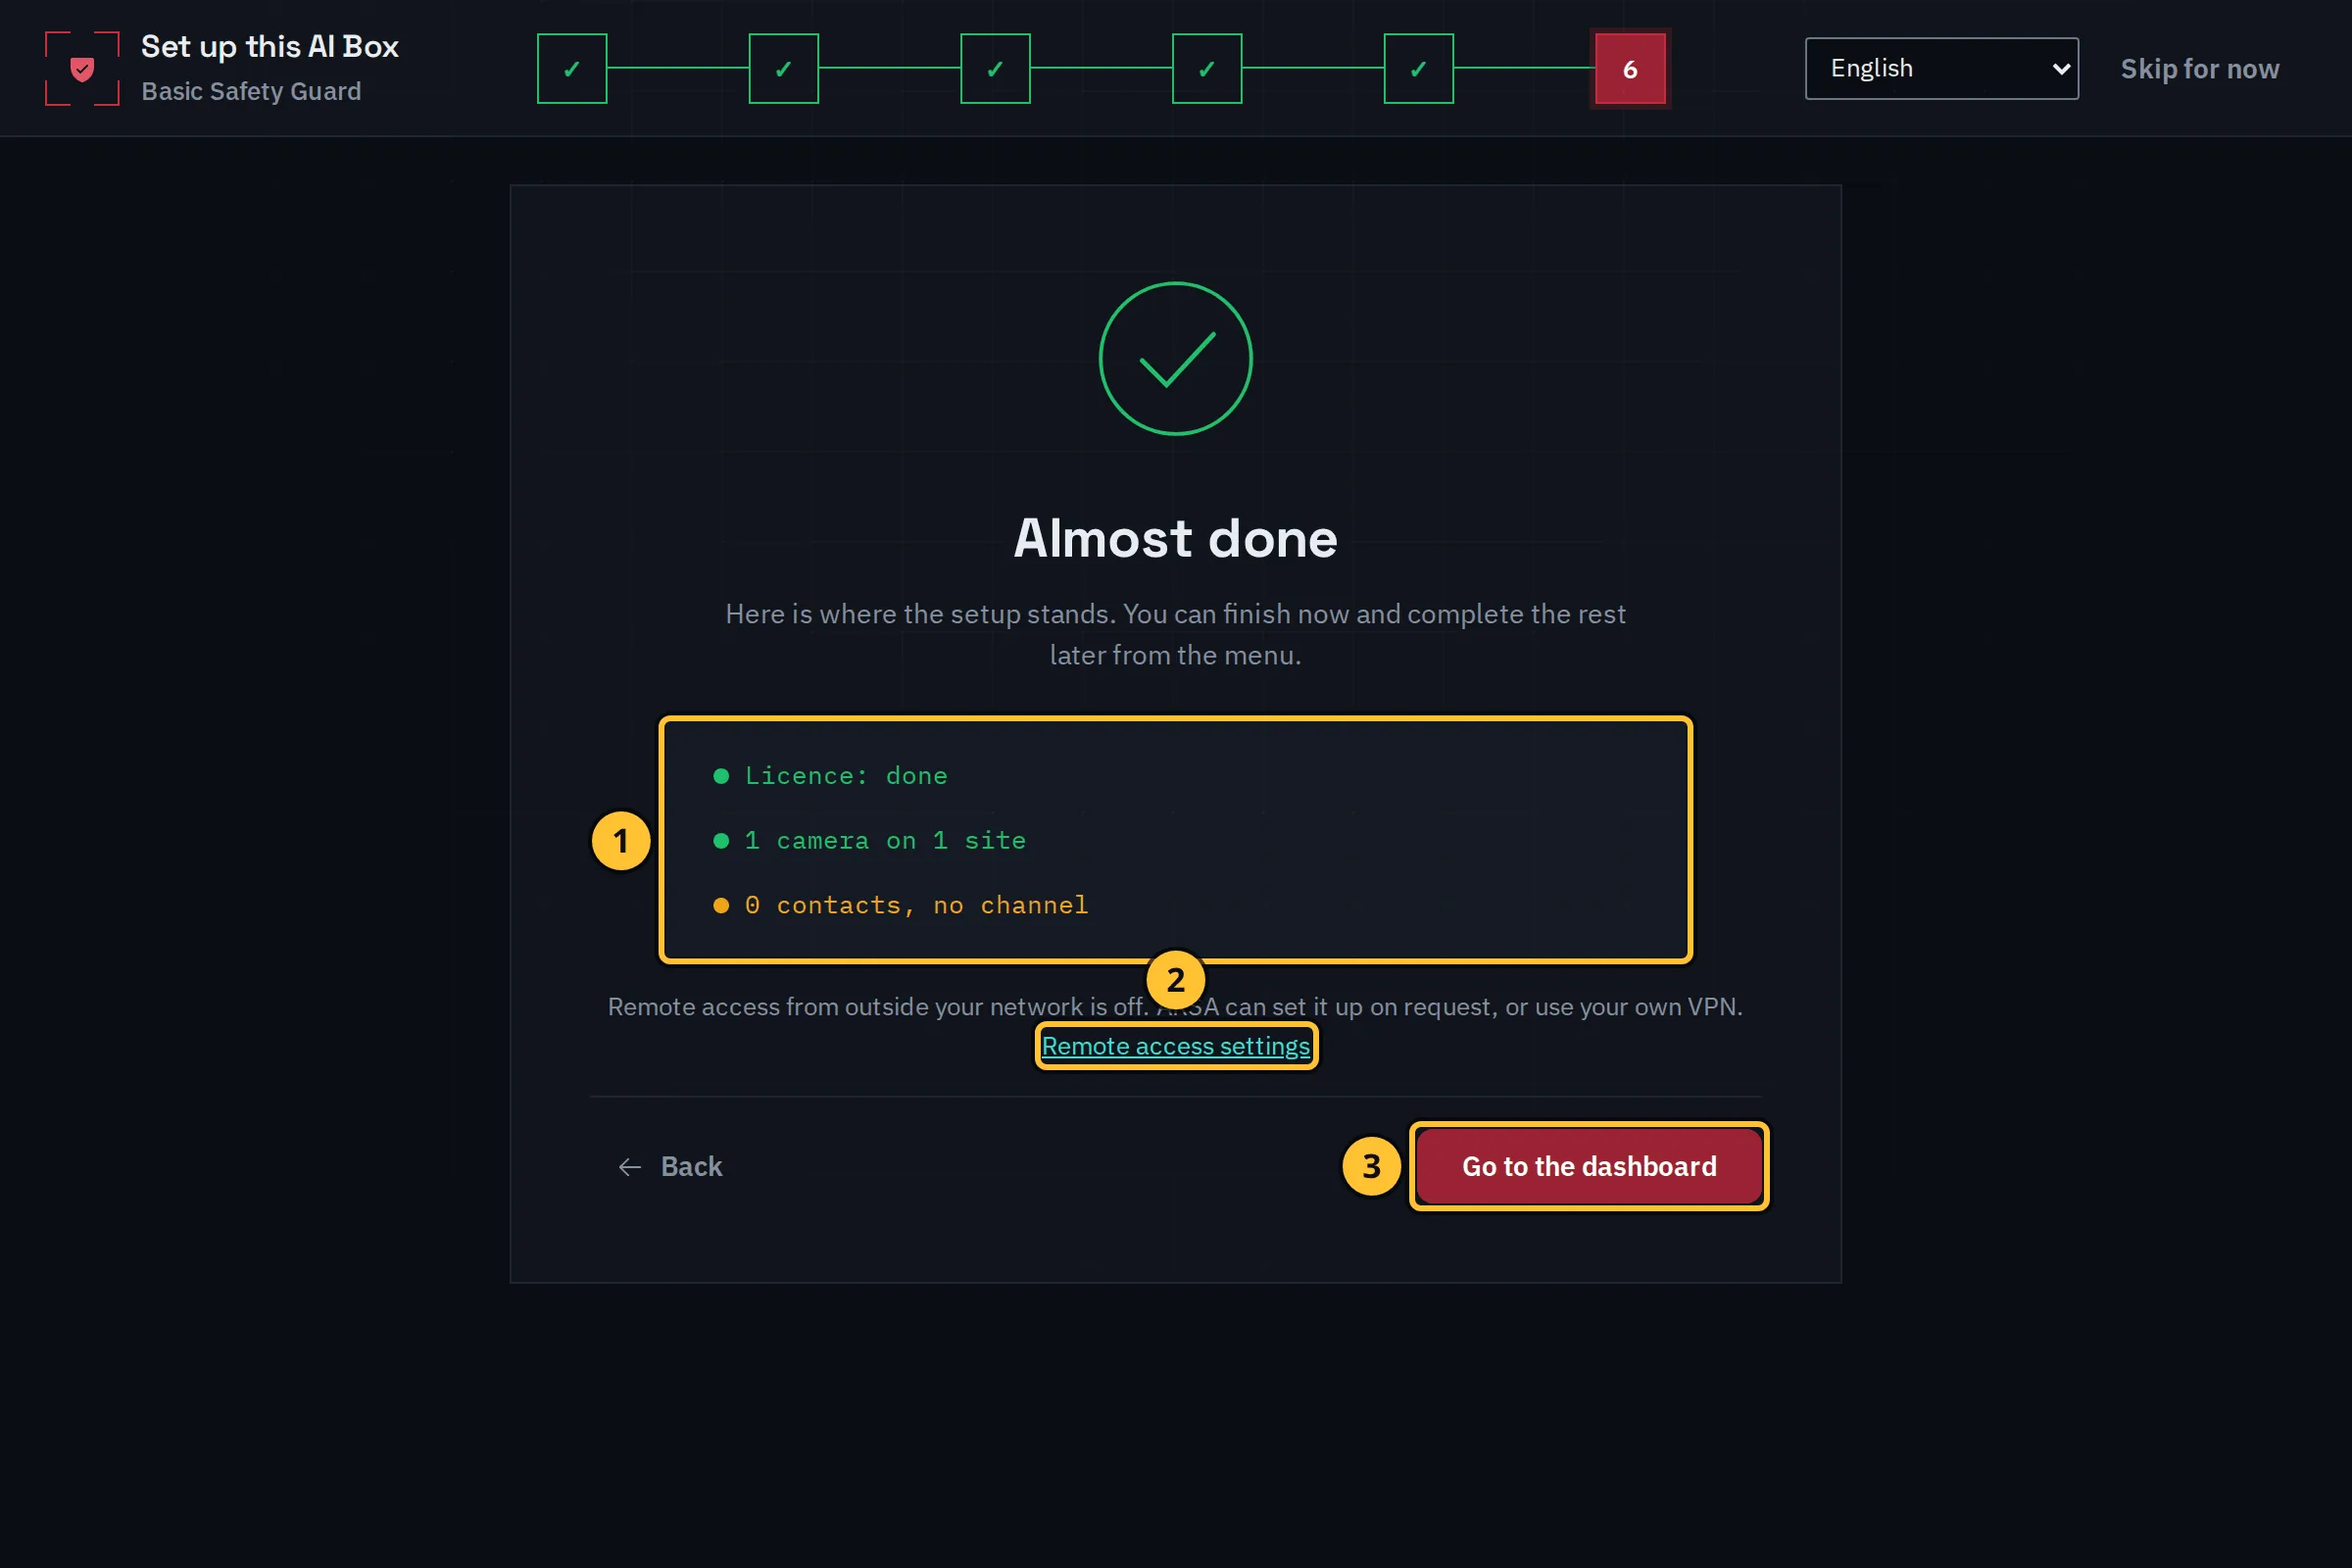
- The summary shows what is done: the licence, the cameras and sites, the contacts and channels. Anything not done yet can be finished later from the menu.
- Remote access from outside your network is off until you switch it on. Remote access settings shows its state; ARSA can set it up on request, or you can use your own VPN.
- Select Go to the dashboard.
Watch The Wizard
Transcript of the setup wizard clip
Transcript of the clip “The Setup Wizard” (silent, about 30 seconds, demo data).
- The wizard’s welcome page lists what to check before you begin. The owner selects Get started.
- On the licence step the owner types the software key from ARSA and selects Activate online.
- The dialog “Confirm it is you” asks for the password and a code from the authenticator app; the owner confirms.
- The licence is now active, with its modules and number of cameras. The owner selects Next.
- On the sites and cameras step the owner adds a site, “Plant A, Cikarang”, in the time zone Asia/Jakarta.
- The owner adds a camera, “Main gate”, types its stream address, user name and password, and selects Connect and test. The test shows Streaming with the resolution and frame rate. The owner goes back to the list of cameras.
- The owner selects Next through the notifications step and the detection step.
- The finish step shows the summary: the licence is done, 1 camera on 1 site, no contacts or channels yet.
Next Steps
1.0.0. Updated 2026-11-06