
Docs / AI Box And Video Analytics Software / Add A Camera And Draw
Add A Camera And Draw
Connect a CCTV camera to the AI Box by its RTSP address or an ONVIF scan, test it live, check its picture, draw its lines and zones, then save.
Every camera is added with the same guided flow in four steps: Connect, Picture, Draw and Review. The flow is the same on the Cameras page and in the setup wizard. You need the role Admin of the site, or the owner account. The pictures show Basic Safety Guard; what you draw in step 3 depends on the product, and each product has its own tutorial for it:
- Basic Safety Guard: PPE and Hazard Areas
- Traffic Monitor: Lanes, Count Line and Speed Lines
- Smart Retail Counter: Door, Shelves, Queue and Floor
- DOOH Audience Meter: the Screen’s Viewing Area
Open The Cameras Page
Demo data.
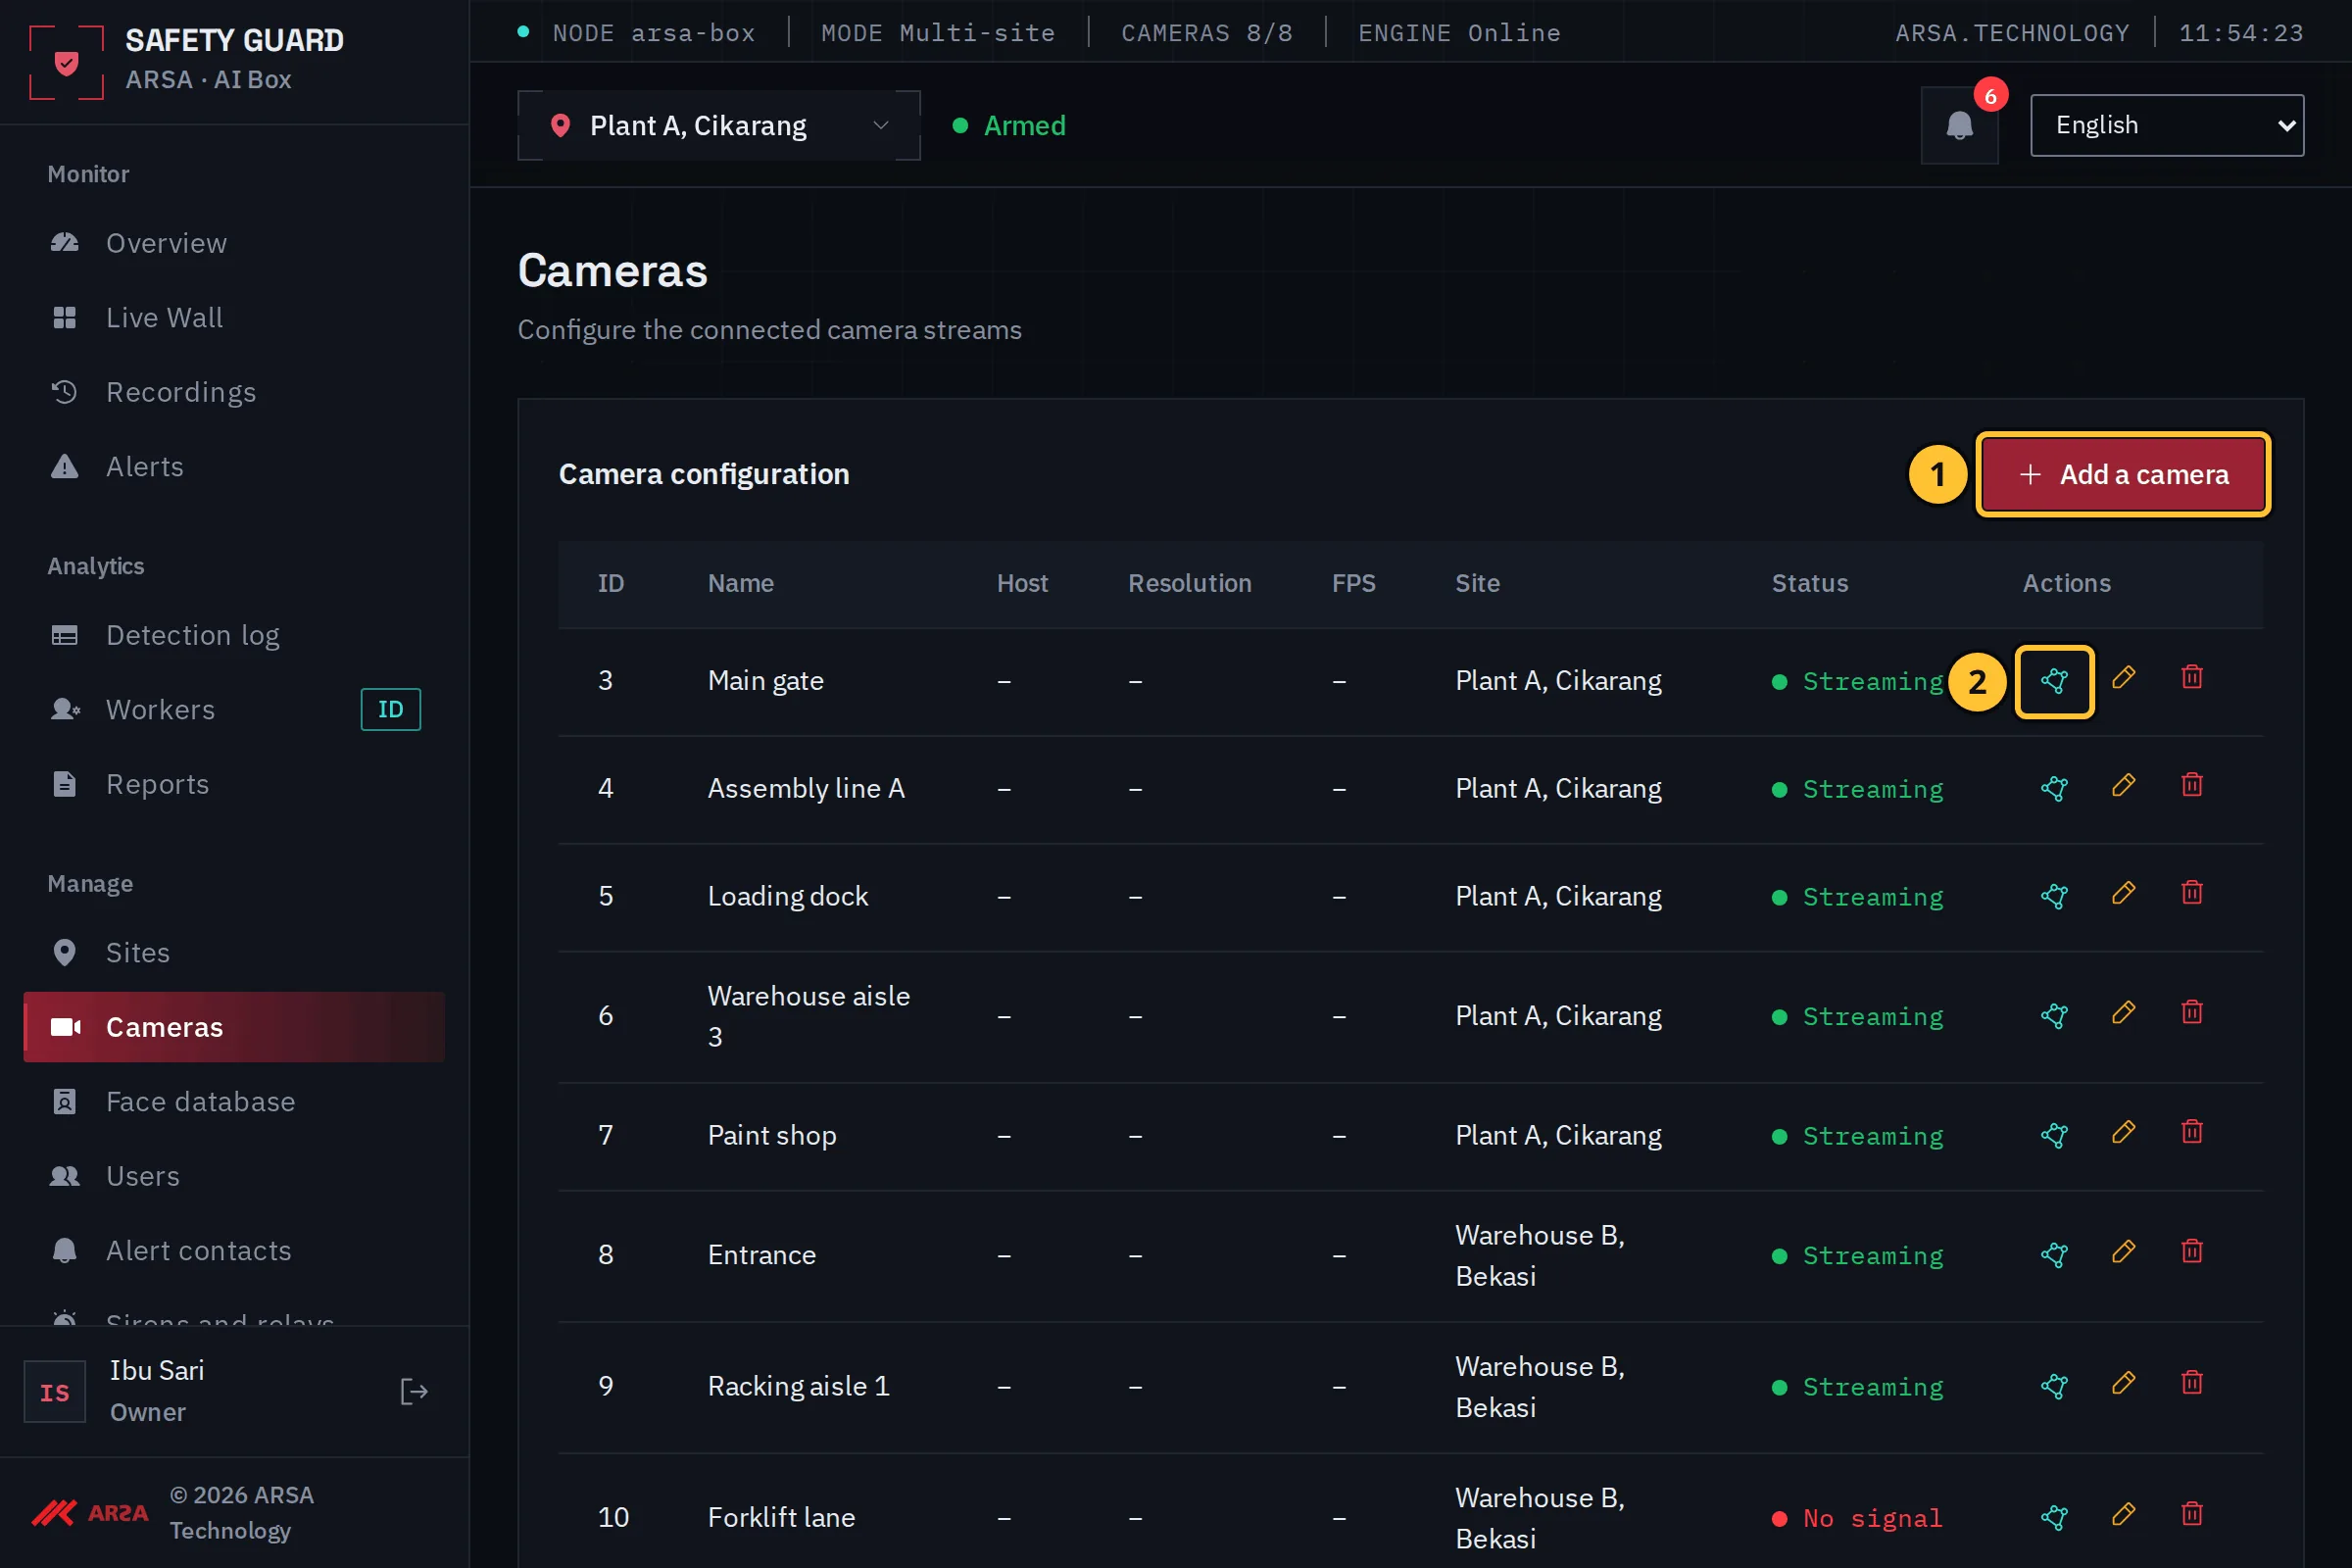
- In the menu, under Manage, open Cameras and select Add a camera.
- To change what is drawn on a camera that is already added, select its Lines and zones button: the same flow opens at step 3.
Step 1: Connect
You connect a camera either by typing its stream address (RTSP) or by finding it on the network (ONVIF).
By Its RTSP Address
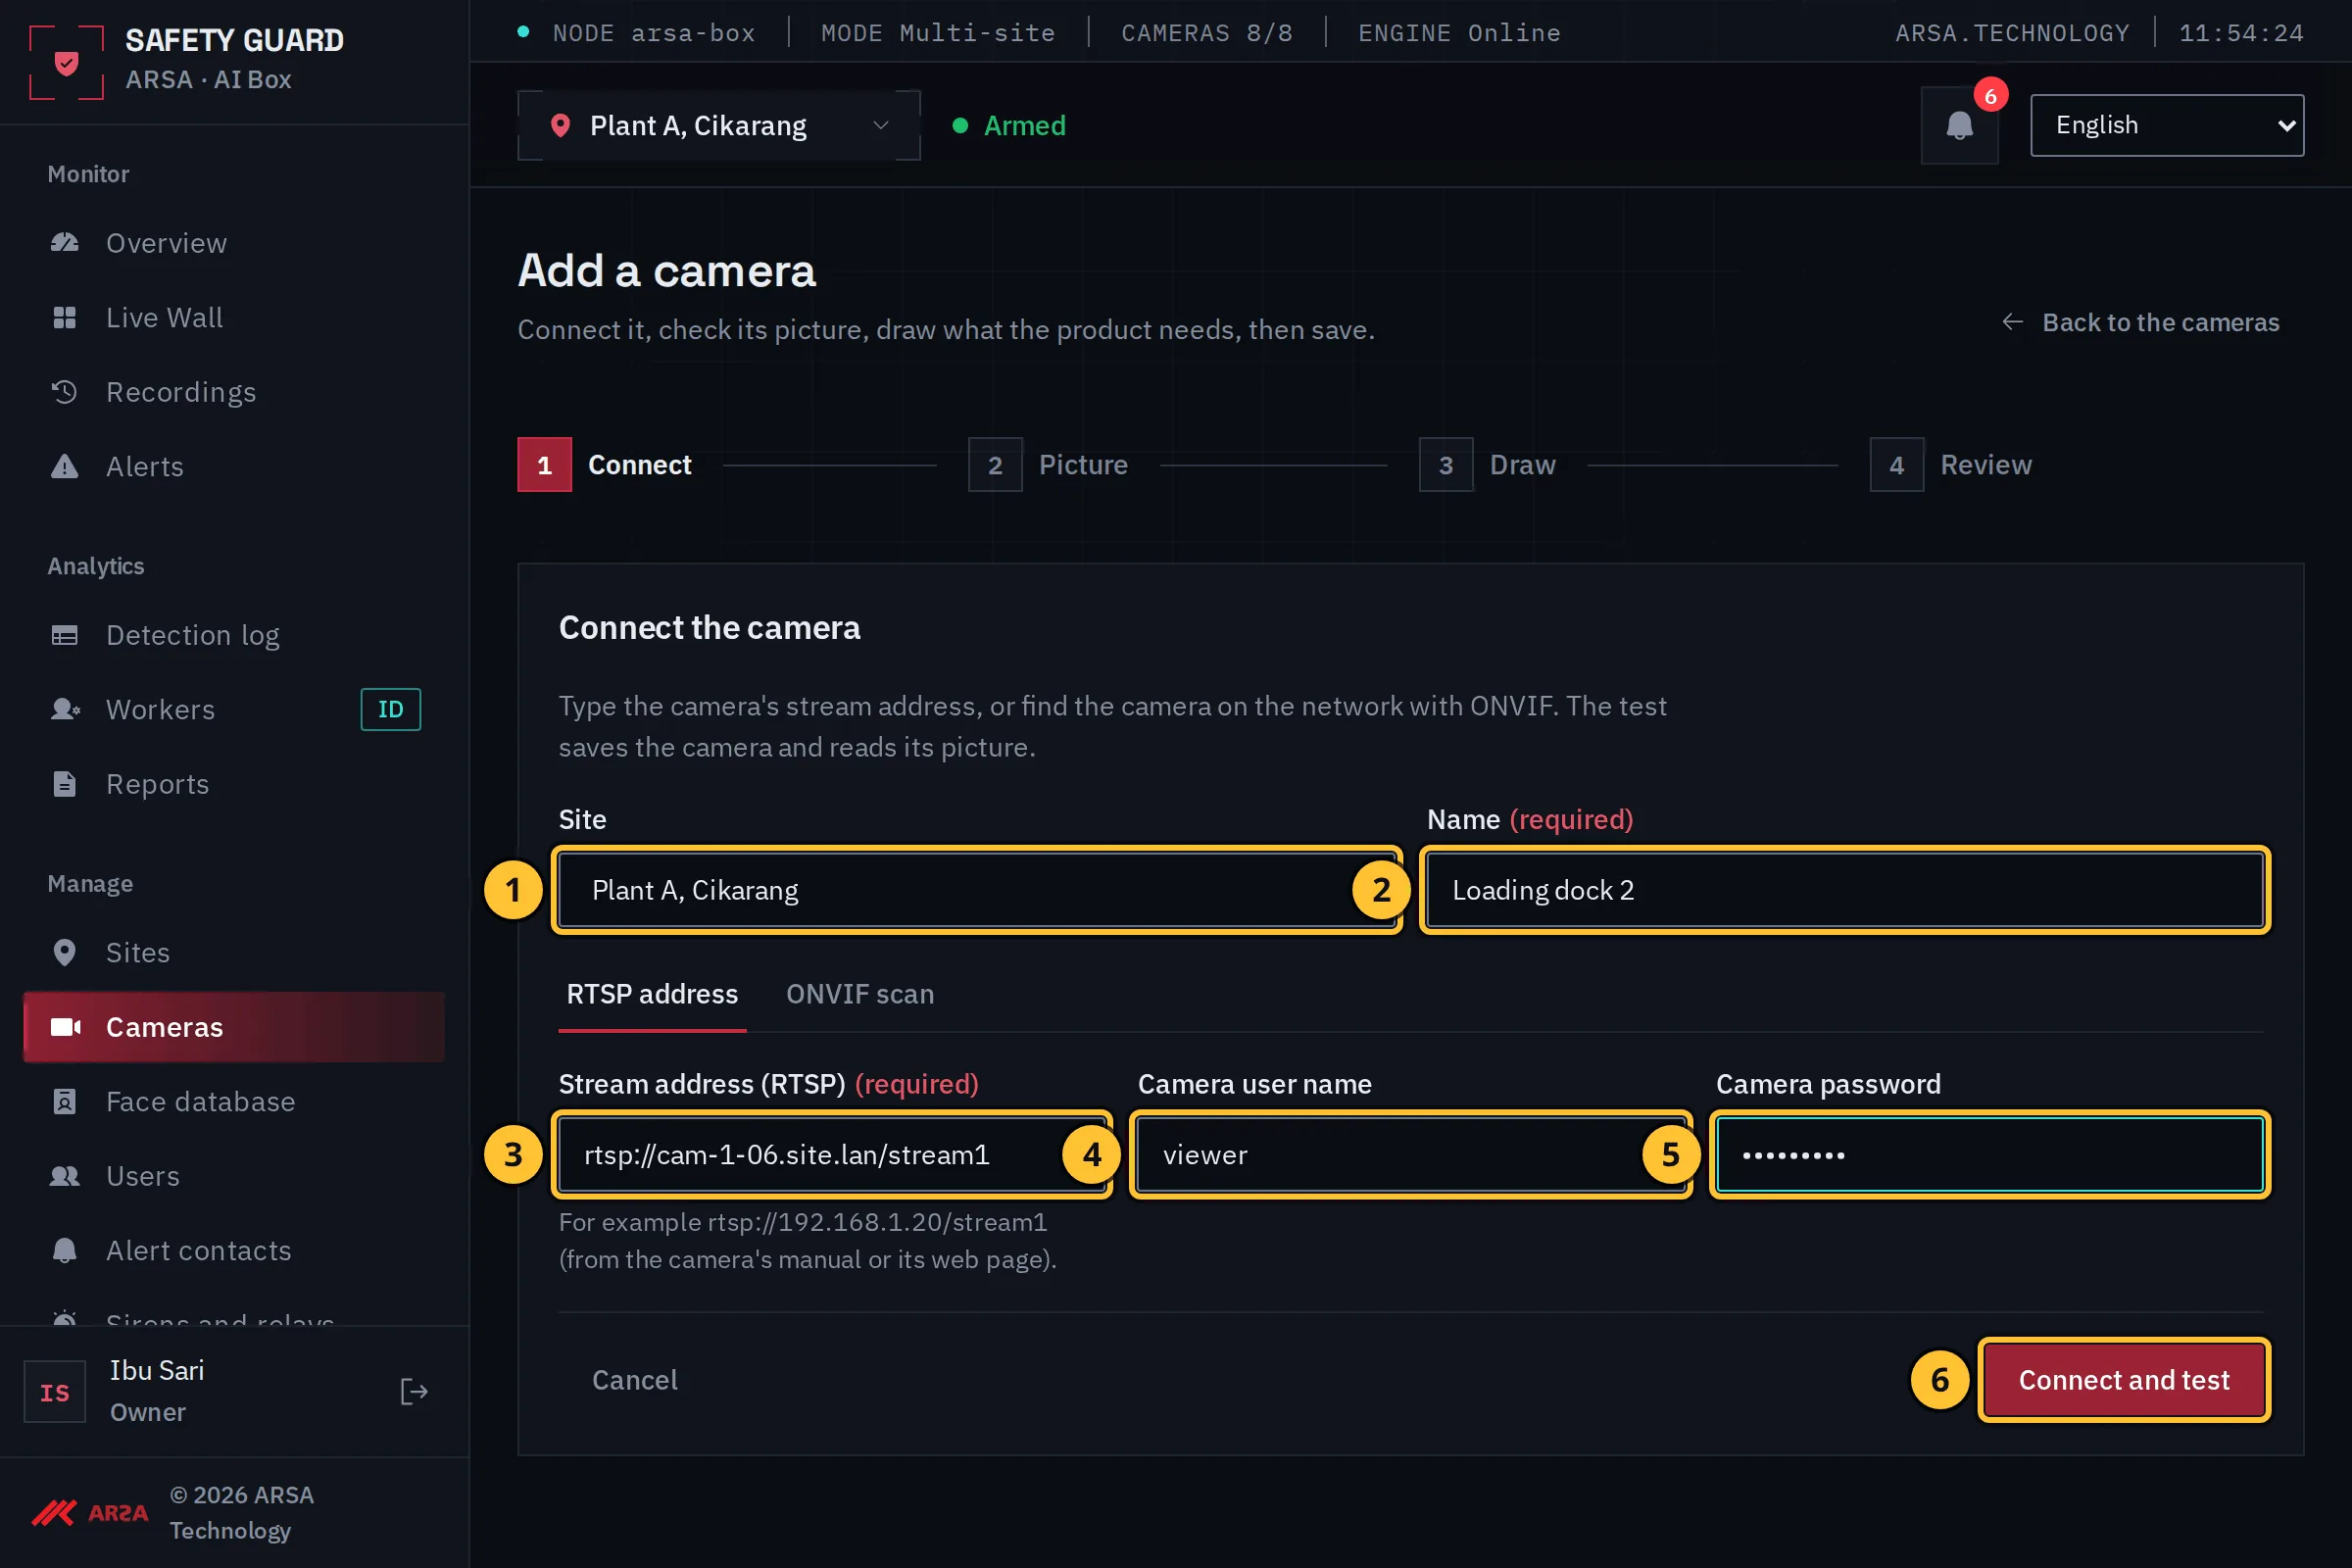
- Choose the site the camera belongs to.
- Give the camera a name people recognise, for example “Loading dock 2”. Alerts and reports use it.
- Type the stream address, for example
rtsp://<CAMERA_HOST>/stream1. The camera’s manual or its web page gives it. - Type the camera’s user name, if it has one.
- Type the camera’s password. The box stores it encrypted and never shows it again.
- Select Connect and test.
By An ONVIF Scan
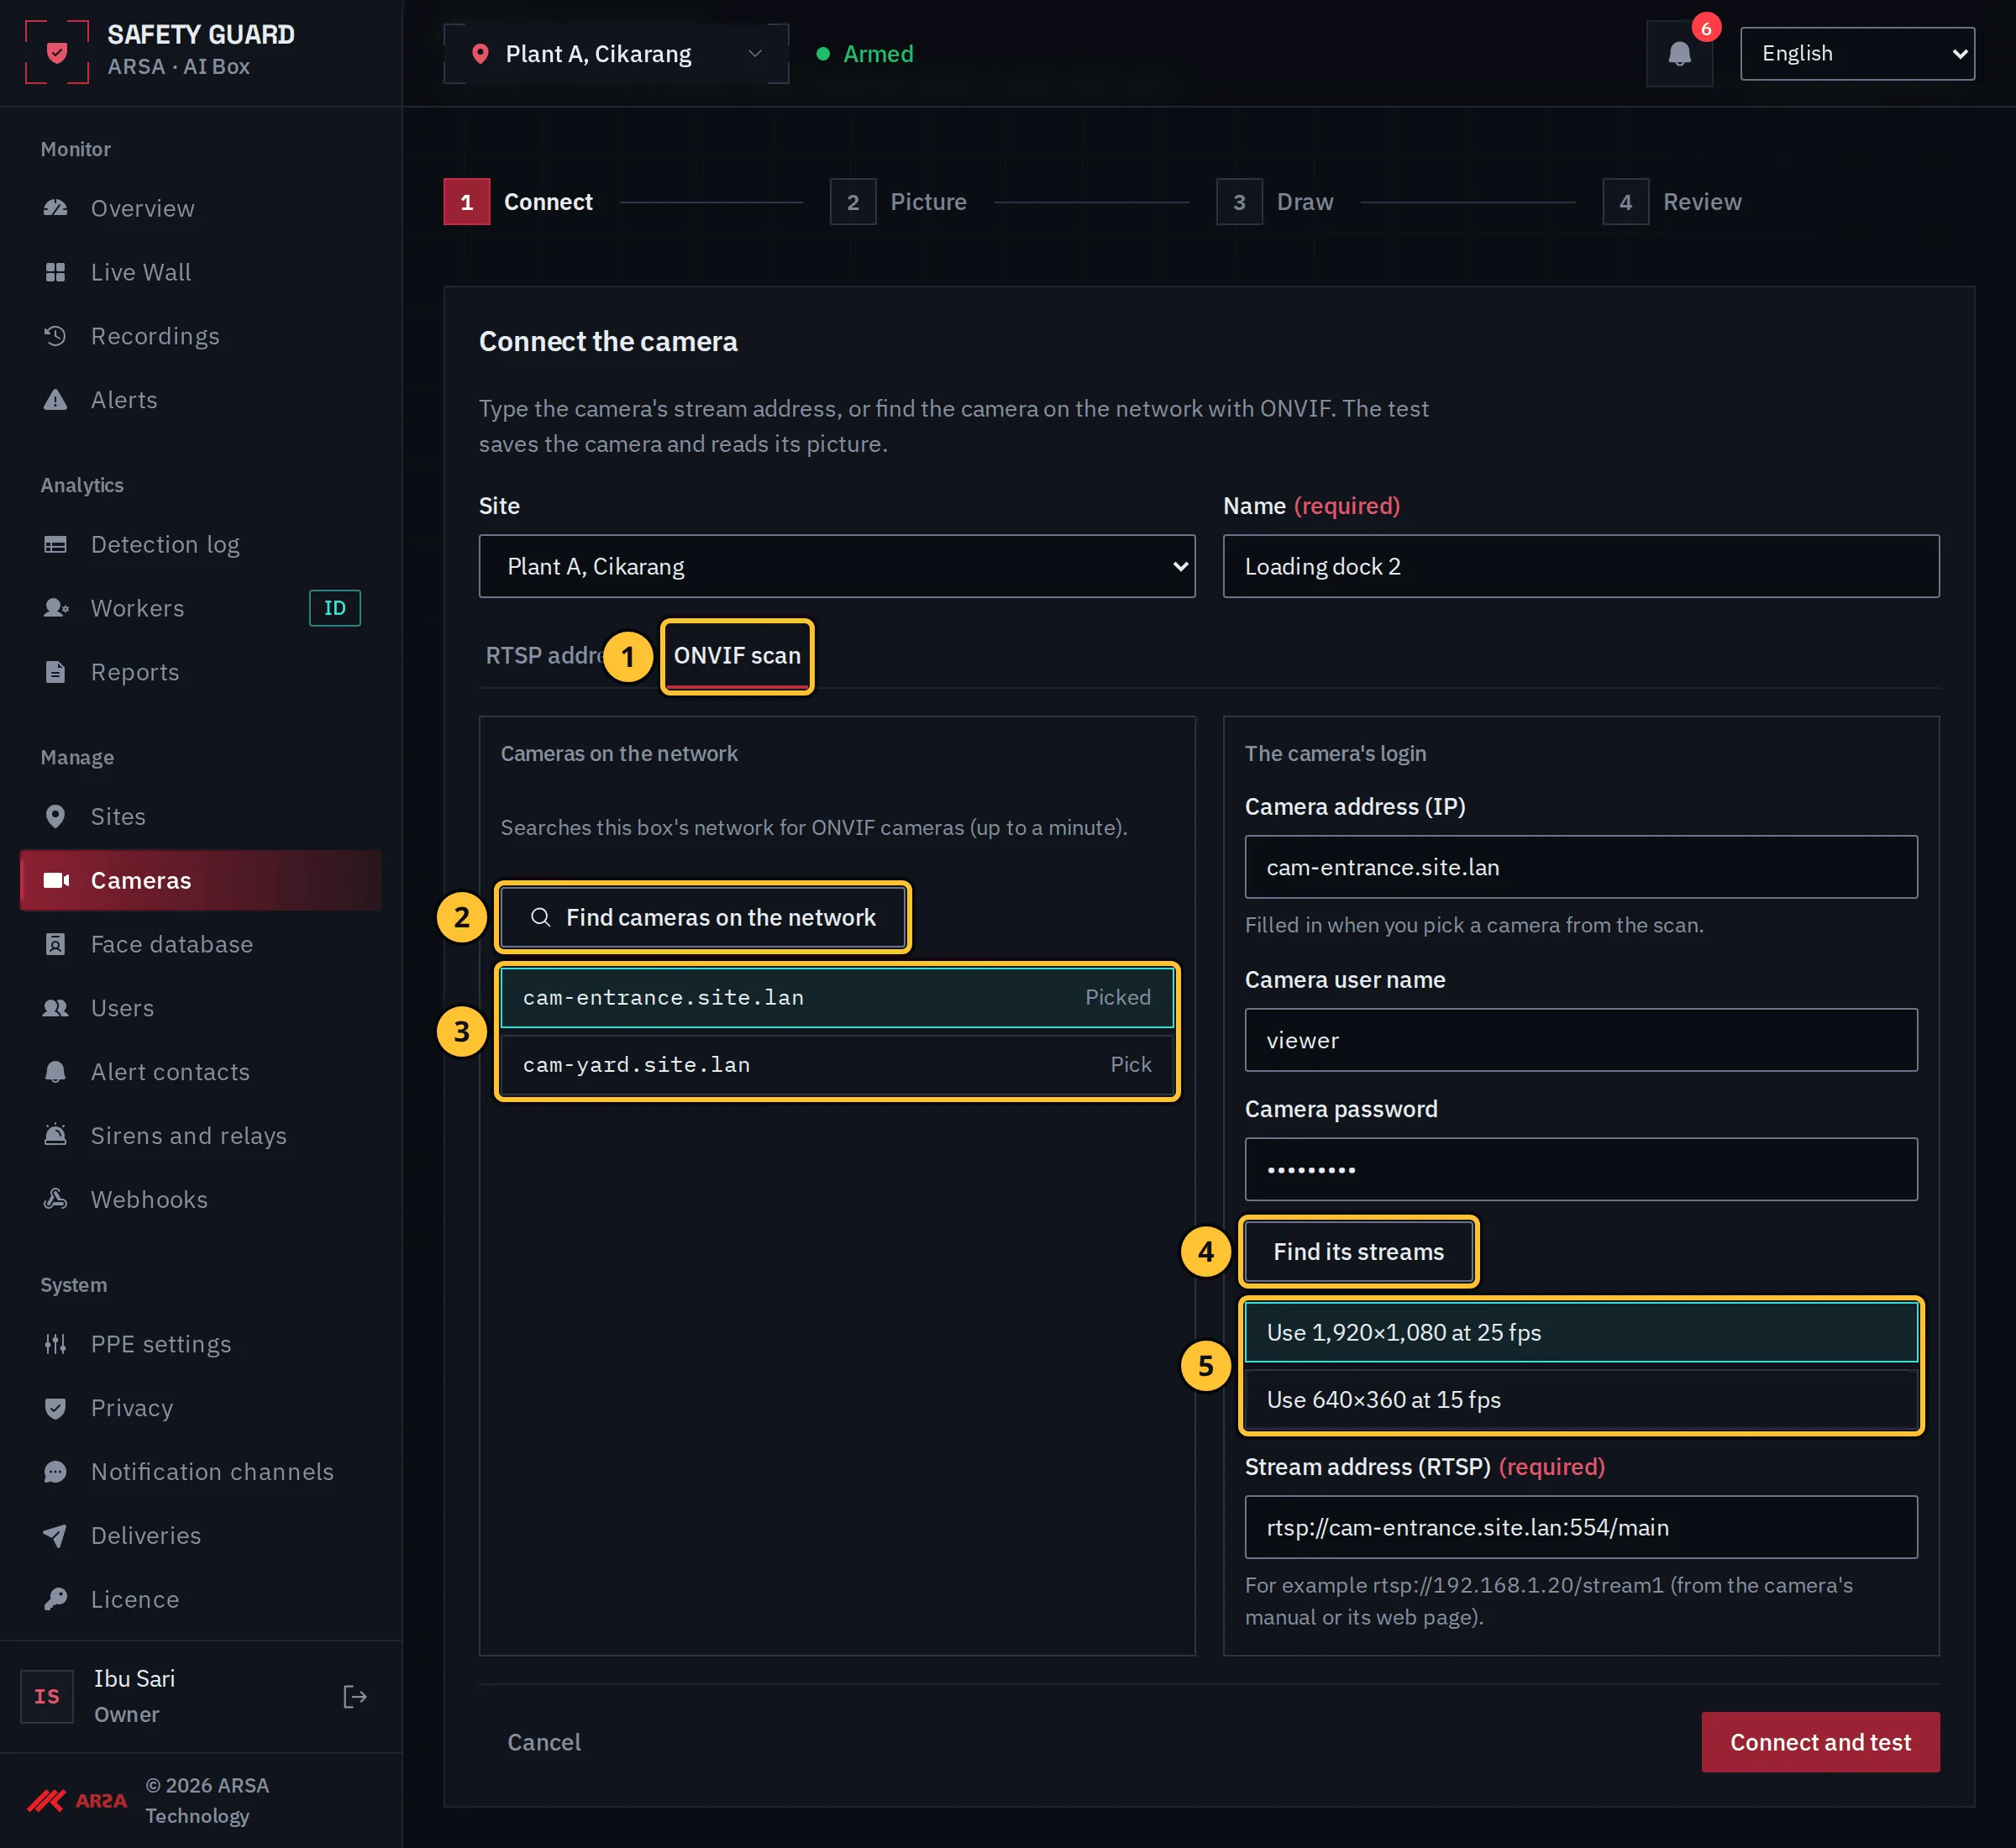
- Open the ONVIF scan tab.
- Select Find cameras on the network. The search takes up to a minute.
- Pick your camera from the cameras found, then type its user name and password on the right.
- Select Find its streams.
- Pick a stream. Each one shows its resolution and frame rate; the main stream gives the best picture. The stream address is filled in for you. Then select Connect and test.
The Live Test
The test saves the camera, starts its stream and reads its picture.
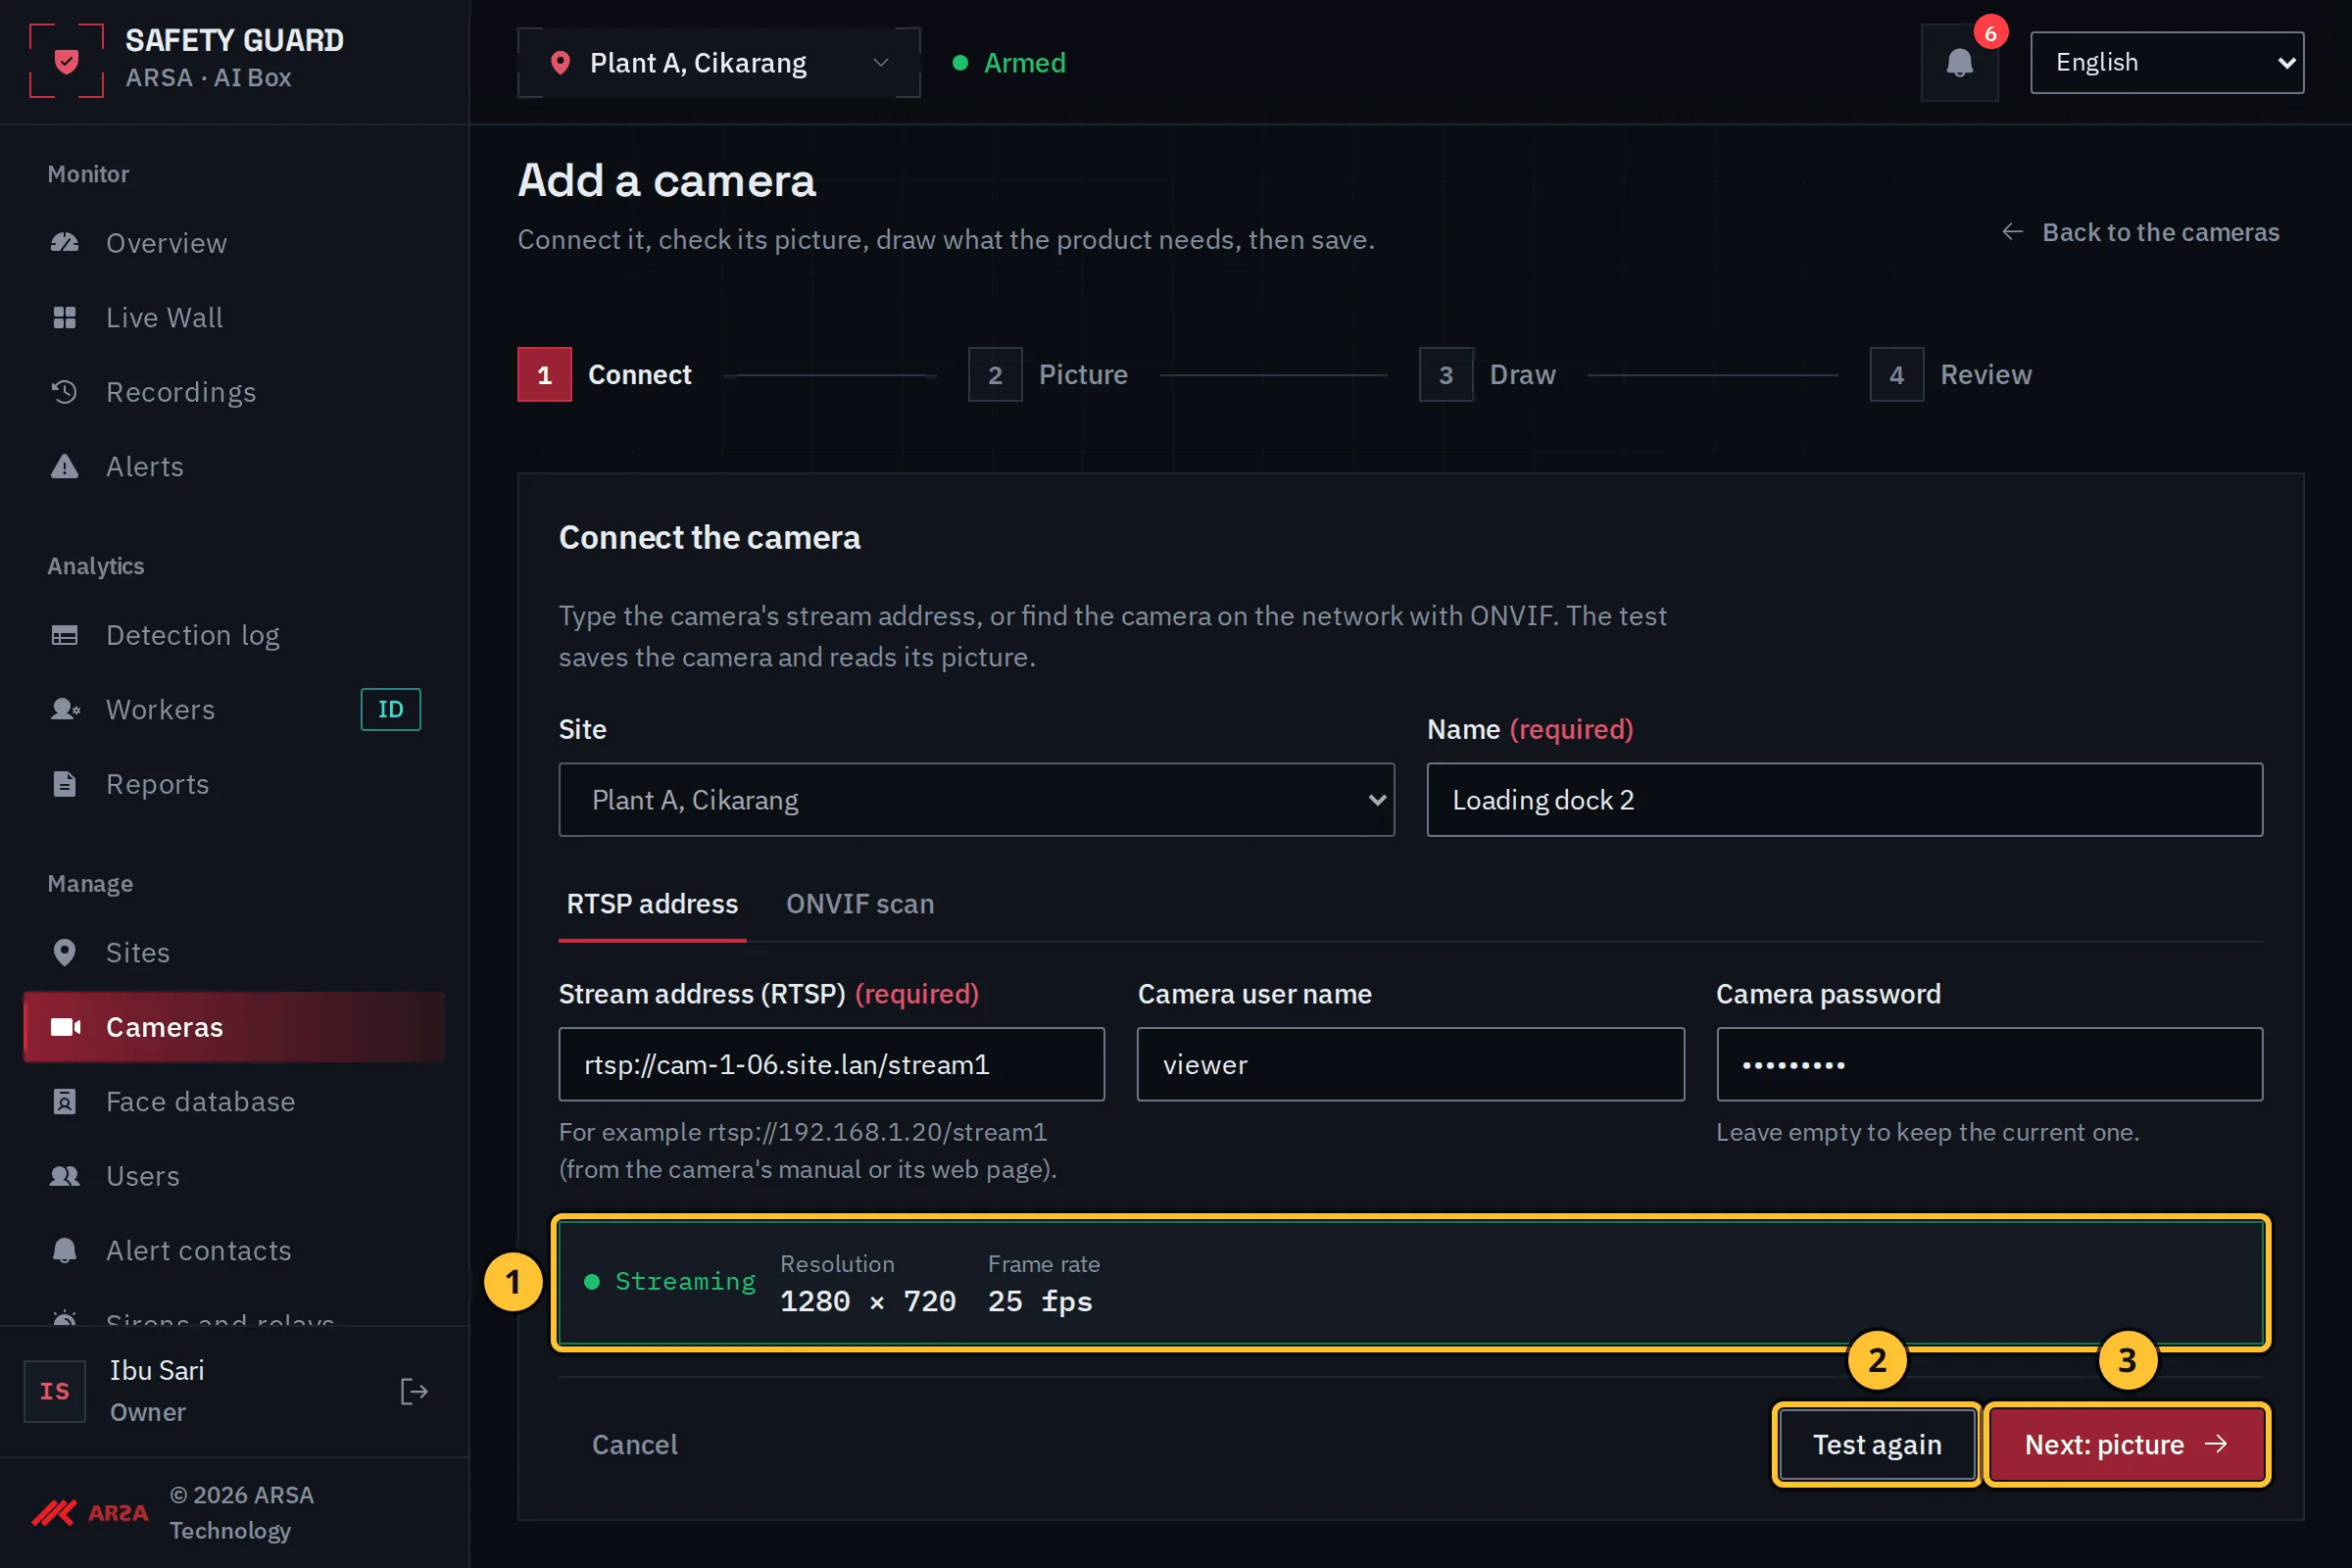
- Streaming means the box receives the camera’s video. The result shows the resolution and the frame rate it measured.
- After a change to the address, user name or password, select Test again.
- Select Next: picture.
If the test shows No picture from this camera, check the address, the user name and the password, and that the camera is on the box’s network.
Step 2: Check The Picture
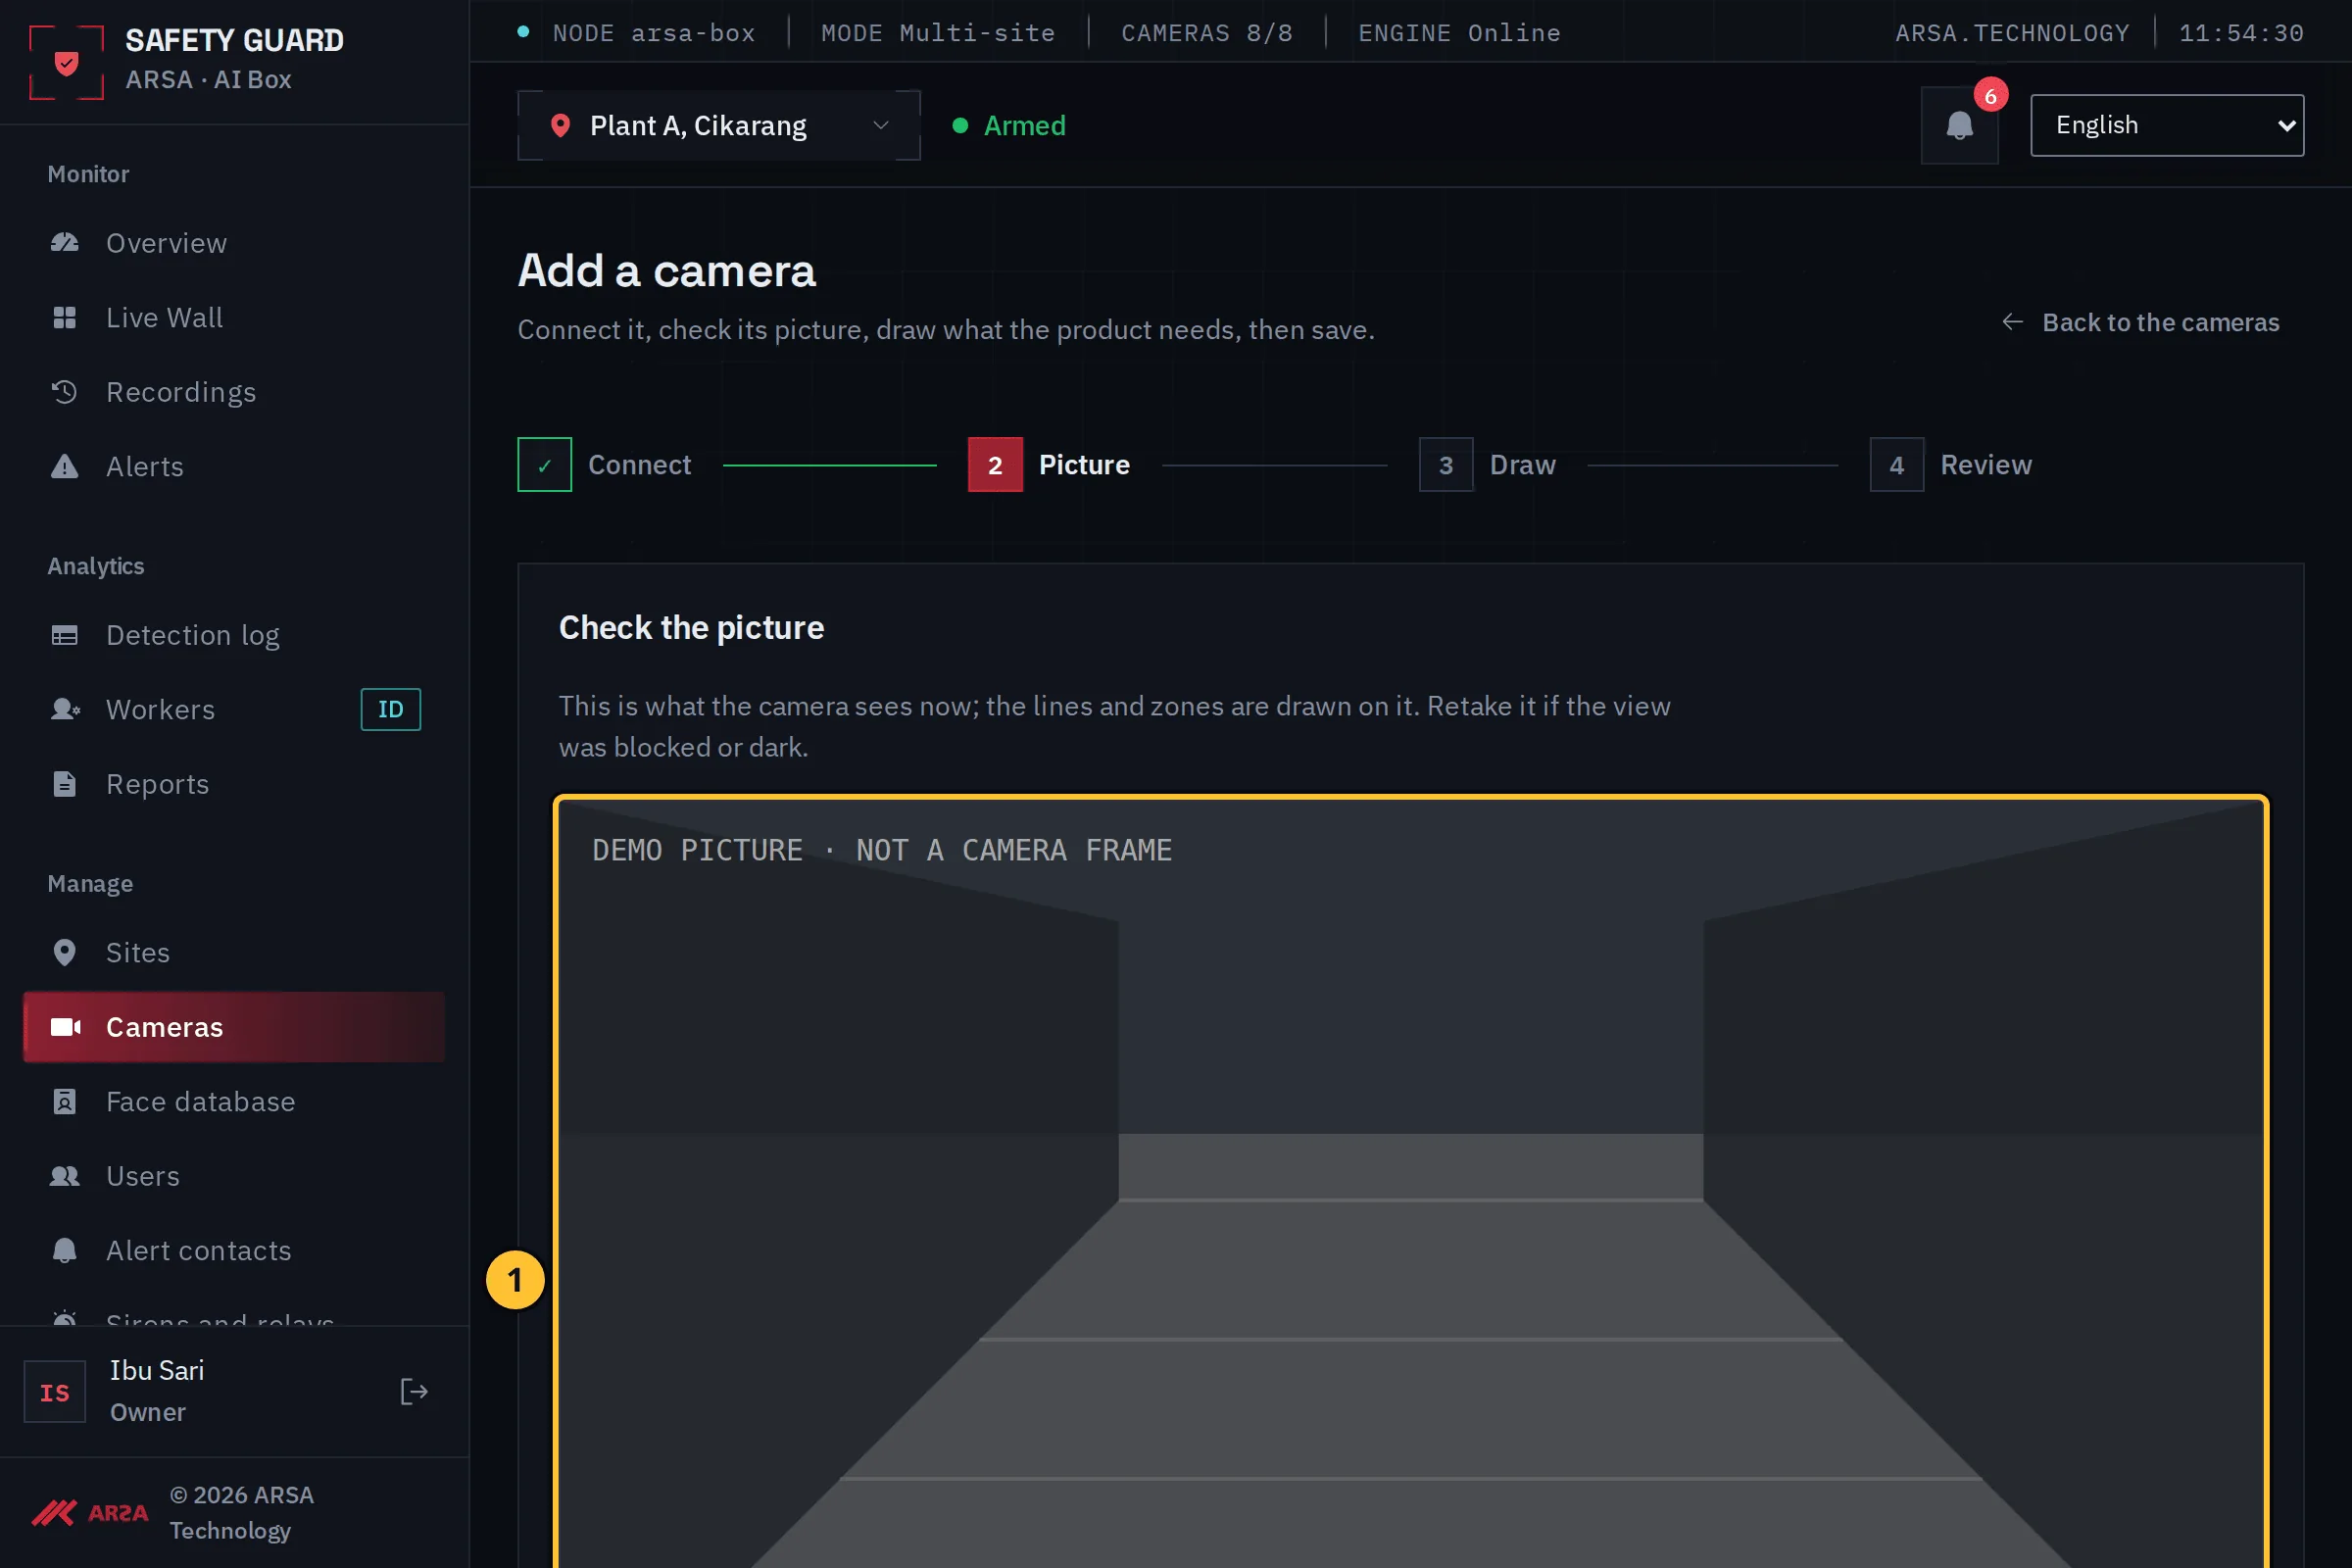
- This is what the camera sees now. The lines and zones are drawn on this picture.
- If the view was blocked or dark, select Retake the picture.
- Select Next: draw.
Step 3: Draw The Lines And Zones
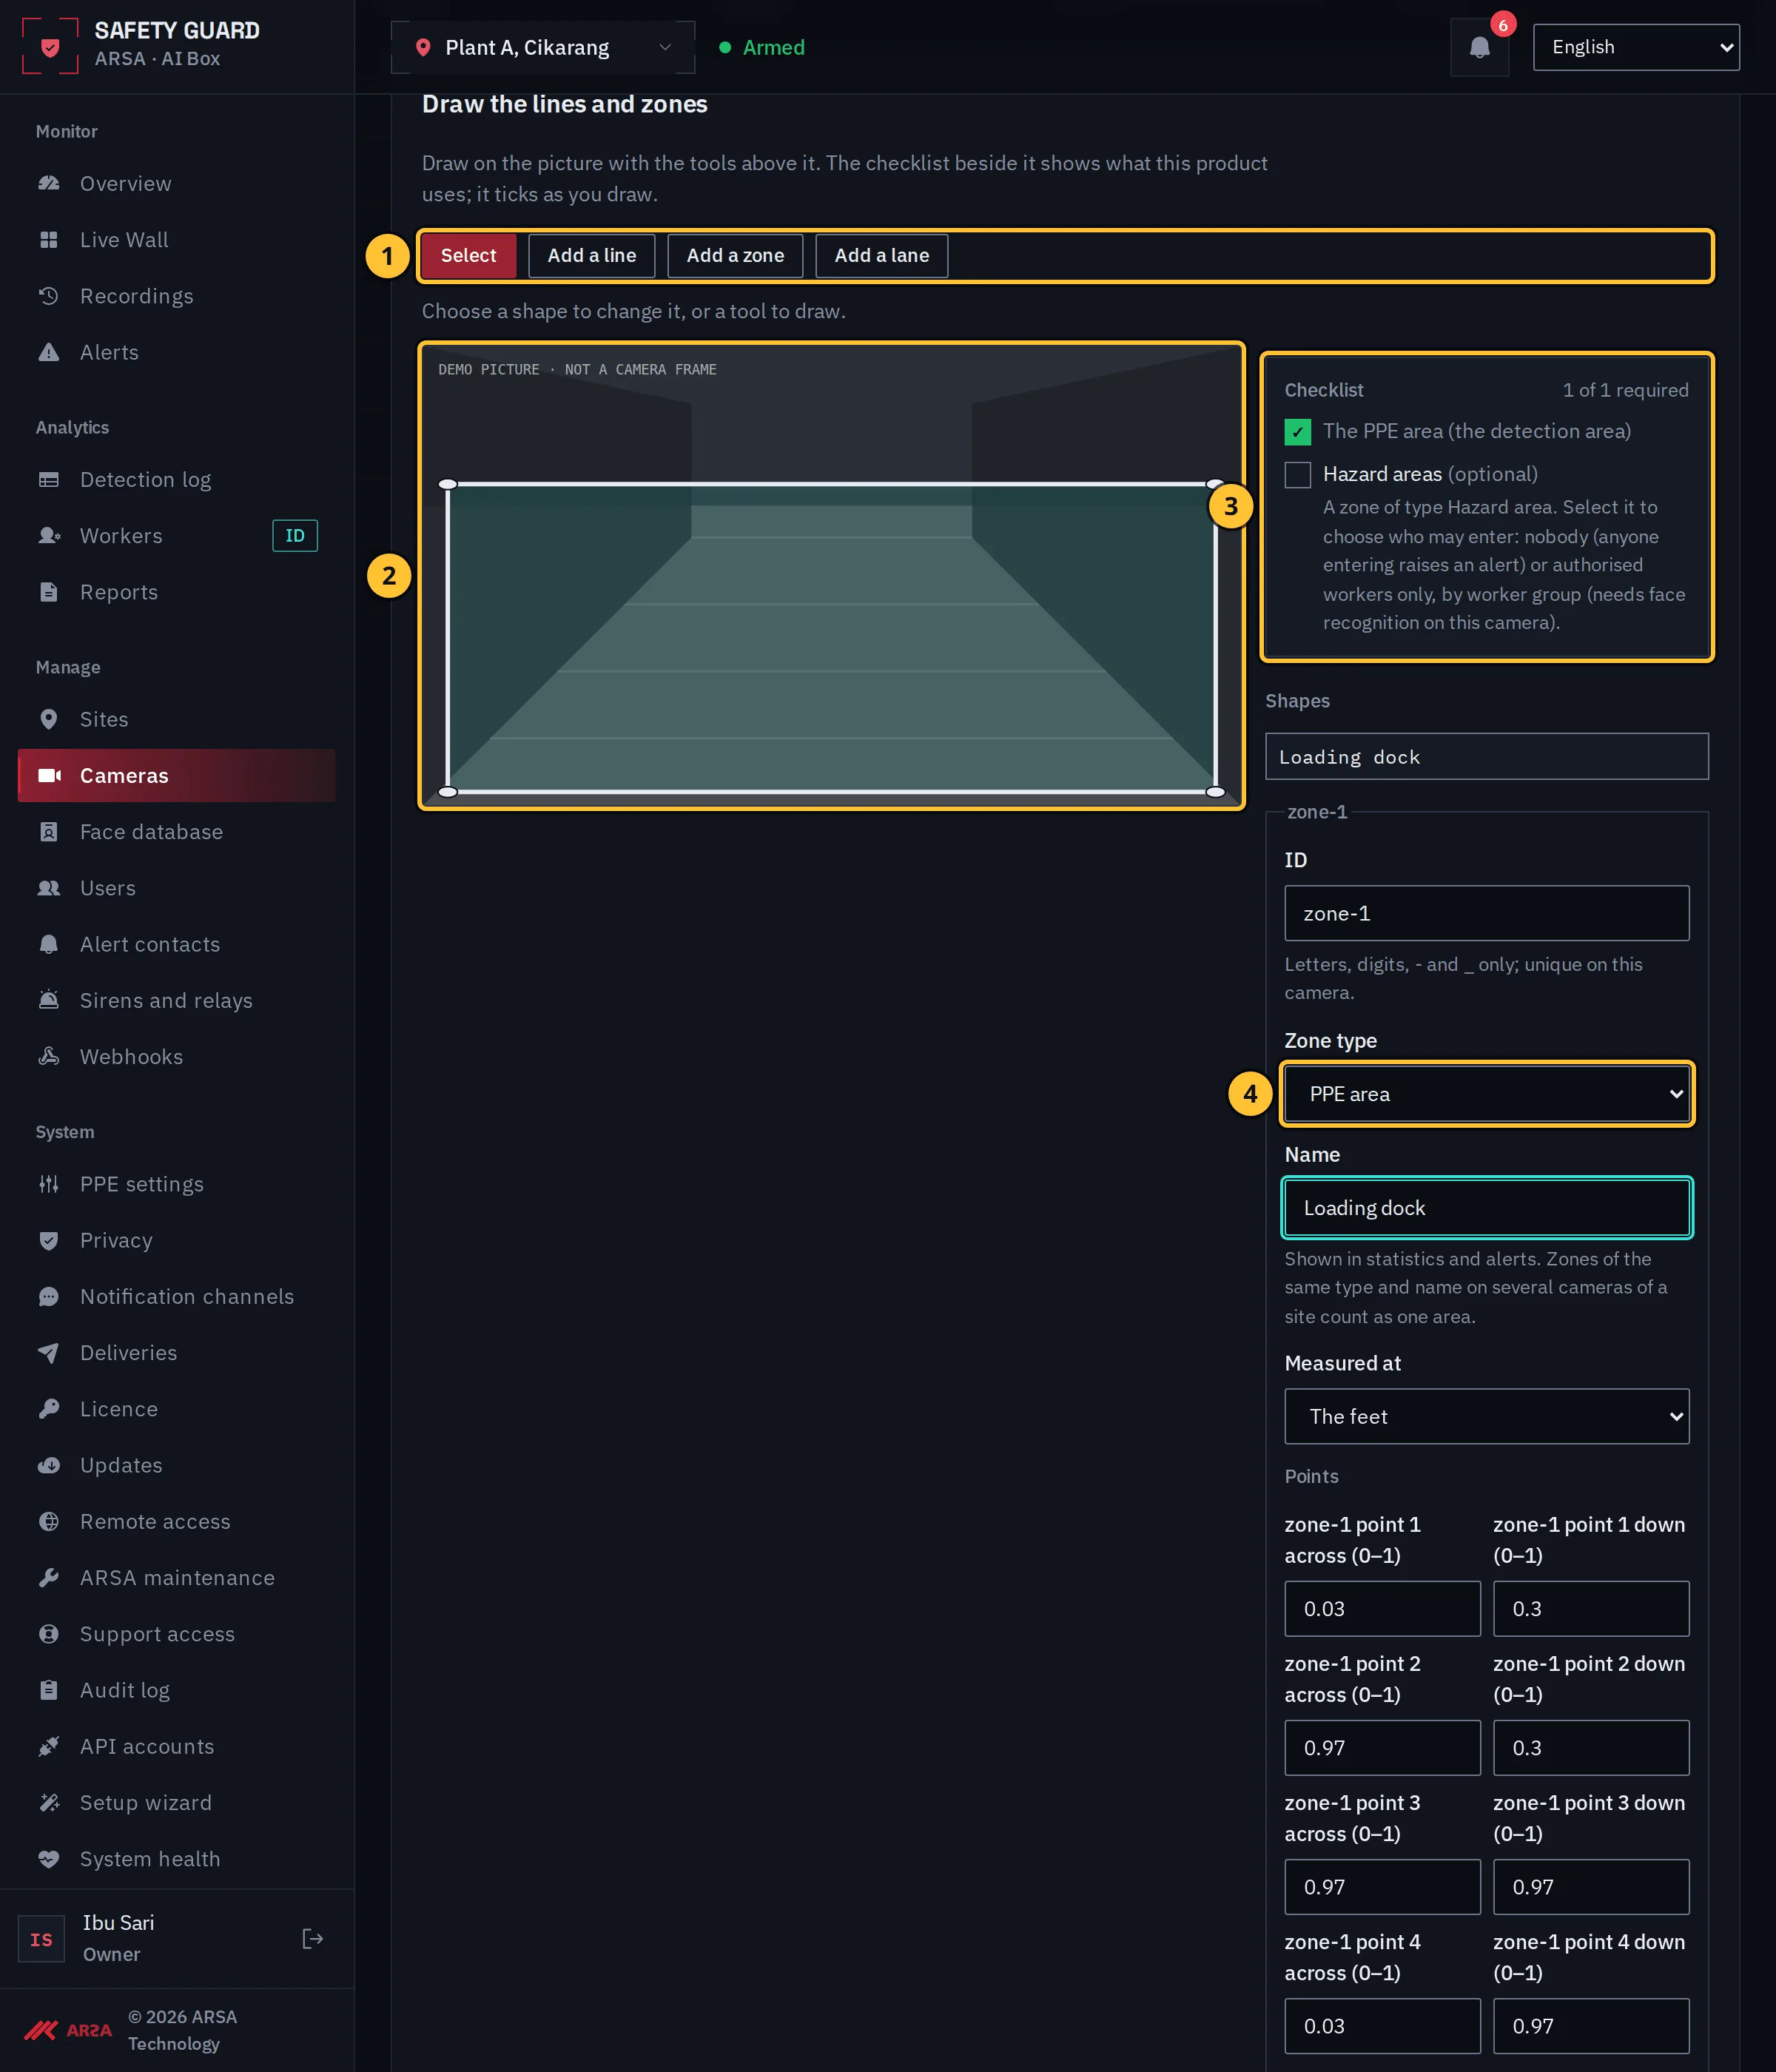
- The drawing tools: Add a line, Add a zone and, where the product uses them, Add a lane and Add speed lines. Select lets you choose a shape to change it.
- Click on the picture to place the points. A zone is closed with Finish the shape.
- The checklist shows what this product needs and ticks each item as you draw it. Optional items are marked.
- The selected shape’s settings appear beside the picture: here the zone type, its name and where a person is measured (the feet or the centre).
To remove a shape, select it and choose Remove this shape.
Step 4: Review And Save
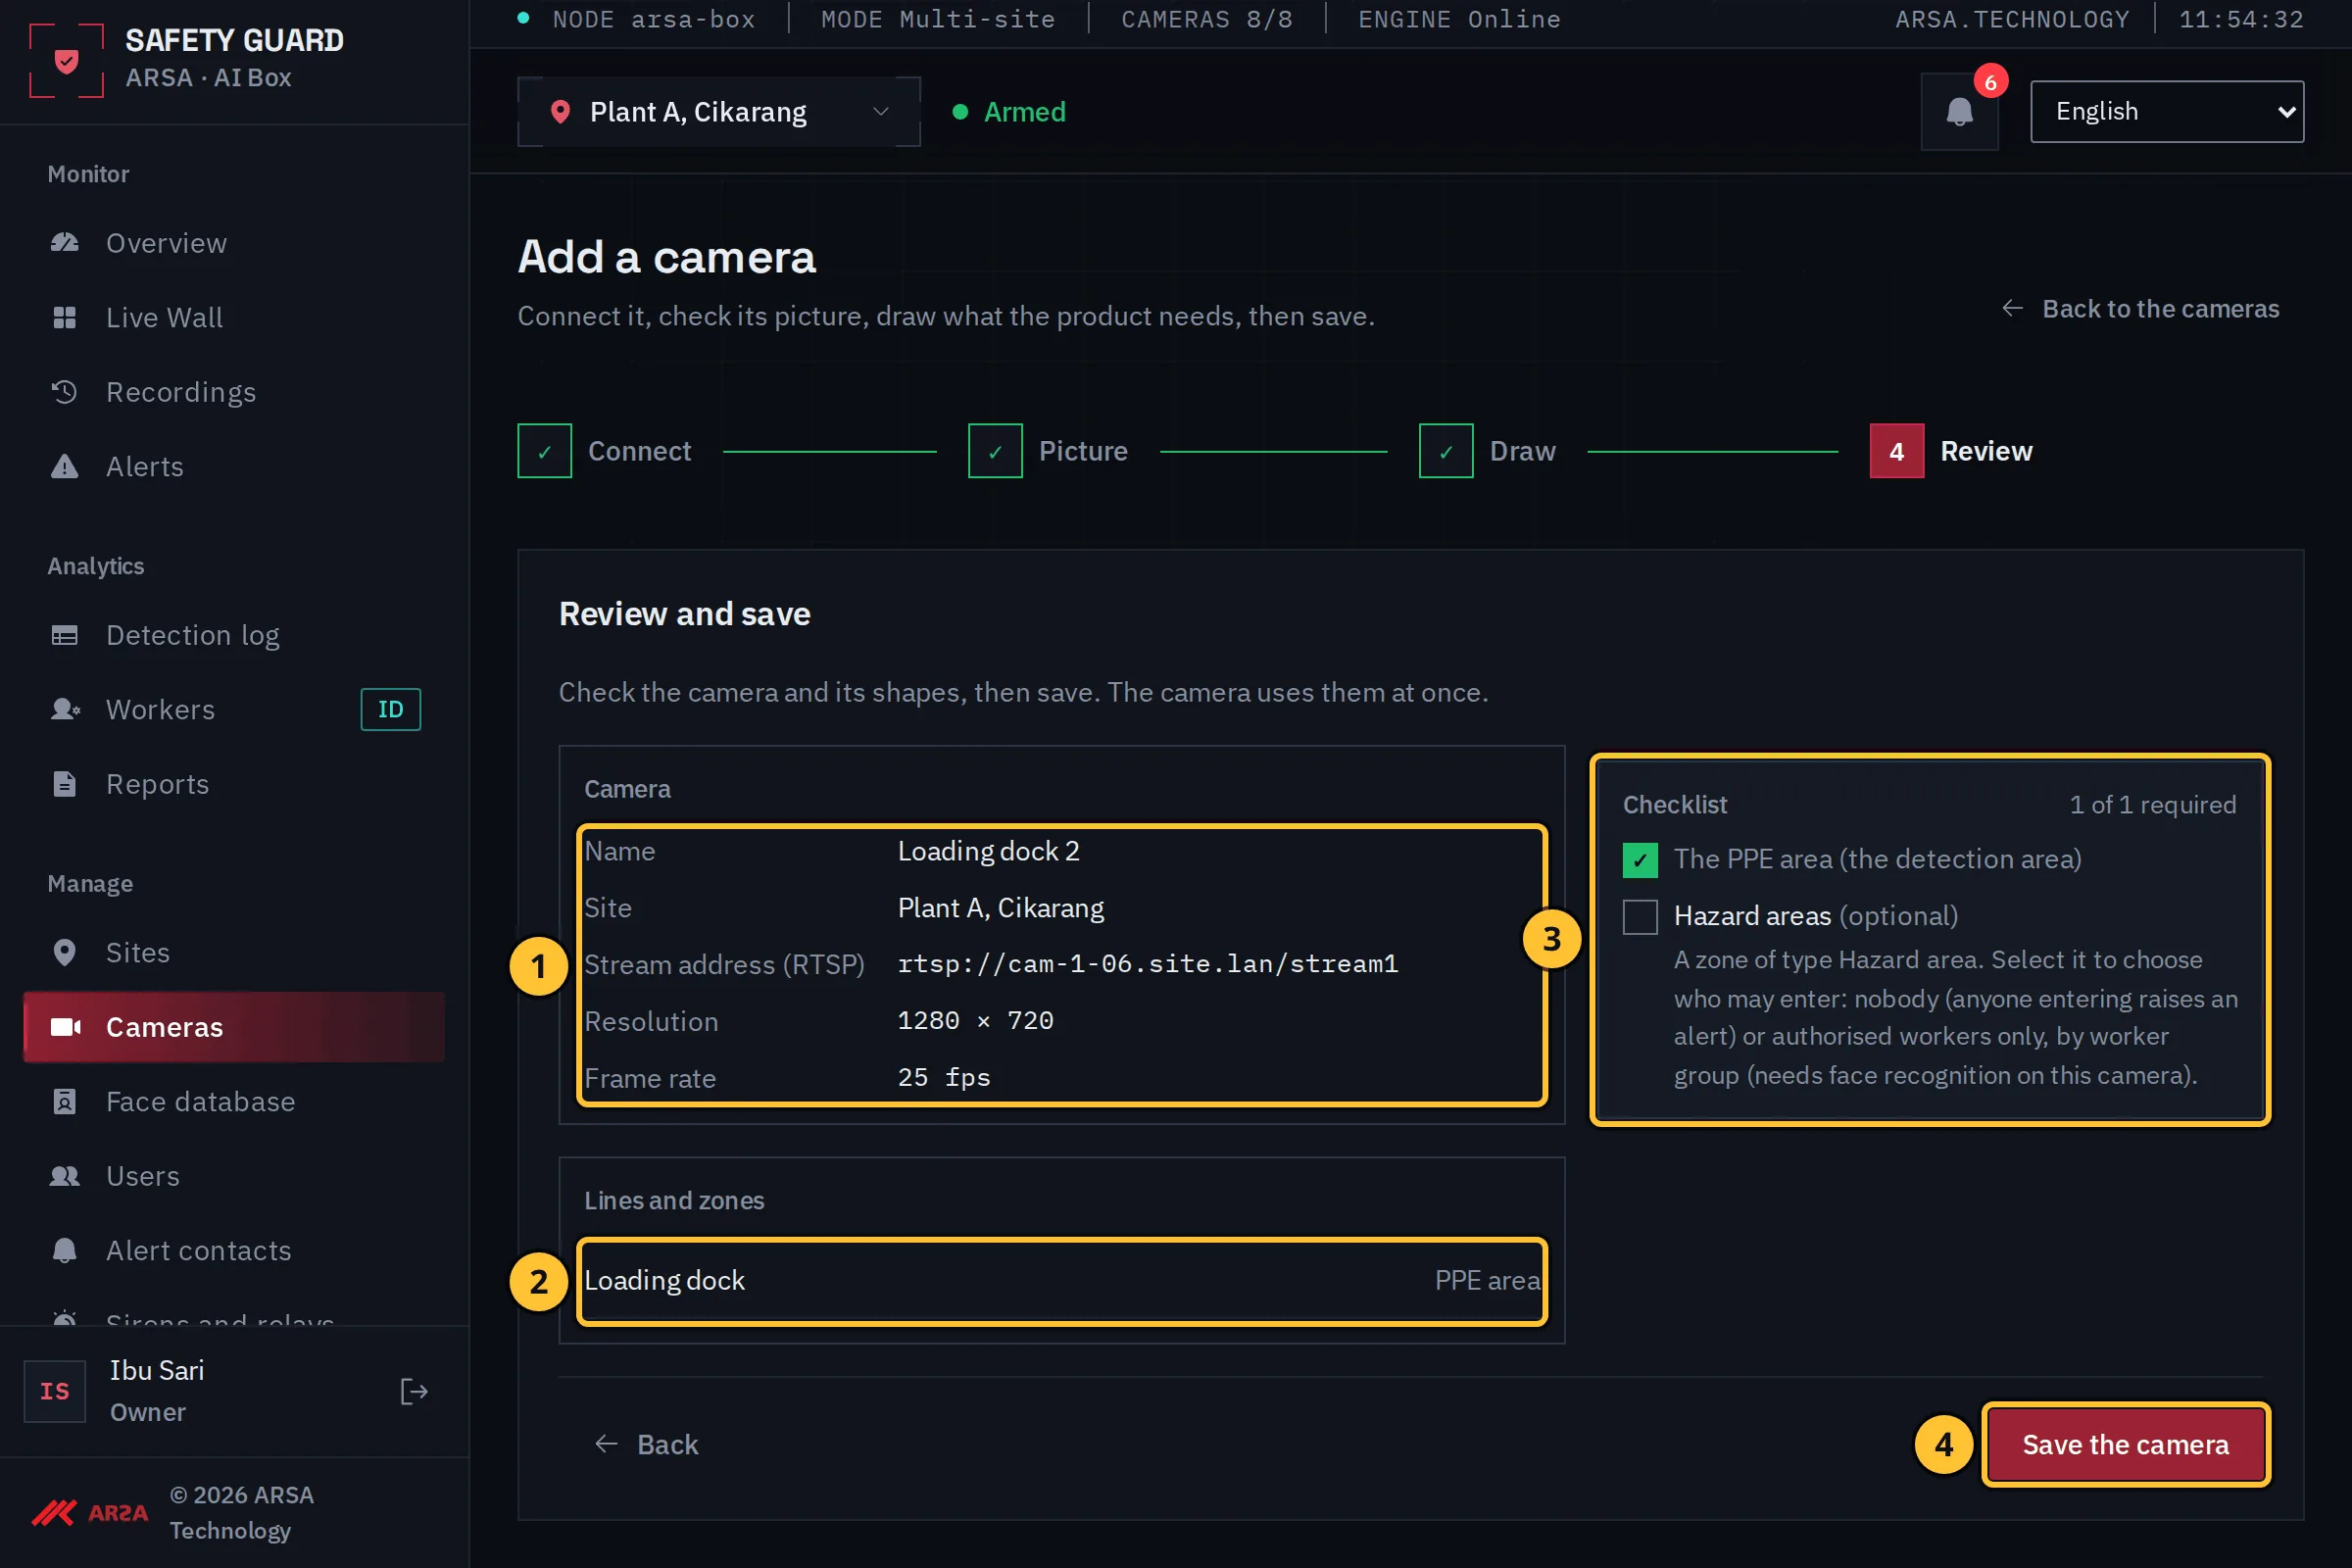
- The camera’s summary: name, site, stream address (without the password), resolution and frame rate.
- The shapes you drew, with their types.
- The checklist again.
- Select Save the camera. The camera uses the new lines and zones at once.
If a required shape is missing, the box names it before saving. Select Back to drawing to add it, or Save anyway: the camera works, but nothing is counted or alerted on for what is missing.
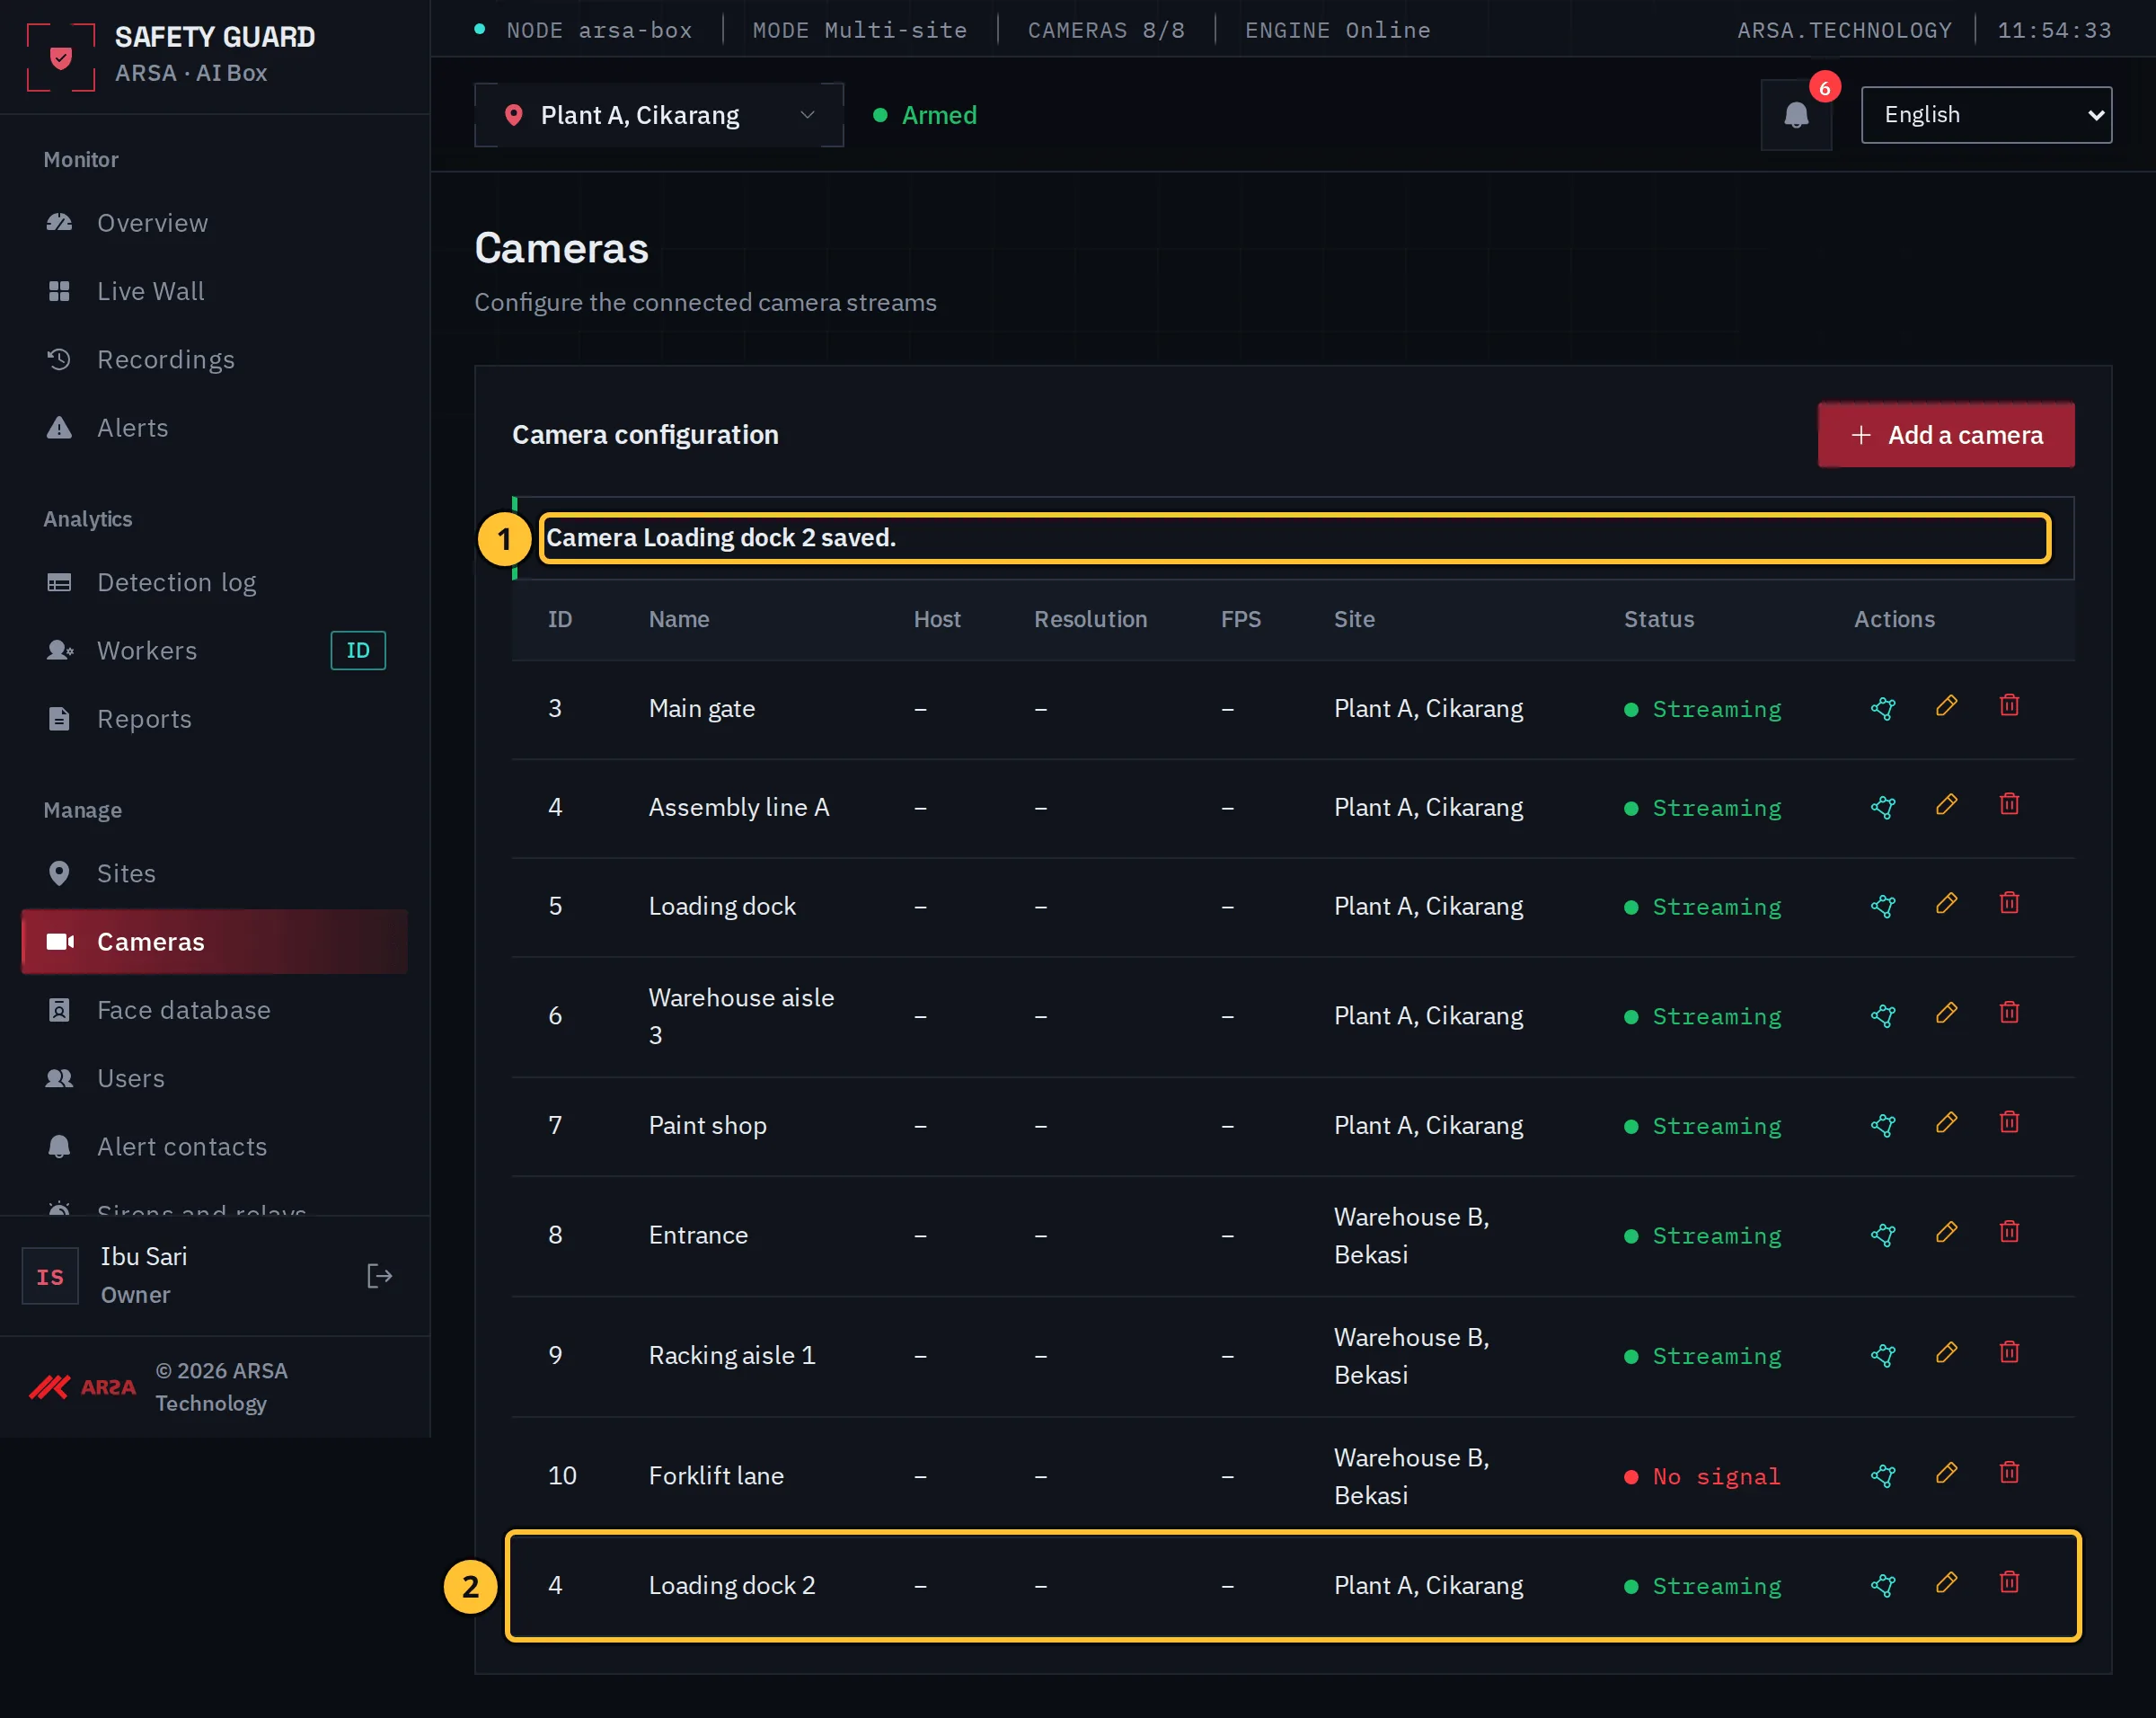
Demo data.
- The message confirms the save.
- The camera is listed with its site and its state.
Watch The Flow
Transcript of the add a camera clip
Transcript of the clip “Add a Camera” (silent, about 30 seconds, demo data).
- On the Cameras page the admin selects Add a camera.
- In step 1, Connect, the admin types the camera’s name, “Loading dock 2”, its stream address, its user name and its password, then selects Connect and test.
- The live test shows Streaming, with the resolution and the frame rate. The admin selects Next: picture.
- Step 2 shows the camera’s current picture. The admin selects Next: draw.
- In step 3 the admin selects Add a zone, clicks four corners on the picture, selects Finish the shape, sets the zone type to PPE area and names it “Loading dock”. The checklist ticks the PPE area.
- In step 4, Review, the summary lists the camera and its zone. The admin selects Save the camera.
- The Cameras page shows “Camera Loading dock 2 saved.” and the new camera in the list.
1.0.0. Updated 2026-11-06