
Docs / AI Box And Video Analytics Software / Users And Notifications
Users And Notifications
Give each person their own dashboard account and role per site, set up the e-mail, WhatsApp and Telegram channels, and choose who is told about alerts.
Everyone who uses the dashboard has their own account, with a role on each site. Alerts reach people as alert contacts through the notification channels you set up: e-mail, WhatsApp and Telegram. Users and channels are managed by the owner; a site’s admins manage its contacts.
Roles
| Role | What it allows |
|---|---|
| Owner | Every site, the users and the box’s settings |
| Admin of a site | The site’s cameras, drawings, contacts, sirens and settings |
| Viewer of a site | The site’s dashboards, alerts, logs and reports, without changing them |
A user with no role on a site does not see it. Owners and admins sign in with two-step sign-in.
Step 1: Open The Users Page
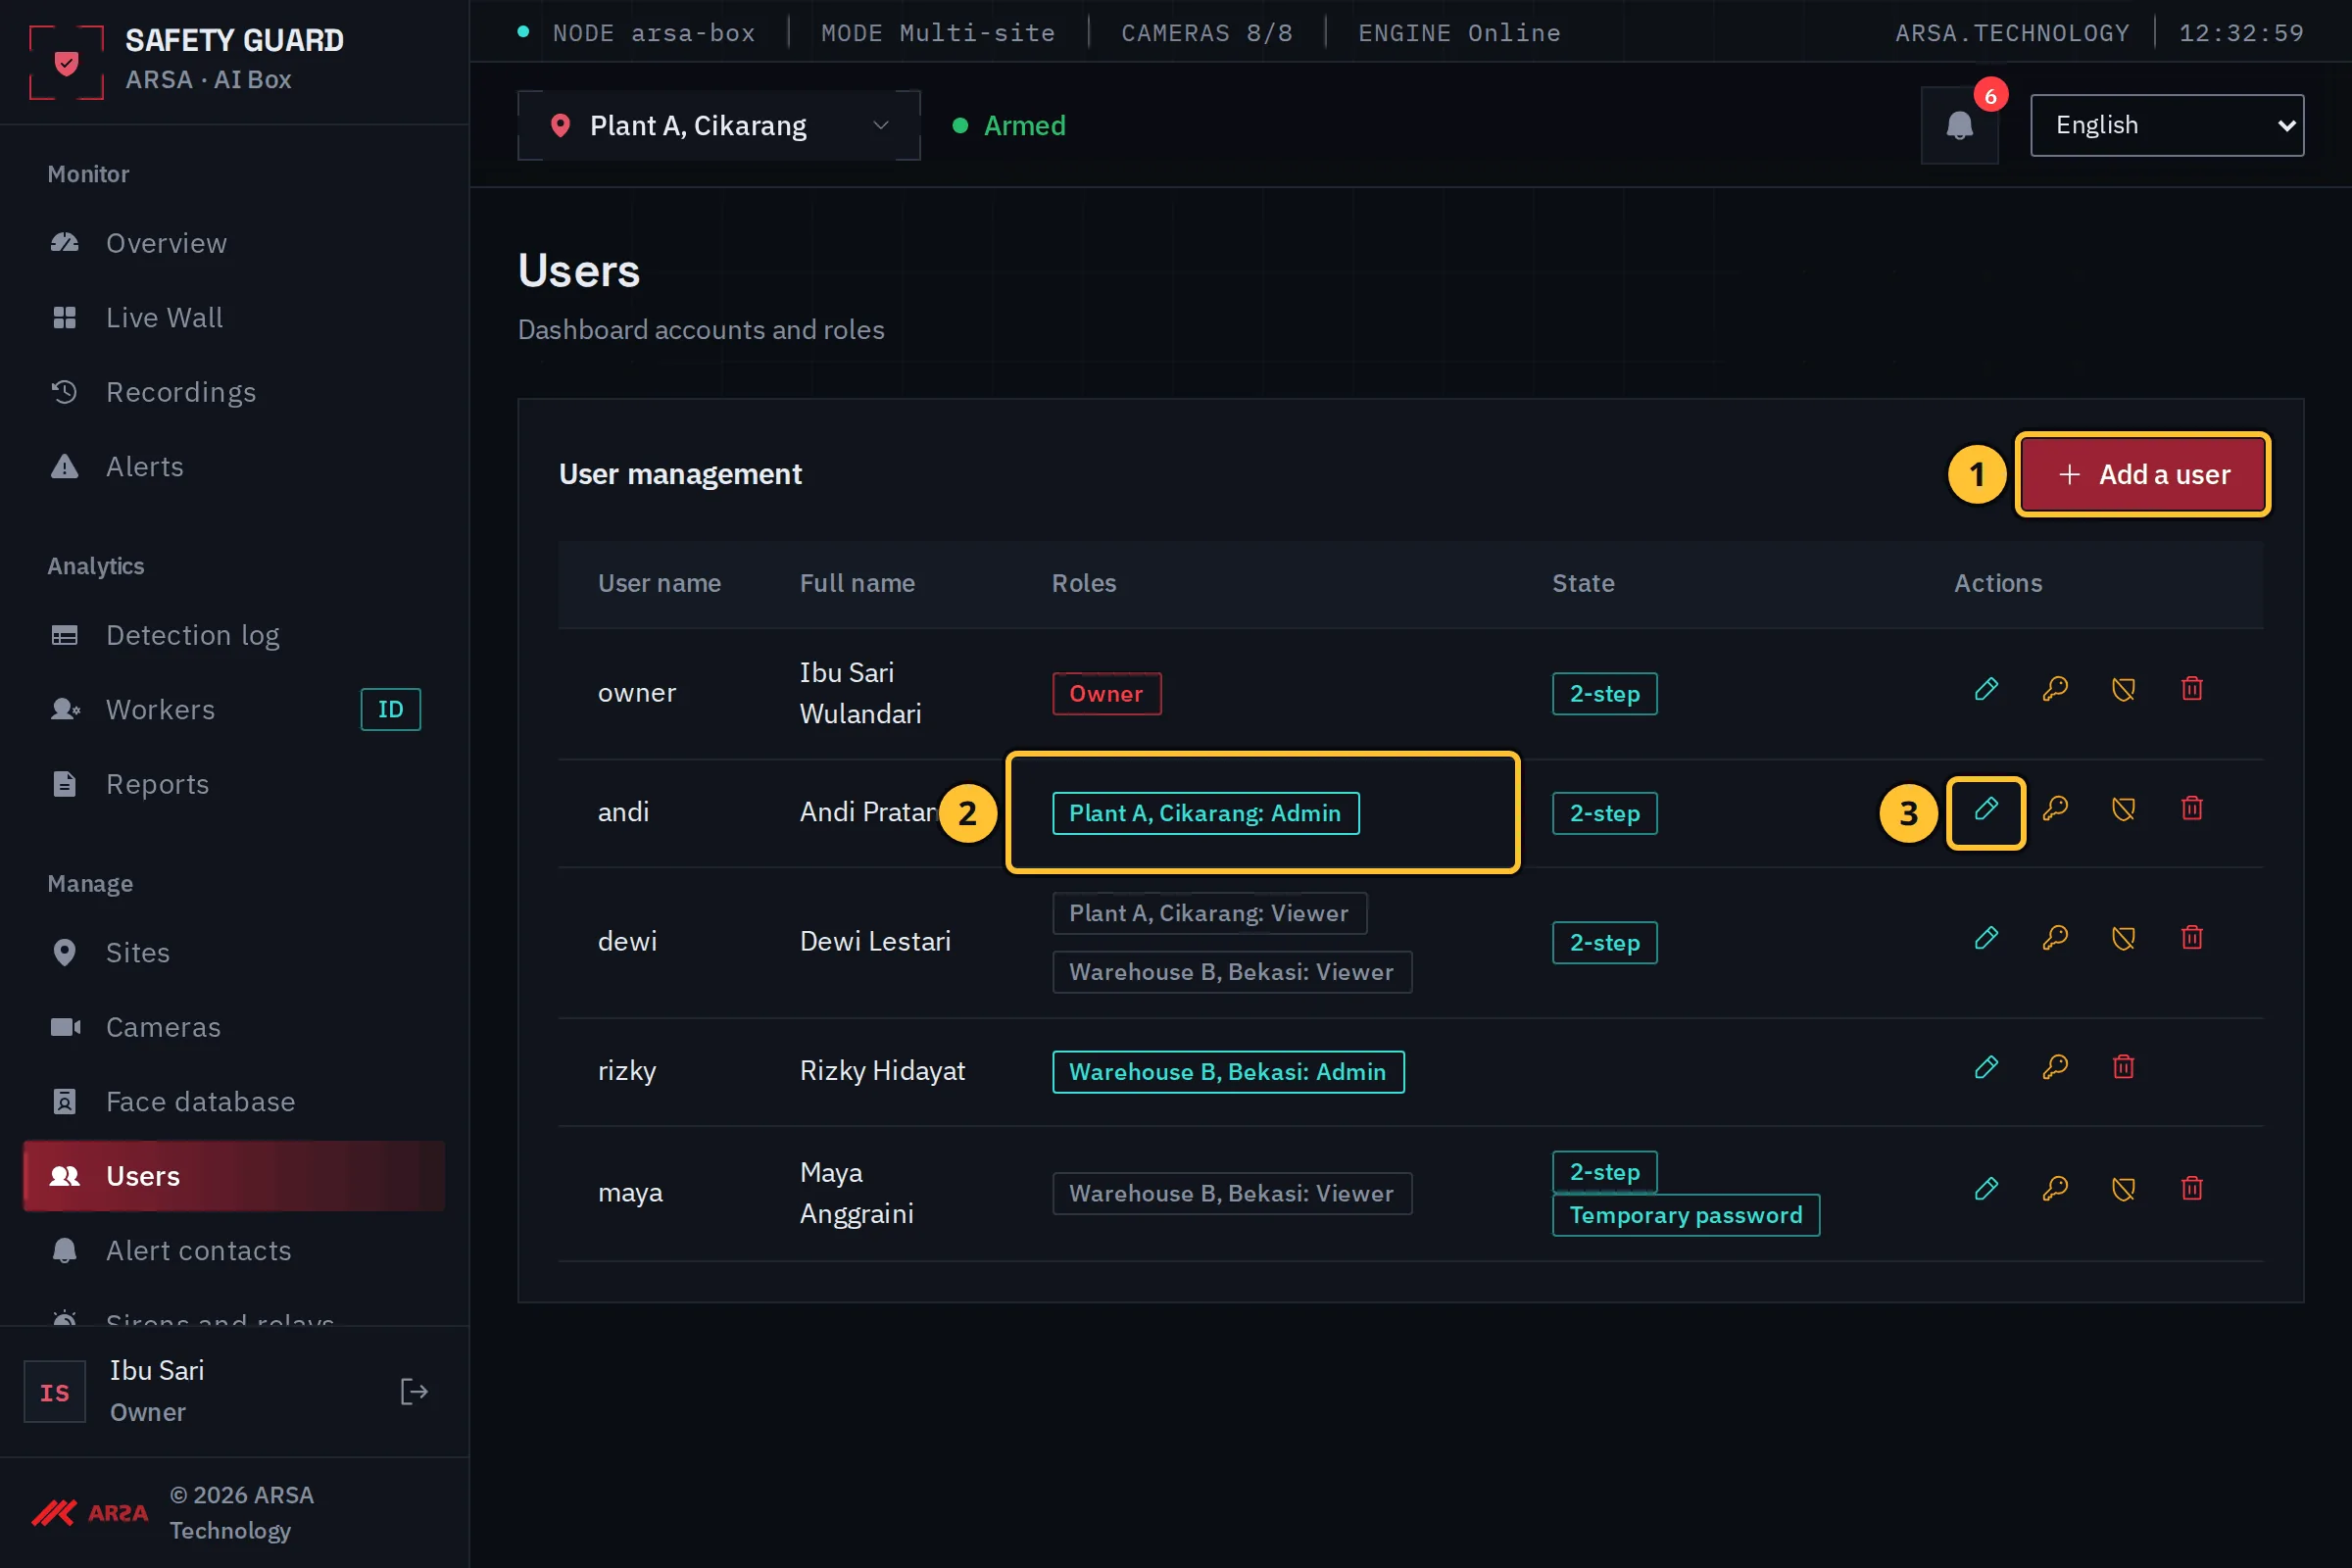
Demo data.
- In the menu, under Manage, open Users and select Add a user.
- The roles column lists each user’s role per site.
- The actions: edit the user, reset their password, reset their two-step sign-in, or delete them. A deleted user’s actions stay in the audit log.
Step 2: Add A User
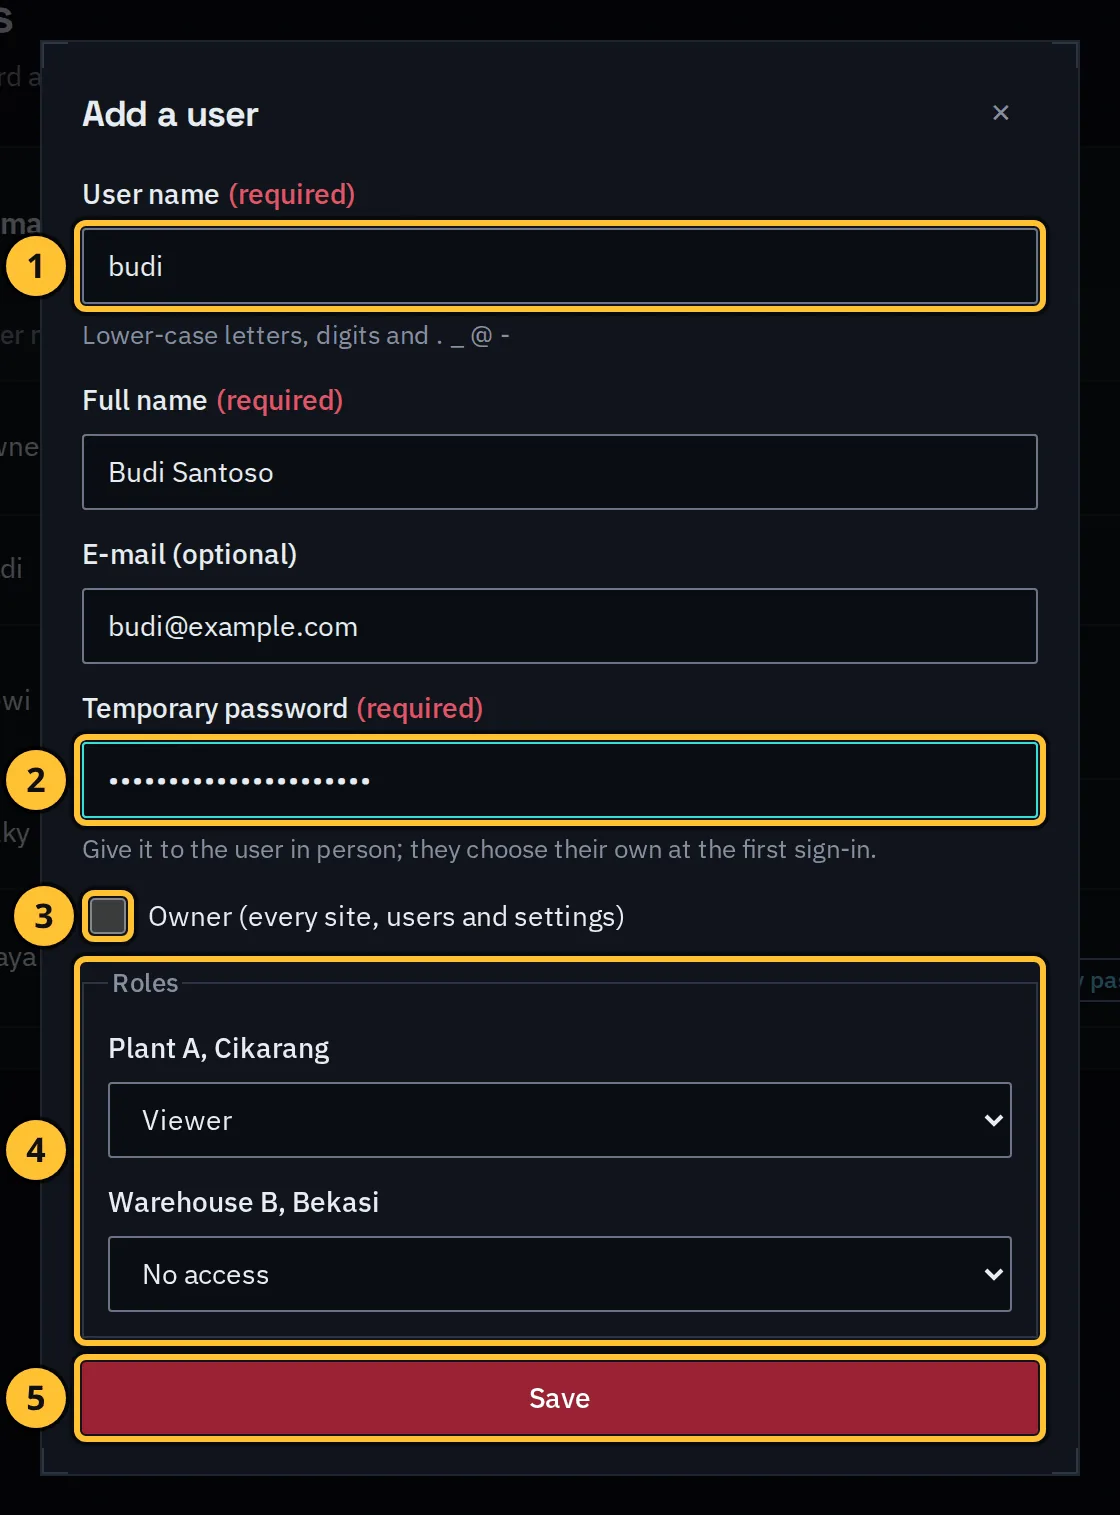
- Type a user name in lower-case letters, then the person’s full name and, if you like, their e-mail address.
- Type a temporary password. Give it to the person yourself; they choose their own at the first sign-in.
- Tick Owner only for someone who should manage every site, the users and the settings.
- Under Roles, choose Admin, Viewer or No access for each site.
- Select Save.
Step 3: Set Up The Notification Channels
Alerts and reports are sent through your organisation’s own accounts. Passwords and tokens are stored encrypted on the box and are never shown again. Open System, Notification channels.
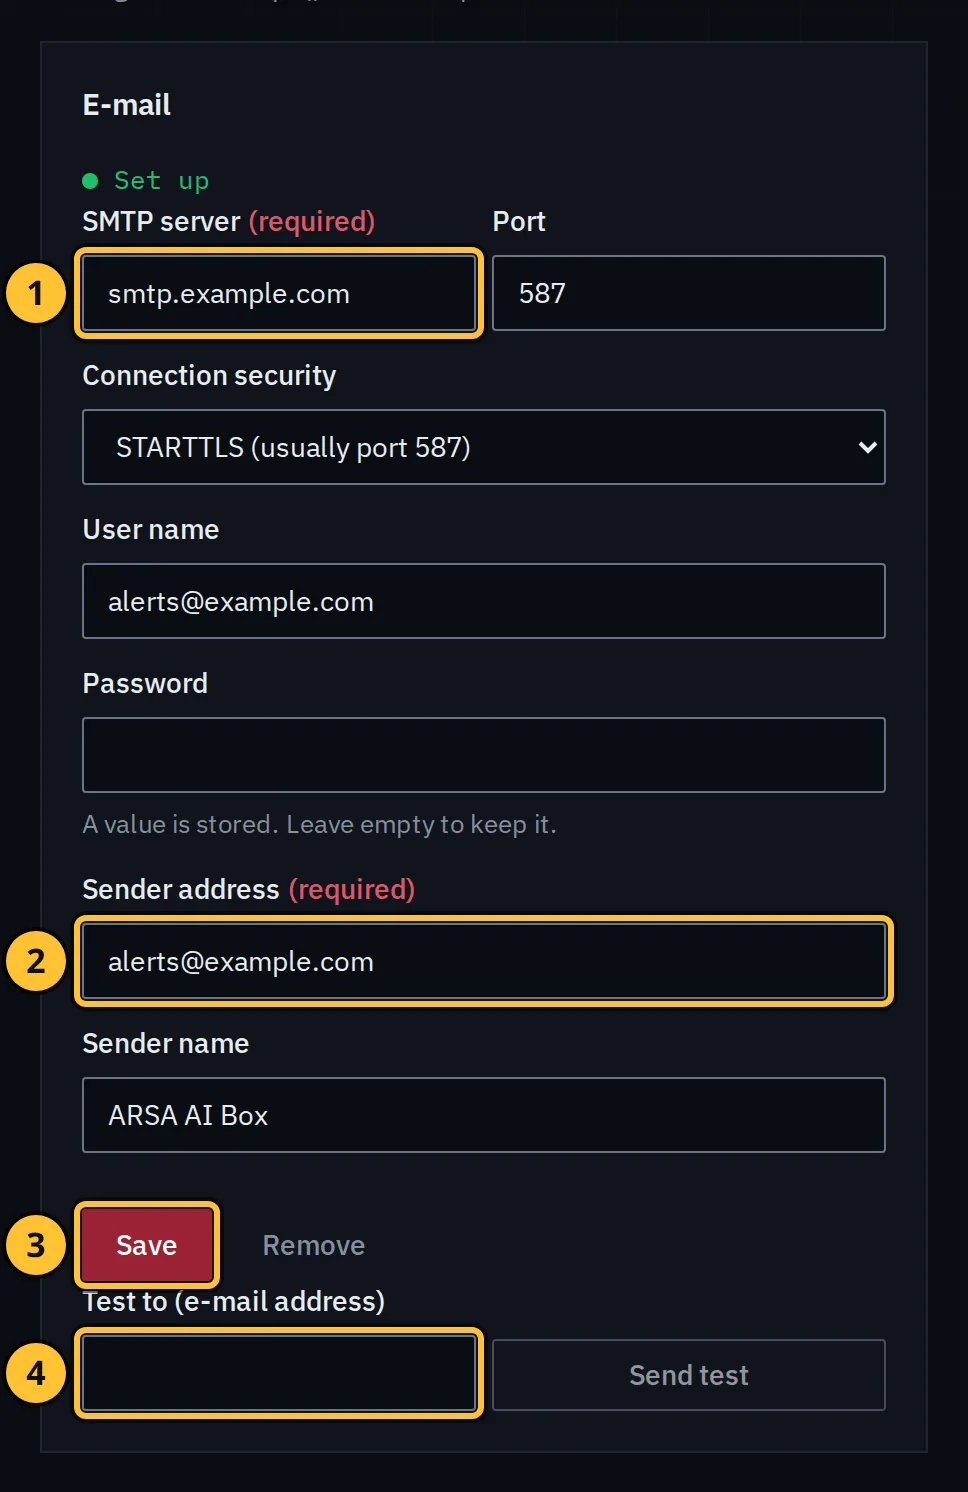
Demo data.
- Type your mail server (SMTP server), its port and connection security, and the user name and password of the sending account.
- Type the sender address, the address alerts come from.
- Select Save.
- Type your own address under Test to and select Send test to check that a message arrives.
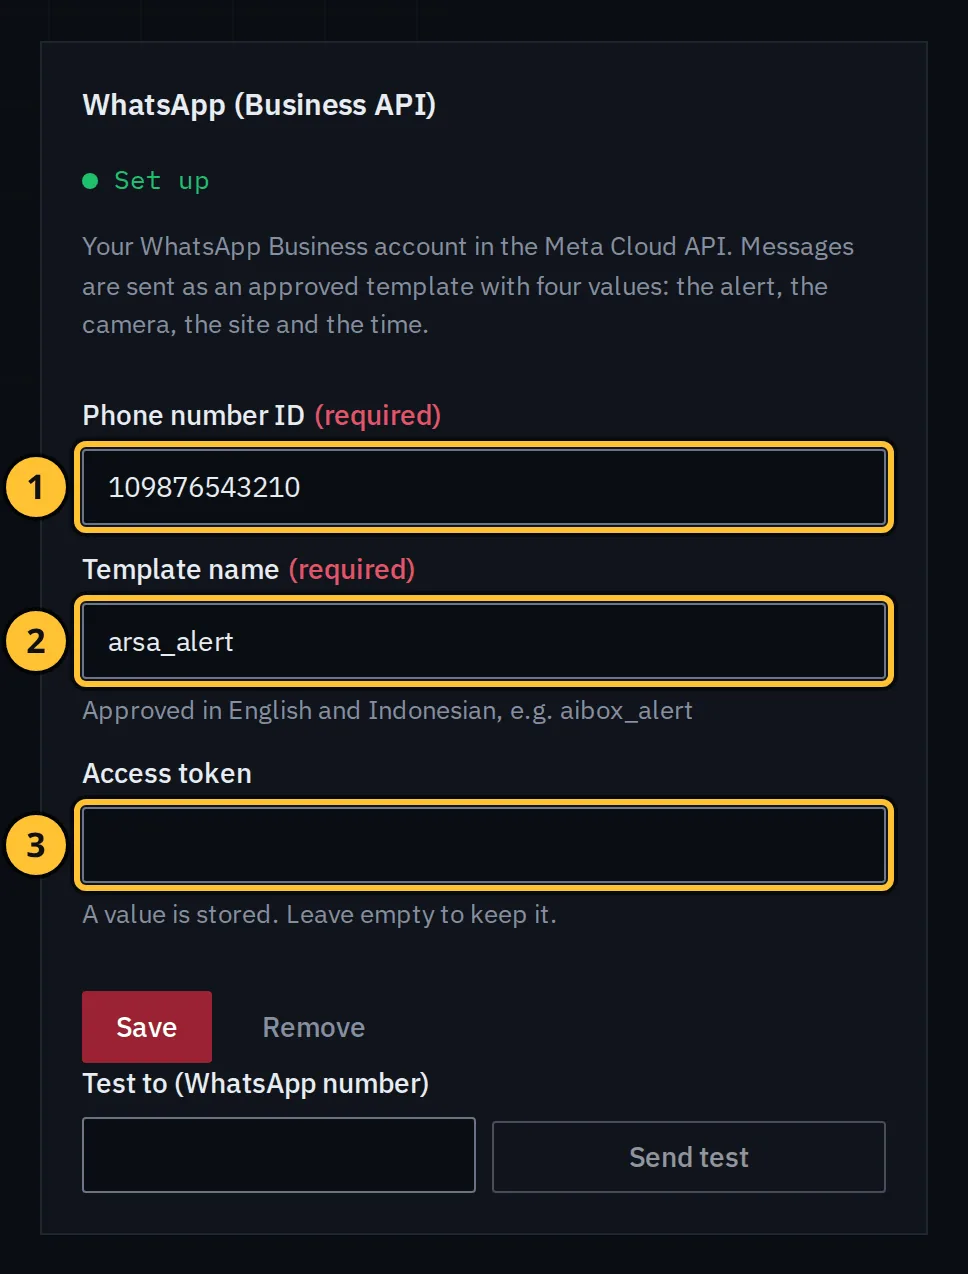
Demo data.
The supported WhatsApp channel is your WhatsApp Business account in the Meta Cloud API. Alerts are sent as an approved message template with four values: the alert, the camera, the site and the time.
- Type the phone number ID of your WhatsApp Business number.
- Type the template name, approved in English and Indonesian.
- Paste the access token, then save and send a test.
The page also offers WhatsApp (the box’s own number), which links a number to the box by QR code. WhatsApp does not support that use and can ban a number that sends automatic messages, so use a number set aside for alerts.
Telegram
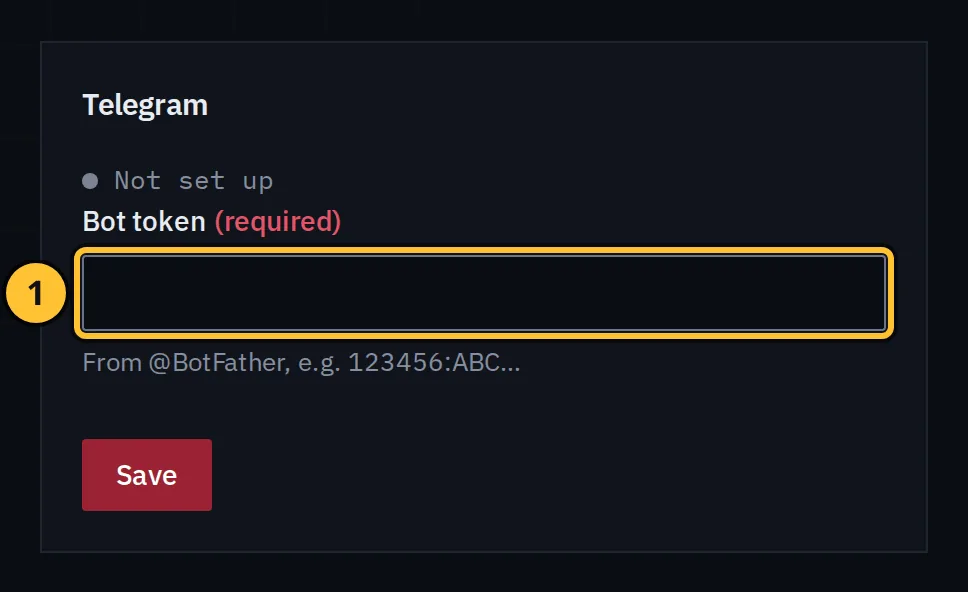
- Create a bot with Telegram’s BotFather, paste its bot token and save. A person who writes to the bot is shown their chat ID, which you enter on their contact.
Step 4: Add The Alert Contacts
Open Manage, Alert contacts.
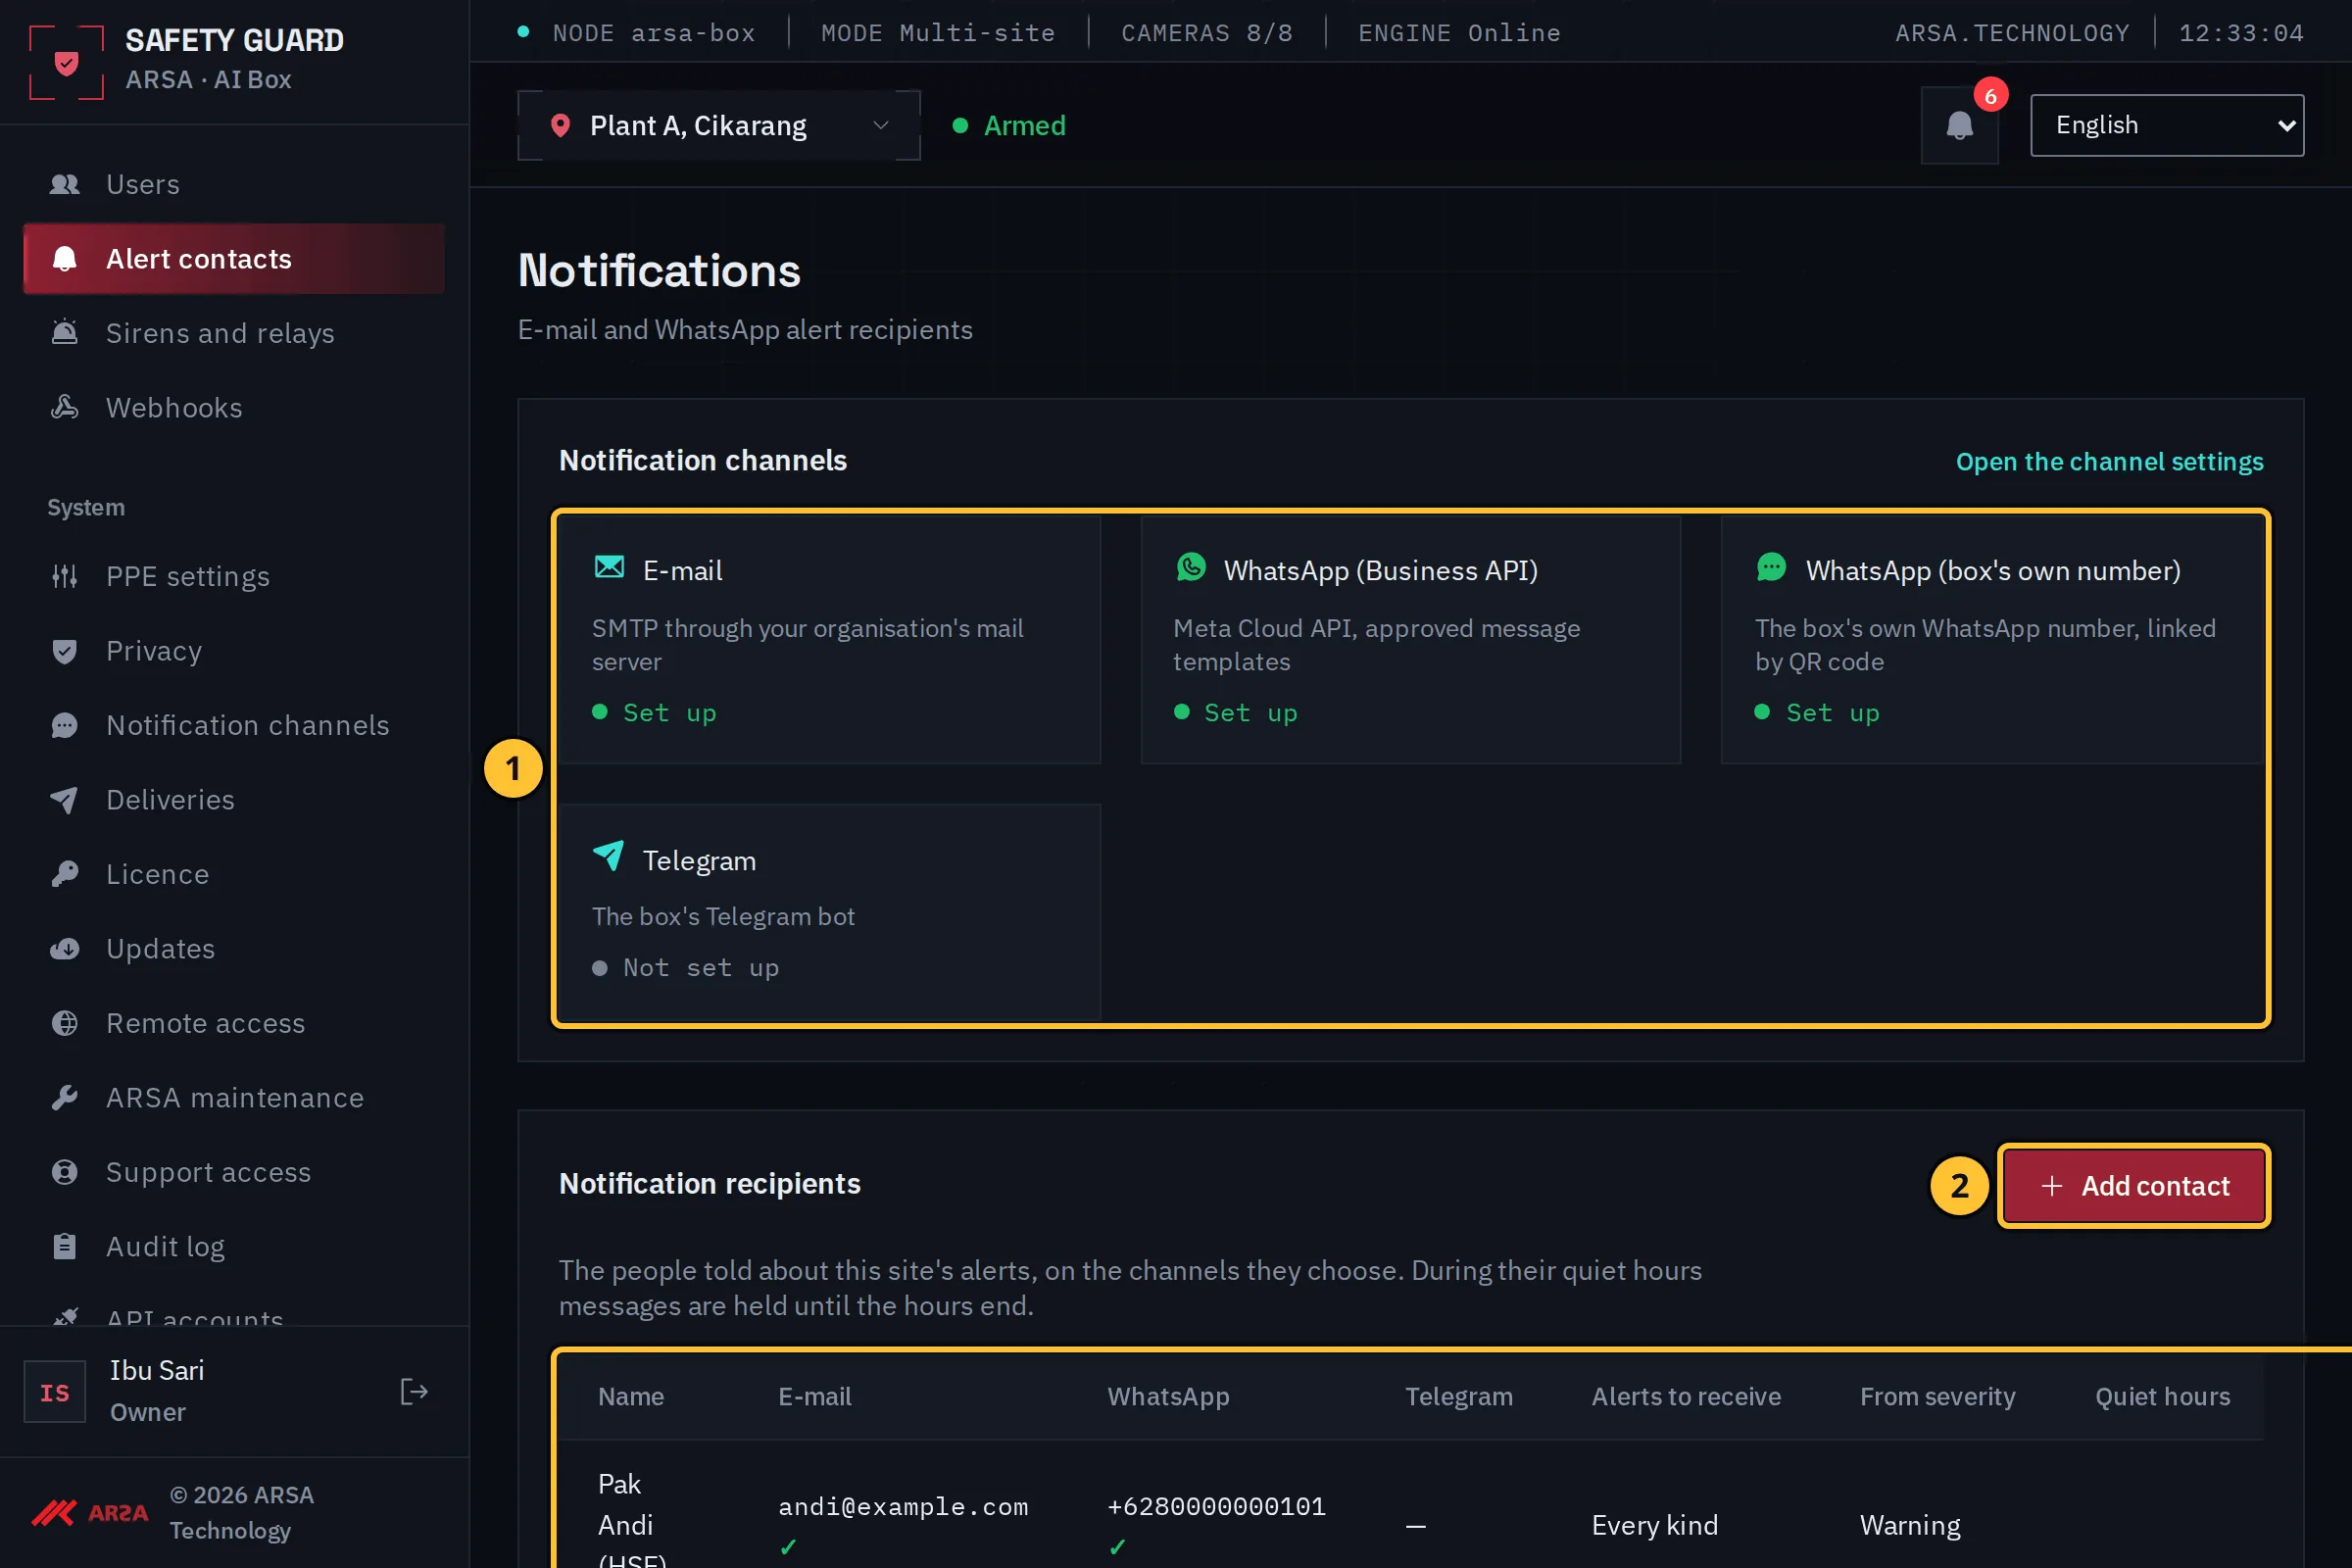
Demo data.
- The state of each channel: set up, or not yet.
- Select Add contact.
- The site’s contacts, with their channels, the alerts they receive and their quiet hours.
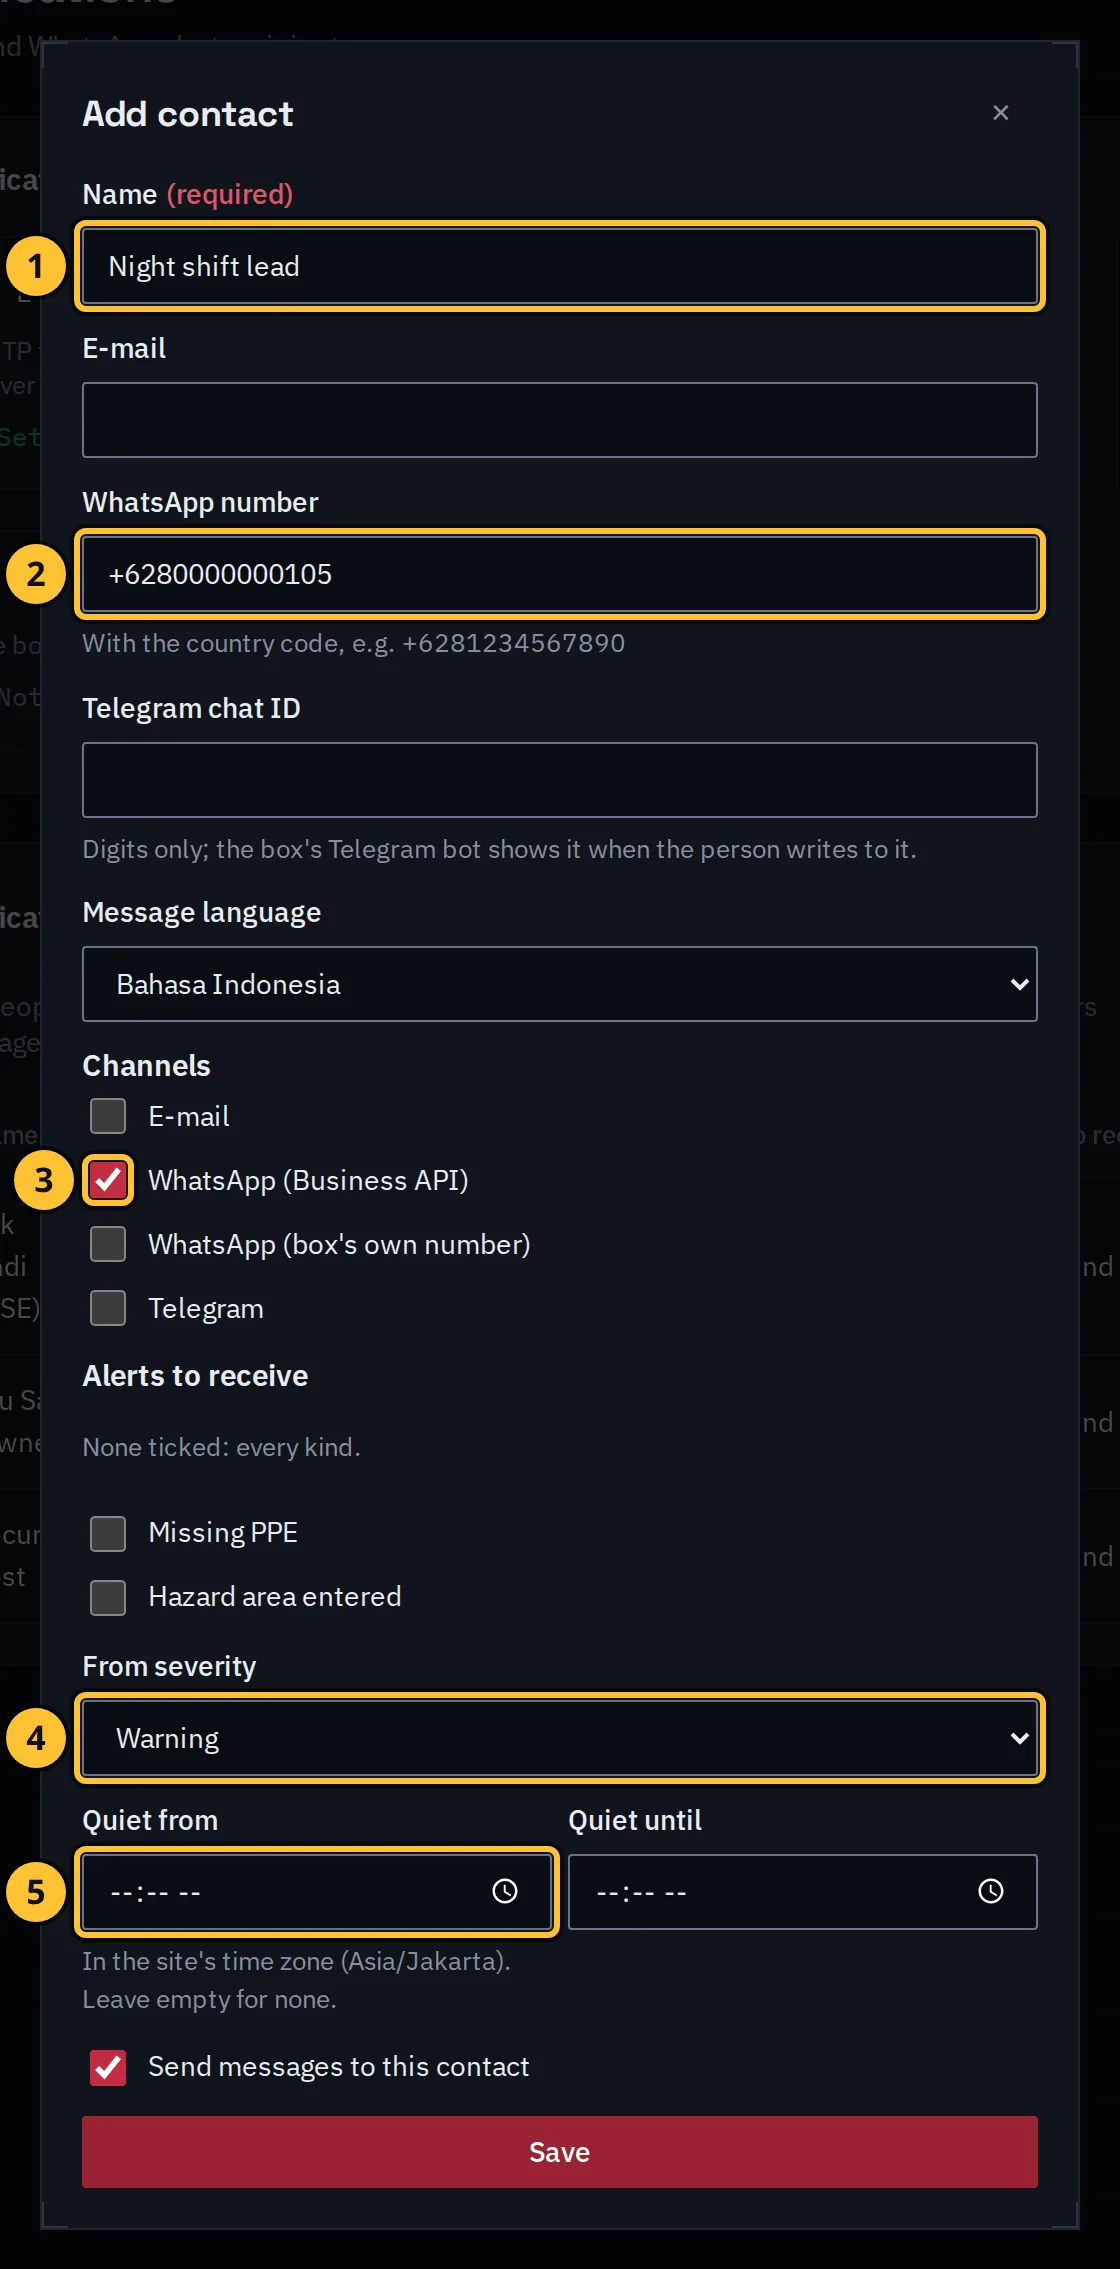
- Type the contact’s name, for example a person or a post (“Security post”).
- Type their e-mail address, WhatsApp number with the country code (for example
+62…) or Telegram chat ID. - Tick the channels to use, and choose the message language.
- Under Alerts to receive tick the kinds of alert (none ticked: every kind), and choose From severity, the lowest severity they are told about.
- Set quiet hours if needed: messages are held during those hours and sent when they end.
Then select Save. Every message sent, waiting or failed is listed under System, Deliveries.
Watch: Adding A User
Transcript of the add a user clip
Transcript of the clip “Add a User” (silent, about 20 seconds, demo data).
- On the Users page the owner selects Add a user.
- The owner types the user name “budi”, the full name “Budi Santoso”, an e-mail address and a temporary password.
- Under Roles the owner gives Budi the role Viewer on the site “Plant A, Cikarang” and leaves the other site at No access.
- The owner selects Save. Budi is added to the list and chooses his own password at his first sign-in.
Next Steps
- Alerts: the inbox, acknowledging, sirens and relays.
1.0.0. Updated 2026-11-06