
Docs / AI Box And Video Analytics Software / Draw Lanes, The Count Line And Speed Lines
Draw Lanes, The Count Line And Speed Lines
On a Traffic Monitor camera, draw each lane with its direction and speed limit, the count line, and the two speed lines with the metres between them.
Traffic Monitor counts vehicles, measures their speed and watches each lane’s direction. You draw what it needs in step 3 of the camera flow (Add a Camera and Draw). The checklist beside the picture asks for:
- A lane for each direction, with its arrow.
- A count line or the speed lines: without a count line, vehicles are counted at the first speed line they cross.
- The two speed lines and the metres between them.
- Detection area (optional): vehicles outside it are ignored.
Step 1: Draw A Lane And Its Direction
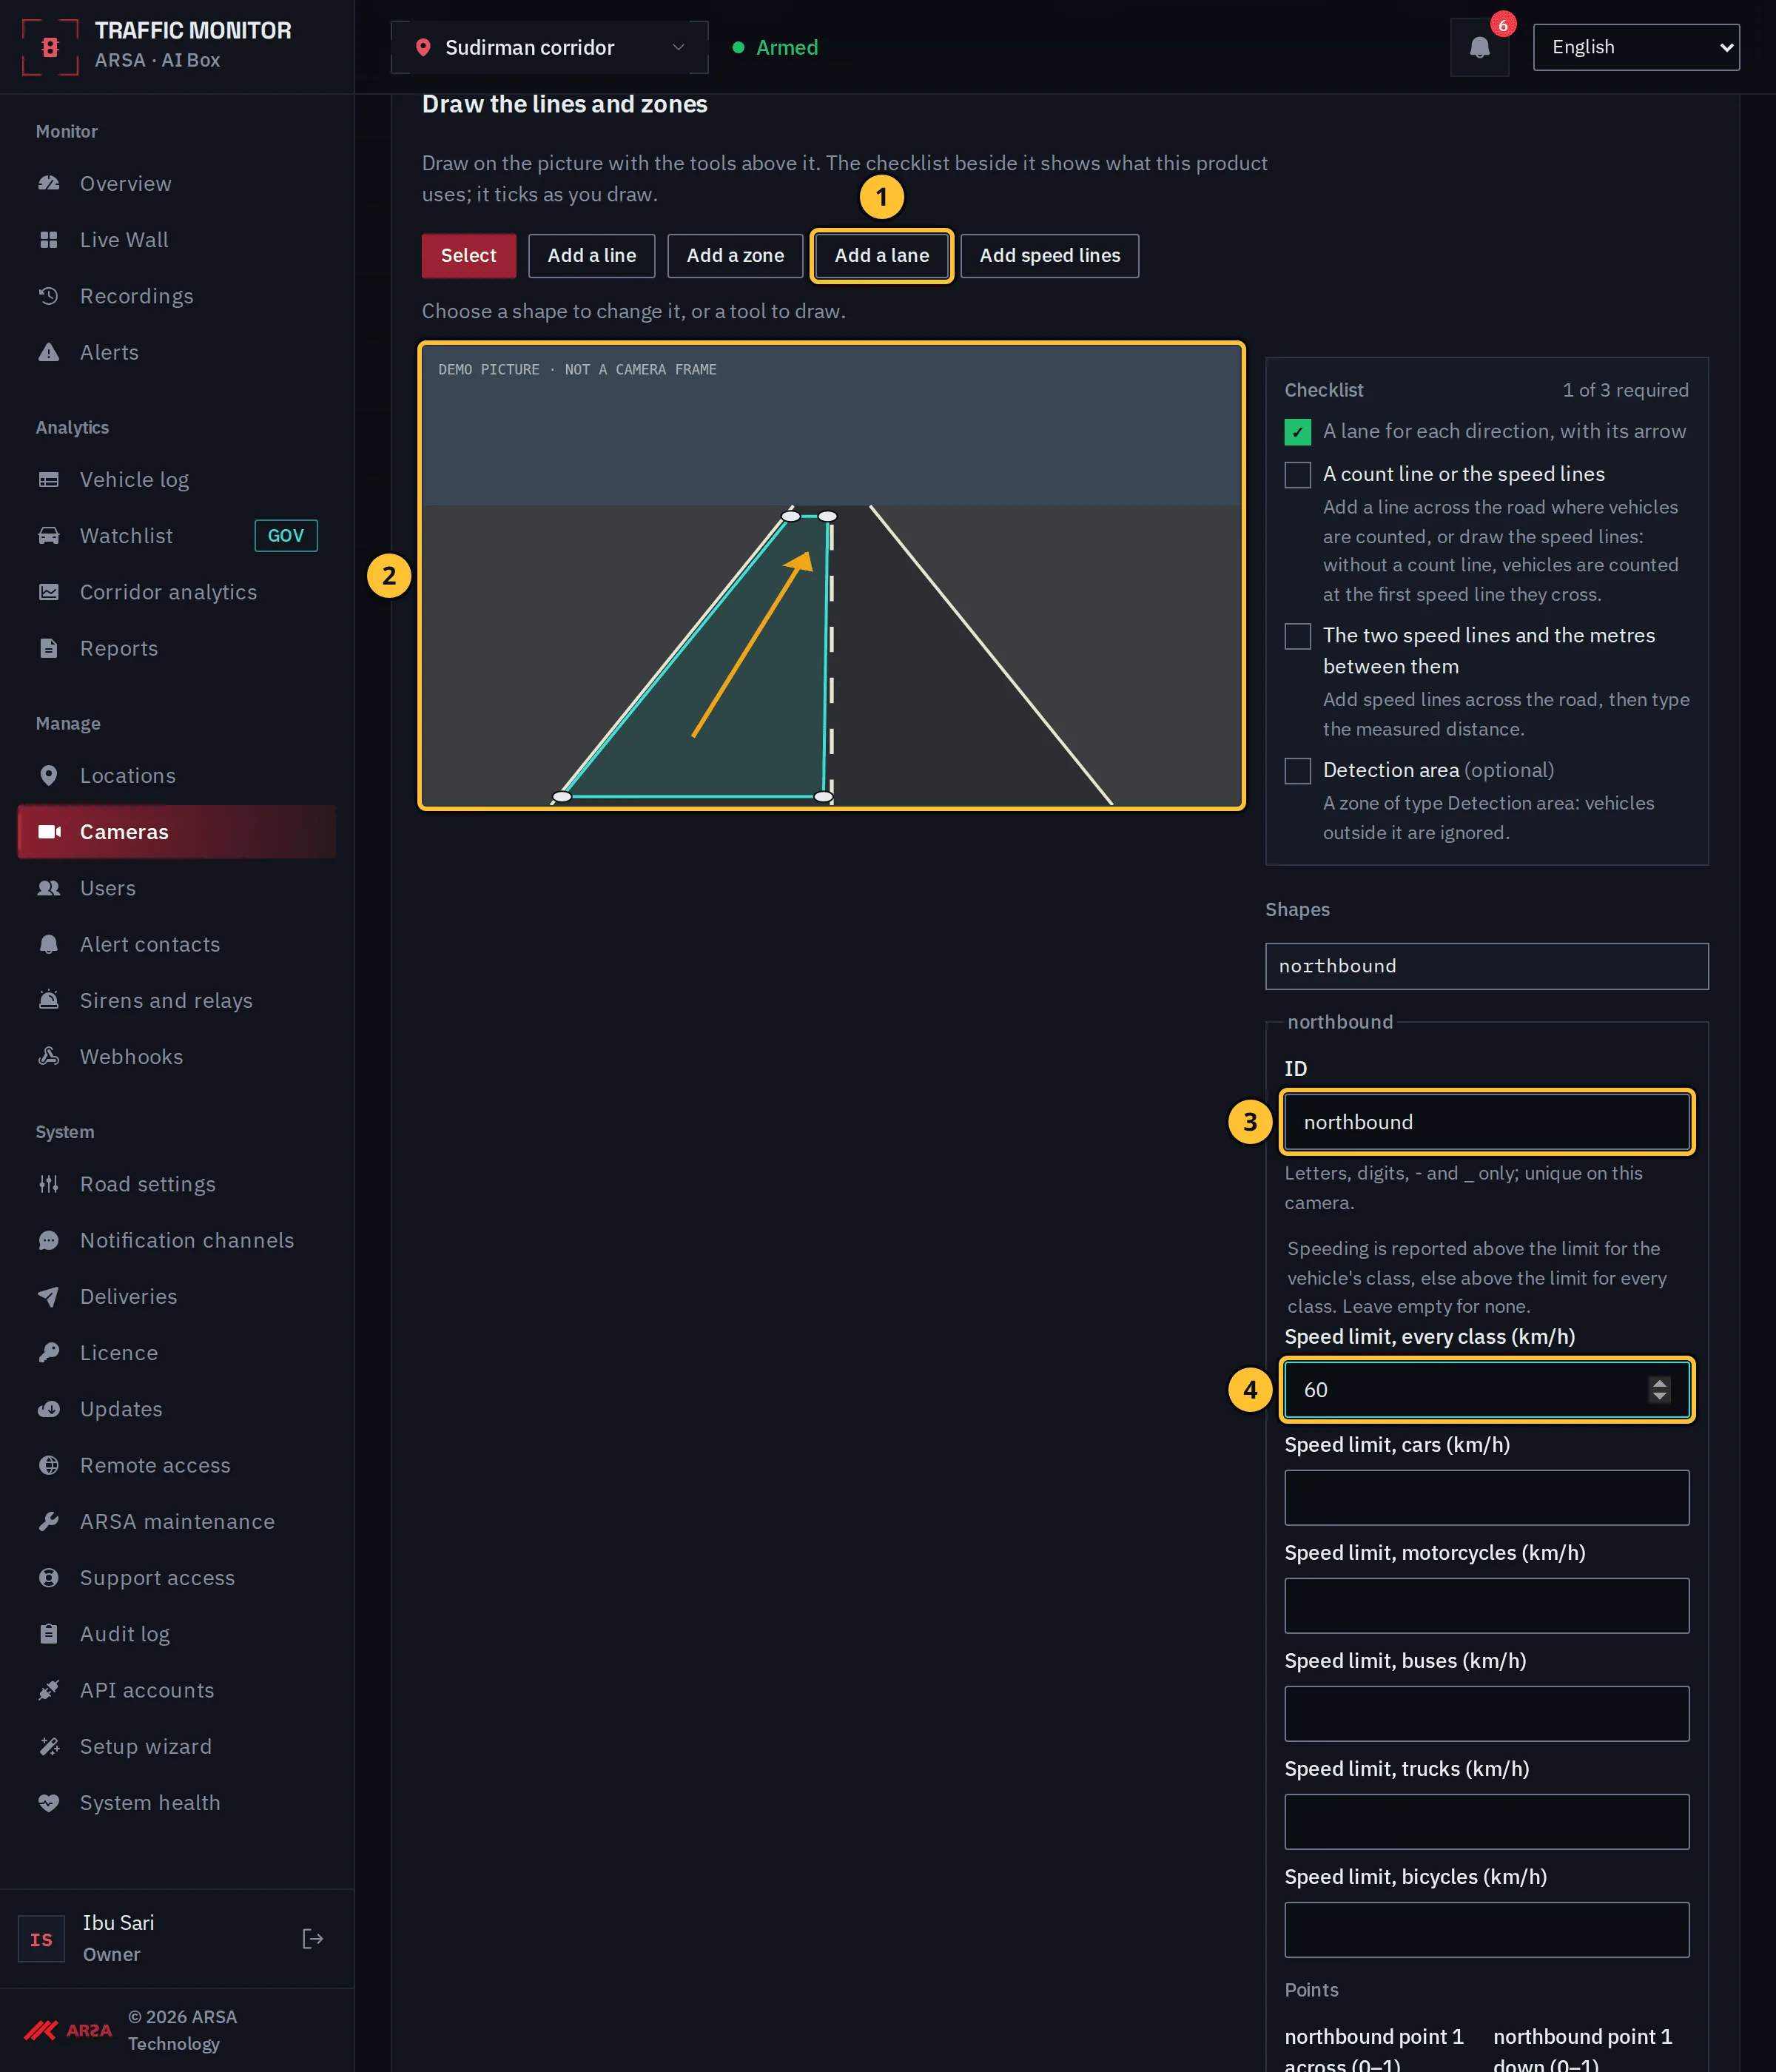
- Select Add a lane.
- On the picture, click the lane’s corners, then two points along the direction of travel: the arrow shows it. Select Finish the shape.
- Give the lane an ID, for example
northbound(letters, digits,-and_). - Type the lane’s speed limit in km/h, for every class or per vehicle class. Speeding is reported above the limit; leave it empty for none.
Draw one lane for each direction of travel. A vehicle against the arrow raises a Wrong-way driver alert.
Step 2: Draw The Count Line
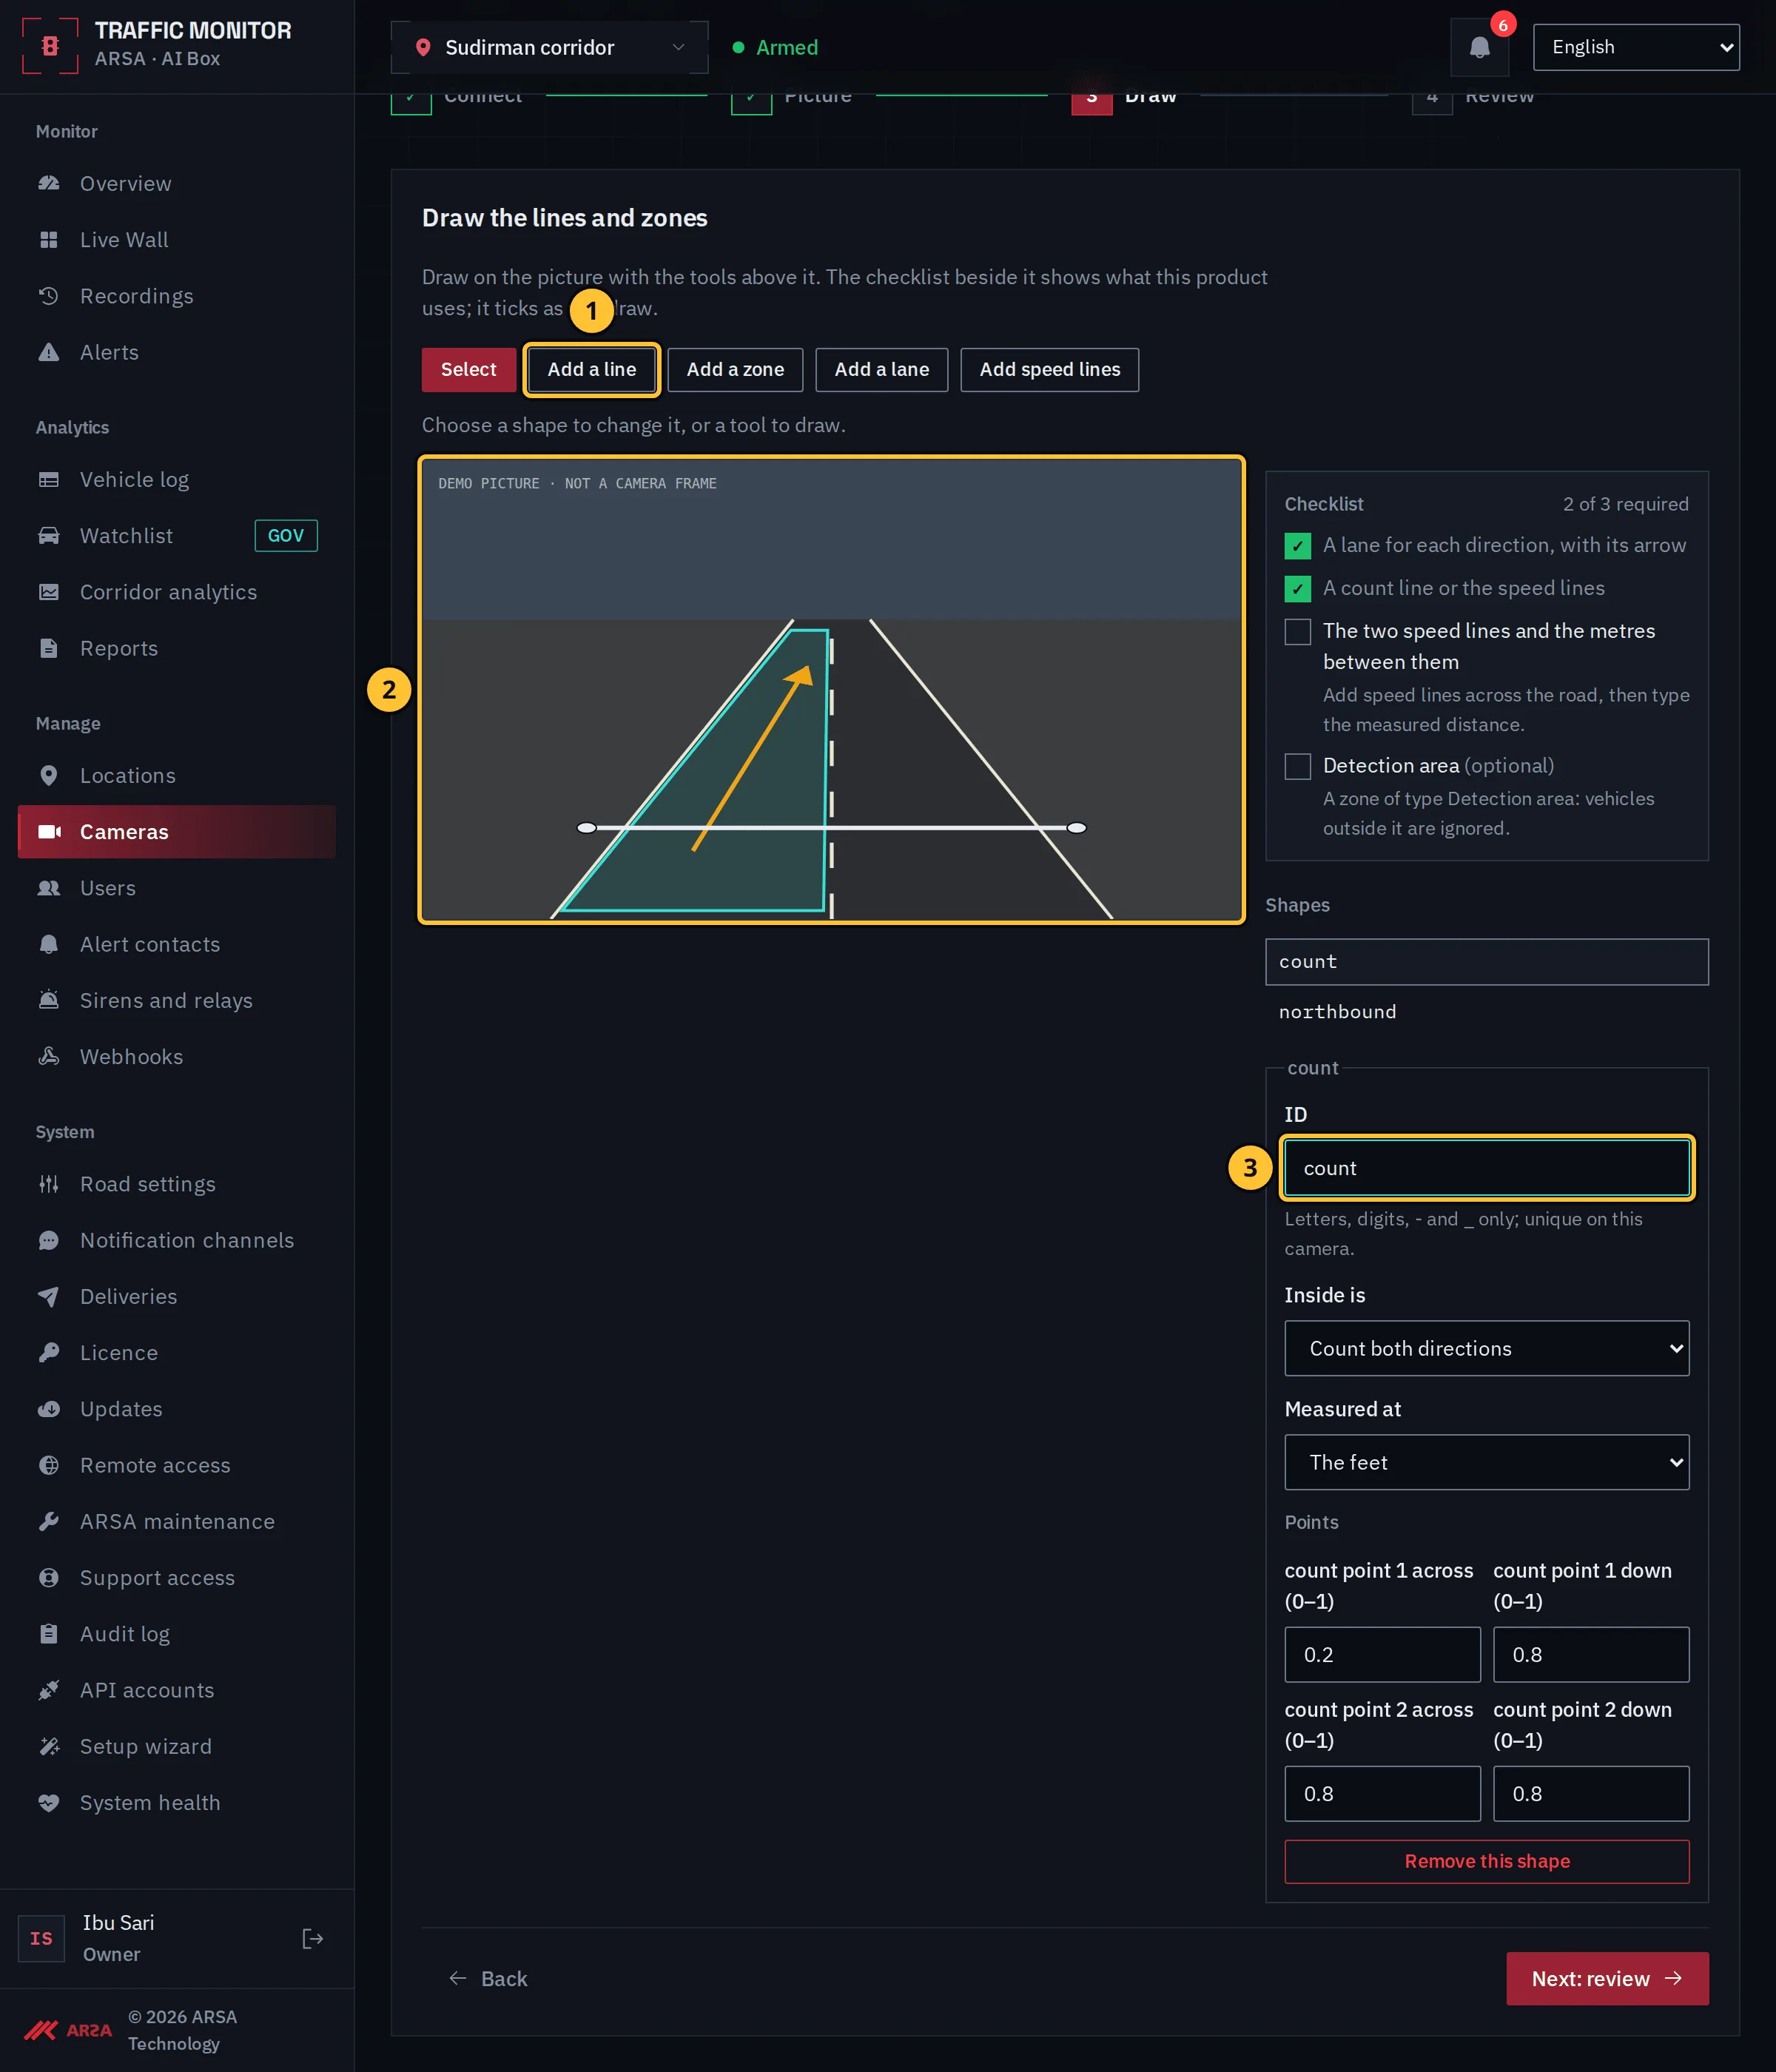
- Select Add a line.
- Click two points across the road, where vehicles are counted.
- Give it an ID, for example
count.
Step 3: Draw The Speed Lines
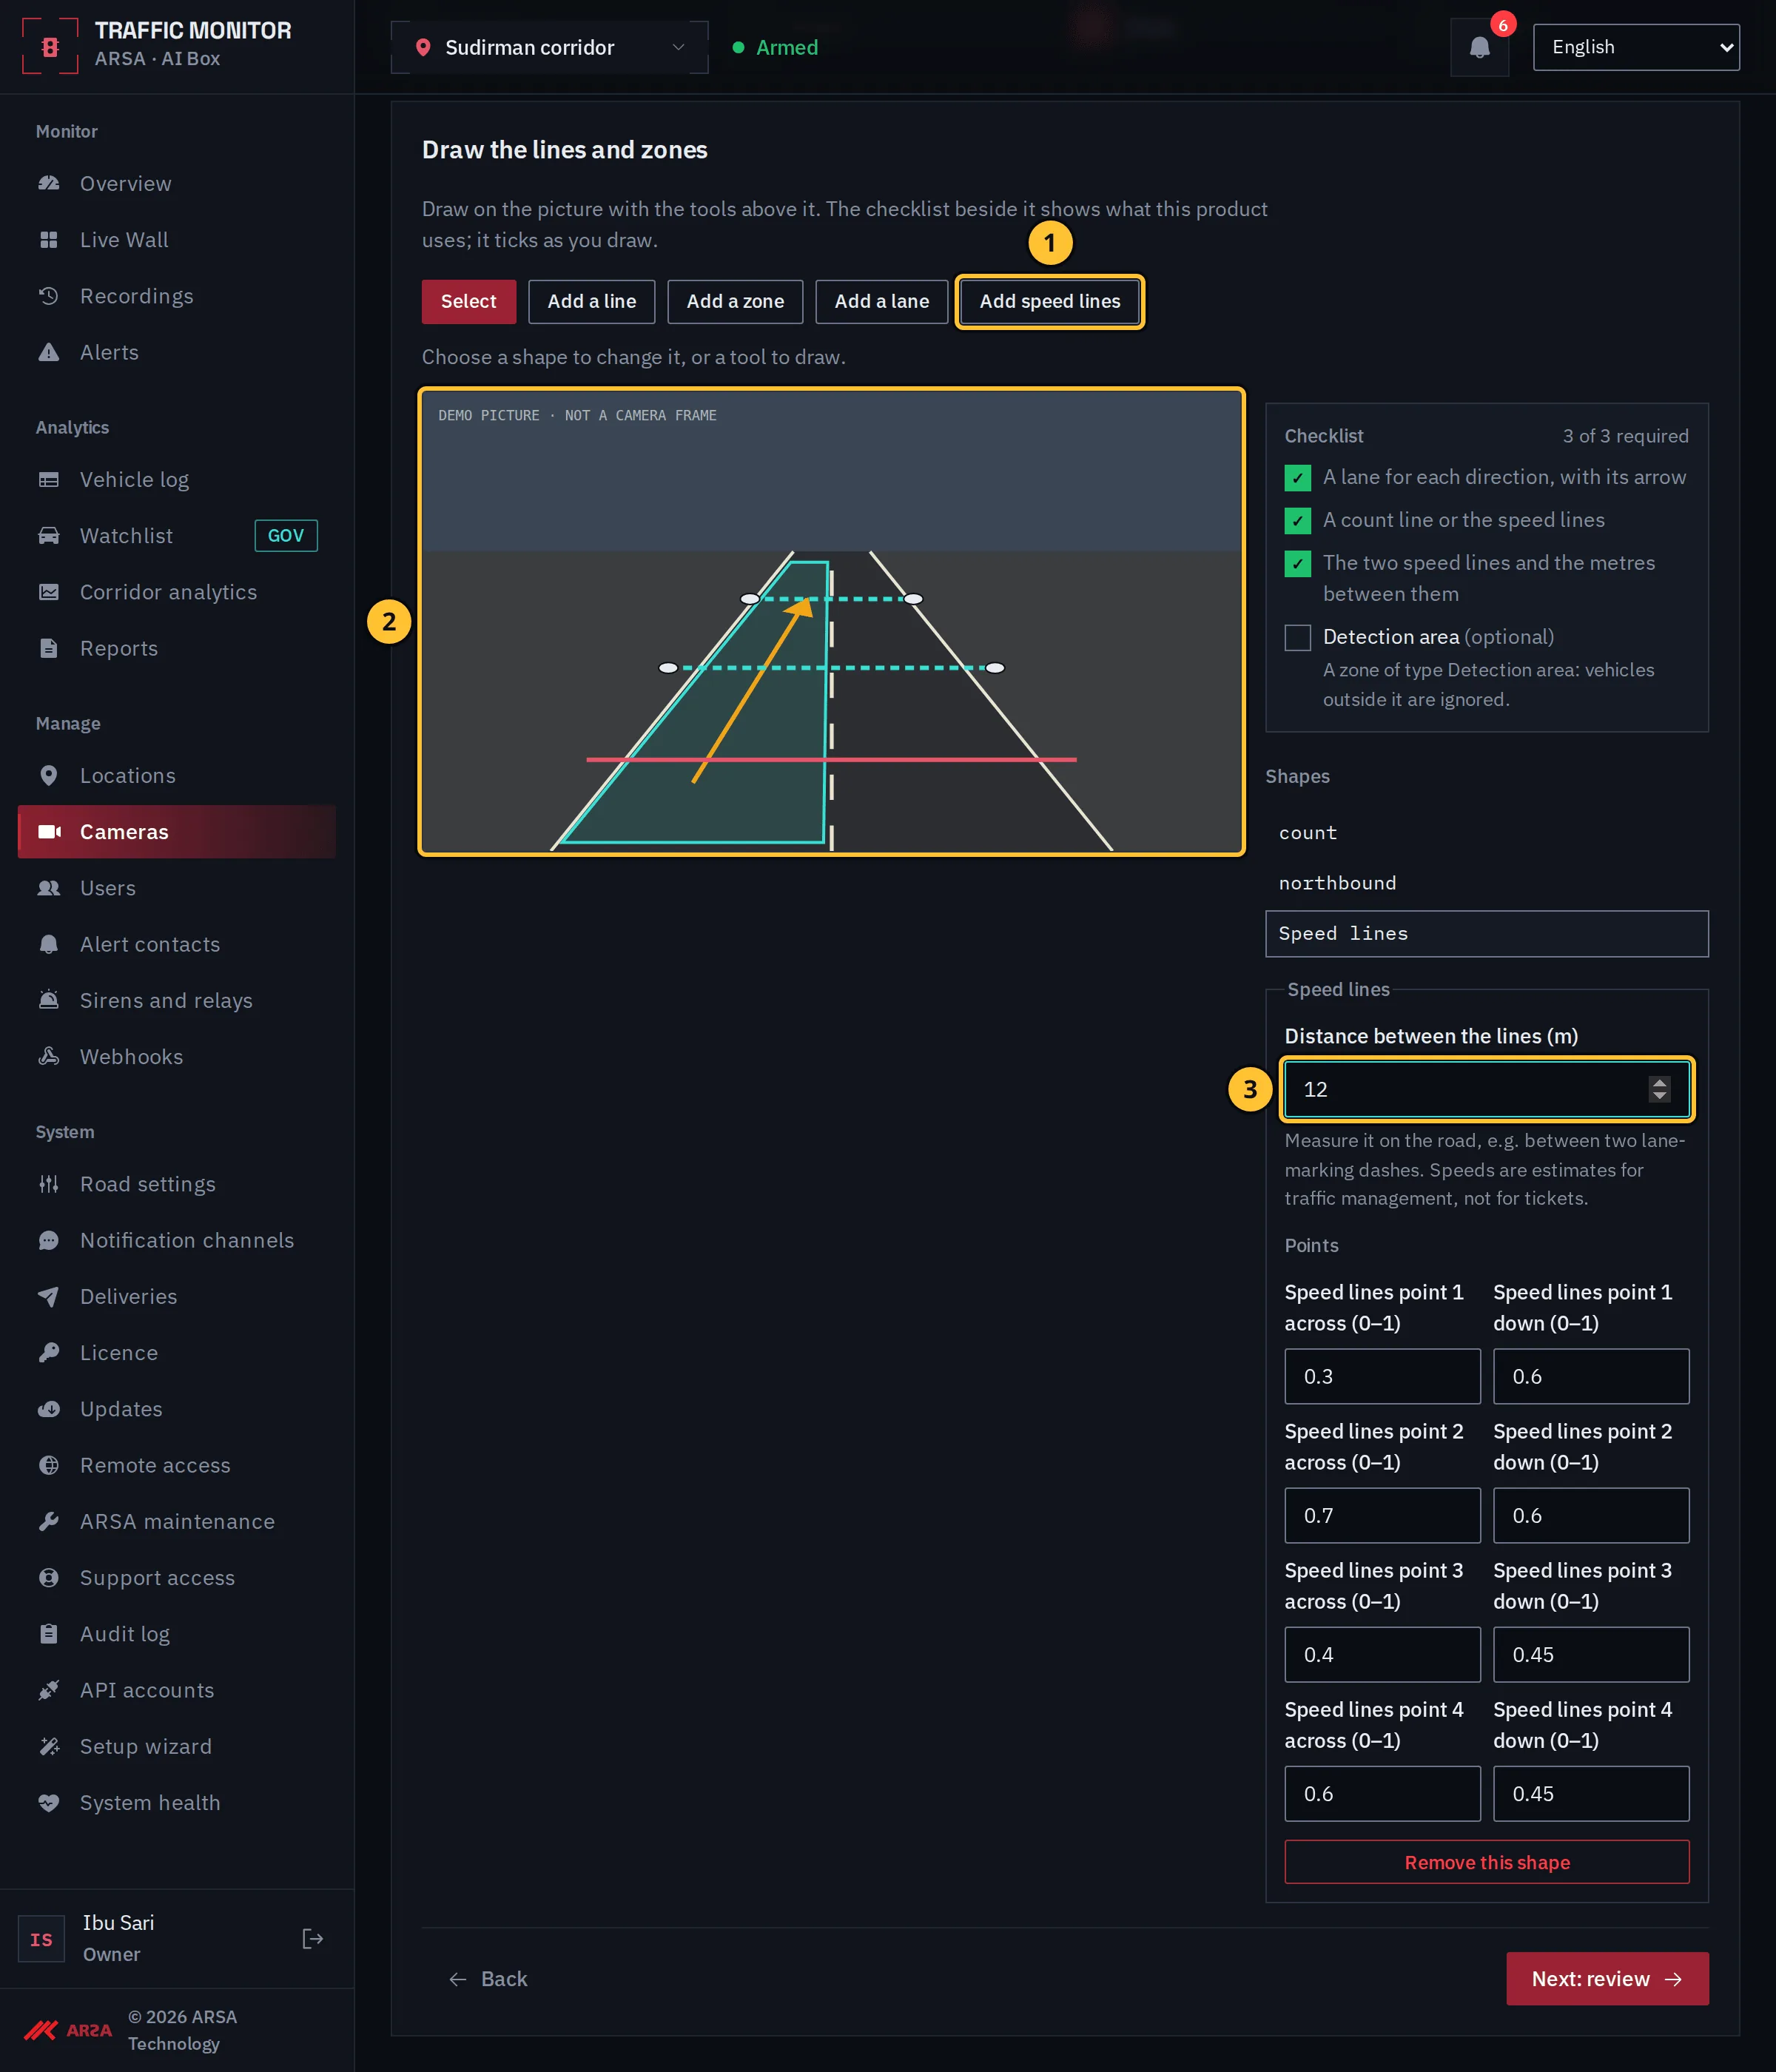
- Select Add speed lines.
- Click two points for the first line across the road, then two for the second, further along.
- Type the distance between the lines in metres, measured on the road, for example between two lane-marking dashes. Speeds are estimates for traffic management, not for tickets.
Step 4: Add A Zone
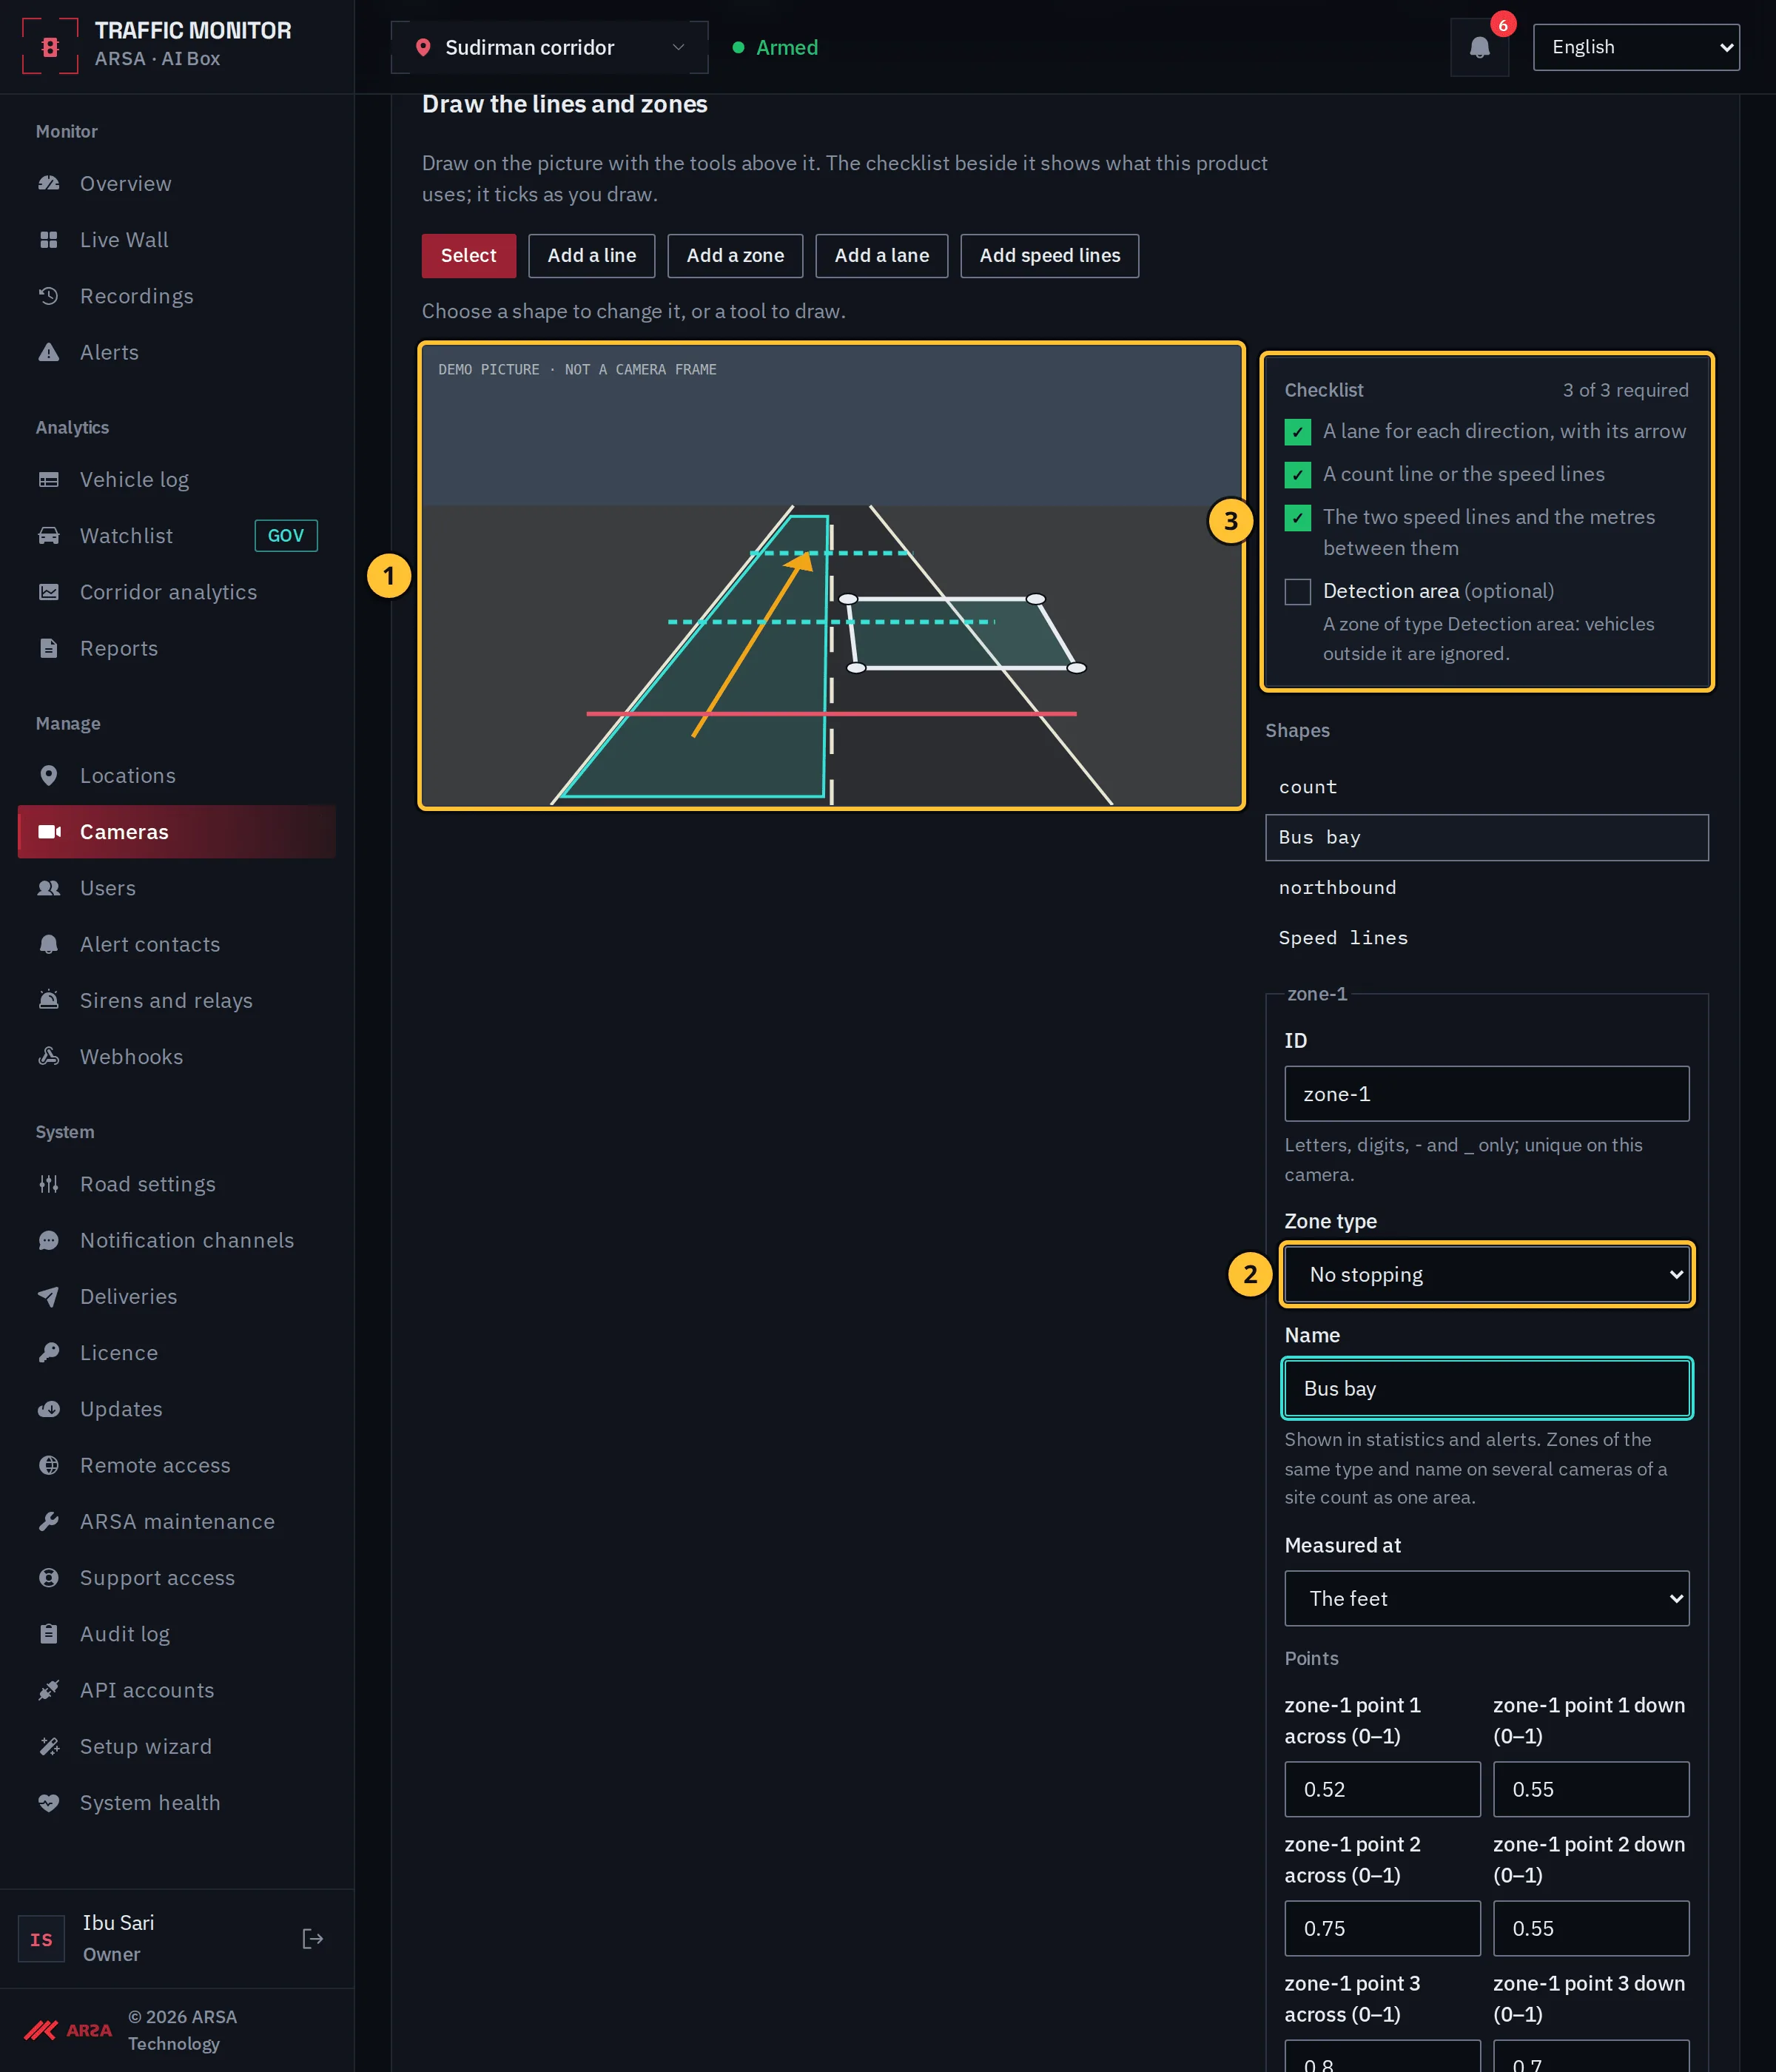
- Select Add a zone, click its corners and select Finish the shape.
- Choose the zone type: No stopping (a vehicle standing there too long raises a Stopped vehicle alert), Plate reading area or Detection area.
- The checklist ticks as you draw.
Step 5: Review And Save
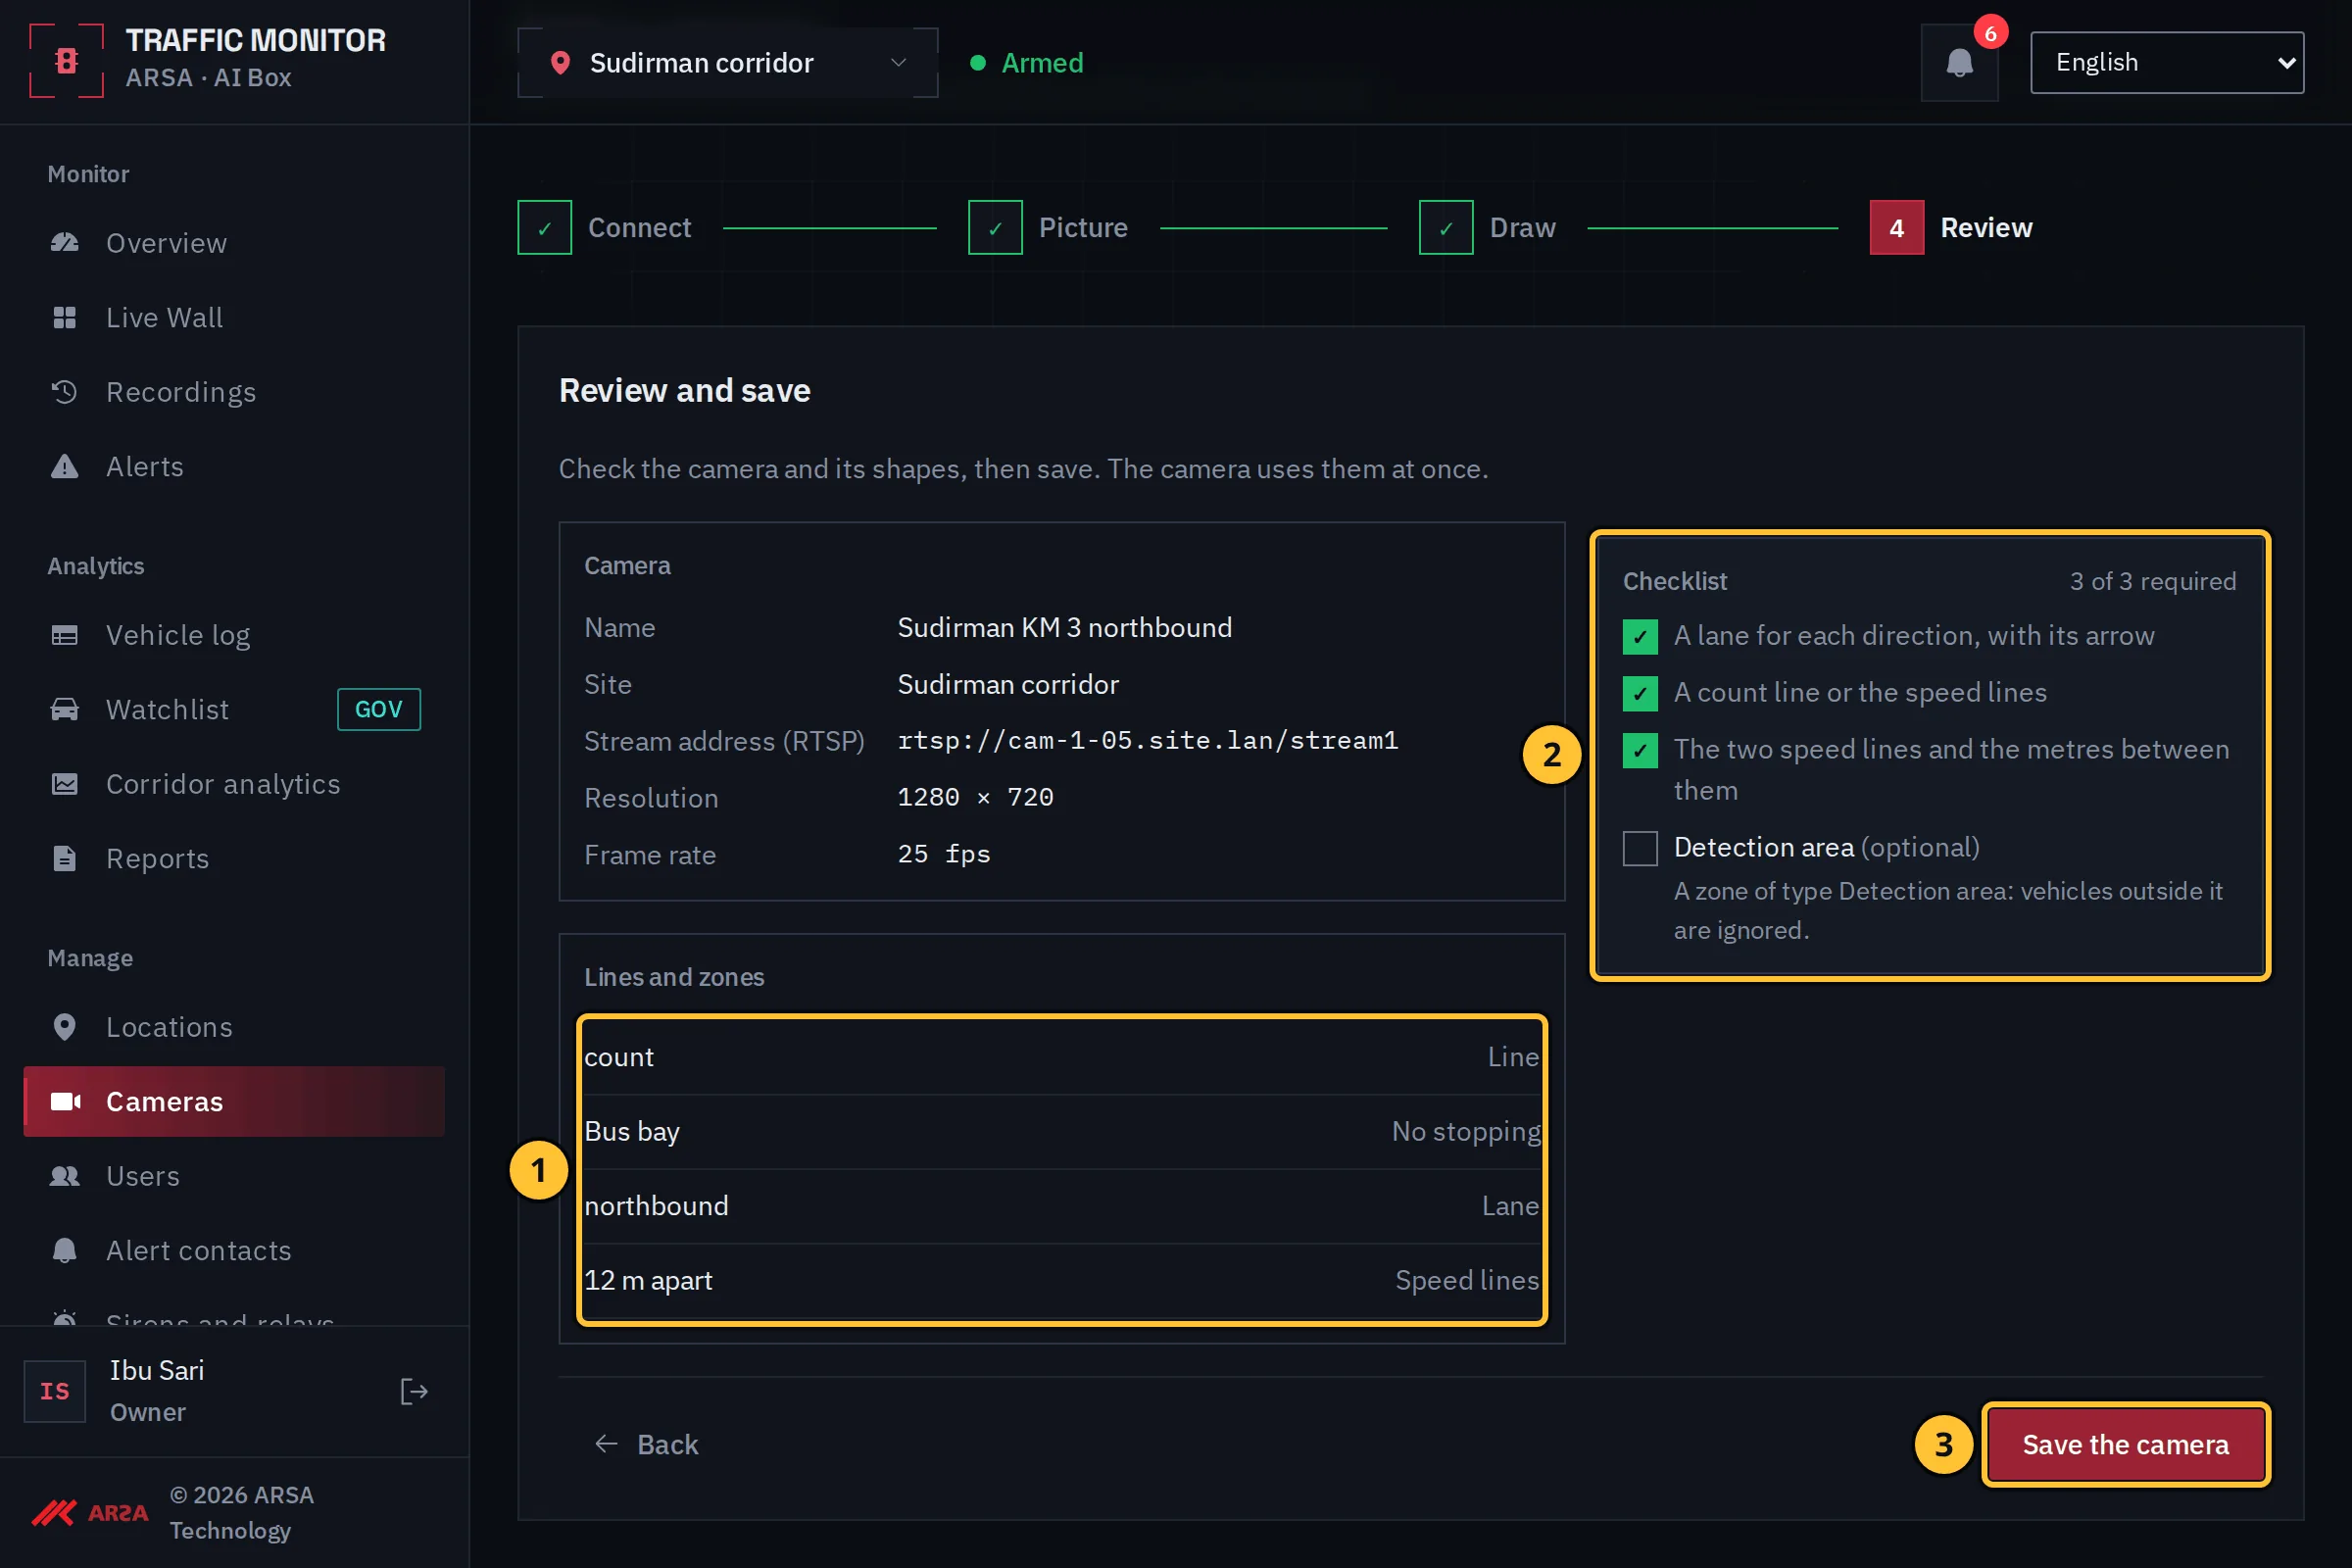
- The shapes: the lane, the count line, the speed lines with their metres, and the zone.
- The checklist with every required item ticked.
- Select Save the camera.
Watch The Drawing
Transcript of the drawing clip
Transcript of the clip “Draw Lanes, the Count Line and Speed Lines” (silent, about 30 seconds, demo data).
- On the drawing step of a new camera the installer selects Add a lane, clicks the four corners of the near lane, then two points along the direction of travel; an arrow shows the direction. Finish the shape closes it.
- The lane gets the ID “northbound” and a speed limit of 60 km/h.
- With Add a line the installer draws the count line across the road and names it “count”.
- With Add speed lines the installer clicks two points for the first line and two for the second, and types 12 metres as the distance between them.
- A zone over the bus bay gets the type No stopping and the name “Bus bay”.
- The review lists the shapes; the installer selects Save the camera.
Was this page helpful?
1.0.0. Updated 2026-11-06